
Sections Processing Manual
Manual informationProcessing Manual
1.6 | June 2026 | Updated to include all new features introduced up to Viewpoint (VP) version 7.9. | Viewpoint Team
Document conventions
Convention | Explanation |
|---|---|
Bold | For file names, commands, fields, menus, options, and window names. |
Courier New | Commands as you should type them. |
Lucida Console | Example output generated by the system. |
Italics | For configuration variables, including variable portions of file names and URLs. Also indicates a document name. |
Note / Blue Callout | The Blue Callout text indicates information that is of special interest or importance, an idea that could be useful or additional information about a product or a feature. |
| The Caution icon along with the text indicates actions that can lead to problems in system operation or configuration settings if the instructions are not followed properly. |

Revision history
This section tracks the initial creation of the document after each major version thereafter.
Ver: | Reviewed / Approved By | ||
|---|---|---|---|
1.0 | Apr 12, 2013 | Initial Version | Team |
1.1 | September 6, 2021 | Rebranded adhering to the latest Conduent brand central documentation standards/guidelines. | Technical Writer |
1.2 | April 18, 2022 | Added Jpeg Quality project setting | Viewpoint Team |
1.3 | March 16, 2023 | Expose all Excel Content name changed | Viewpoint Team |
1.4 | Feb 16, 2024 | Updated ‘Force New Scope’ language in section 4.5.e | Viewpoint Team |
1.5 | October 2, 2025 | Renamed option ‘Use DTSearch for MS Office Documents’ | Viewpoint Team |
1.6 | June 2026 | Updated to include all new features introduced up to Viewpoint (VP) version 7.9. | Viewpoint Team |
Getting Started#
The processing application is the starting point for all data within the Viewpoint environment. Users can process native files and forensic images directly into Viewpoint or load scanned and previously processed data for use with the review application. Once data has gone through all necessary processing and data handling it will be made ready for distribution to document reviewers through the review application.
To begin, perform the following steps:
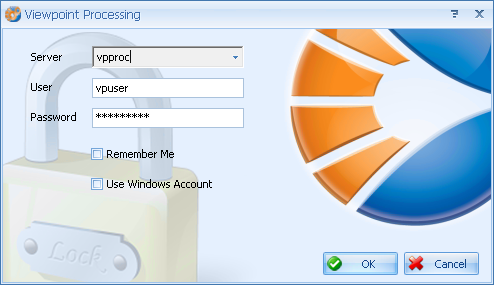
- Open the Viewpoint Processing application on your workstation.
- Input the name of the SQL server that stores the processing databases in your environment.
- Click tab key.
- If your Viewpoint login is synched to the Active Directory system of your environment, the User and Password fields should auto populate. If Active Directory is not being used the User and Password fields should be filled manually.
- When all three fields are populated, click OK.
Minimum Recommended #
Permissions#
Navigation#
Processing Tabs#

Fully processing data within the Viewpoint environment requires multiple distinct phases to be completed. These phases are organized into different tabs located on the upper edge of the application window. You can use the left mouse button to navigate between these tabs. Each tab has unique buttons that are utilized for that particular phase of processing. The screenshot above illustrates the buttons available for the Project tab. The screenshot below illustrates the buttons available for the Index tab.
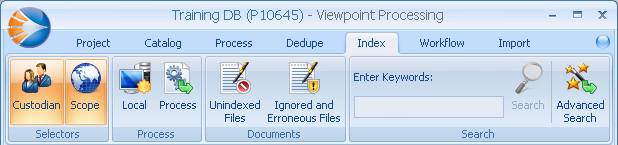
Although some buttons are used for multiple phases, the buttons and layout for each tab changes to match the process being performed.
Modifying Displayed Fields#
During each phase of processing, Viewpoint collects specific information about each document. This information is commonly referred to as metadata. Metadata within Viewpoint comes from a number of sources. Some of this information is system file information such as the Created Date and Last Modified Date of a document. Others are application specific, such as the author of a Microsoft Word document or the sender of an e-mail.
Viewpoint also stores its own information about how a particular document was processed within the system and general system settings. The combination of document metadata and Viewpoint system information are referred to as fields.
Resizing Fields#
On each grid, users can fully customize the display to their preference. Each field header is surrounded by a thick line called a splitter which acts as a boundary between unique fields. Users can click these splitters and drag them to either reduce or enlarge the size of a field. An example of this functionality can be seen in the below screenshots from the project tab.
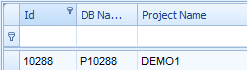
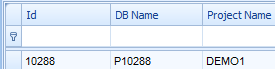
Both the Id and DB Name fields were expanded using this functionality.
Reordering Fields#
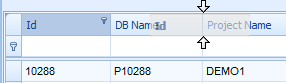
Field order can be manipulated by clicking on the field header, dragging the field to a different portion of the field header row, and releasing the mouse button. In the below example the Id field has been selected and about to be moved behind the DB Name field. Two arrow buttons appear clearly indicating where the field will be positioned when the mouse button is released.
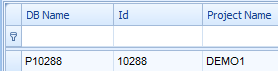
The Id field now exists immediately after the DB Name field.
Adding Fields#
Most grids have more fields available then are shown within the default settings. To gain access to these additional fields, right-click within the display and click on Field Selector.
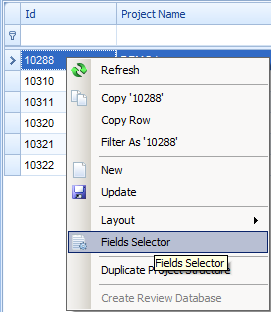
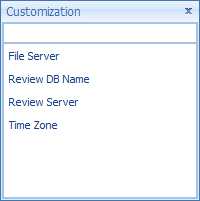
The screenshot to the right above shows options that are available for this particular grid. Each grid will have different options based on its intended functionality. Adding fields from the Field Selector can be done in two ways.
- Double click the name of the field you wish to add to the display. This will add the field to the end of your displayed fields.
- Click and hold the name of the field you wish to add to the display, hover the field between the two fields you would like it to be placed and release the mouse button. This functionality can be seen in the following screen:
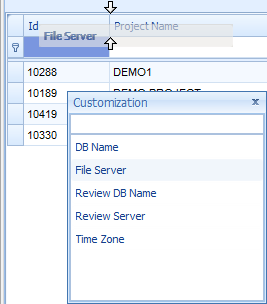
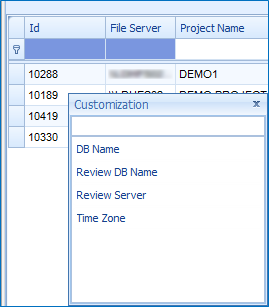
The File Server field was moved from the Field Selector list to the designated location between the Id and Project Name fields.
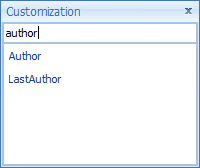
Fields can be quickly found using the filter bar at the top of the Field Selector list. Applied filters will search the entire field name, as shown in the following screen:
Note: To add more than one field at once, check the box next to the desired fields and then drag to the desired location or double click on one to add them all to the end of the grid.
Ordering Fields#
Each field in a grid can be ordered by either ascending or descending order. Click the field header you wish to sort by. An arrow will appear on the right side of the header. An up arrow indicates the documents are in ascending order. A down arrow indicates the documents are in descending order. Multiple fields can be sorted on by holding the shift key and then clicking each field in the desired sort order.
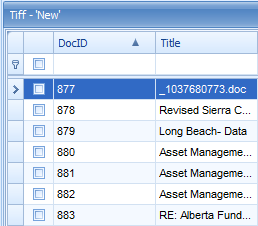
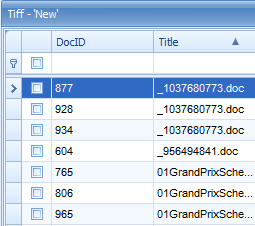
In the above example, documents originally ordered by DocID are now ordered by Title.
Group Documents by a Specific Field#
Documents can be grouped together based on a shared field value. To enable grouping on a grid right-click within the grid, hover over Filters and Groups and select Groups Panel. Perform these steps will place a new blue area at the top of the grid.
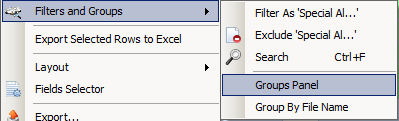
You will now be able to click on a field, drag the field over the blue area, and release. Doing so will automatically group all documents sharing the same grouped field value together. In the below example, documents have been grouped by the field BaseDocID. The BaseDocID field will group documents together based on family relationships.
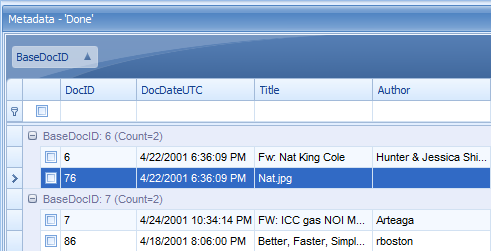
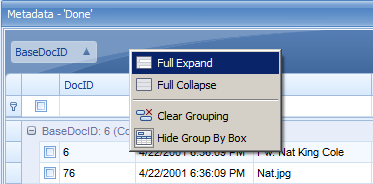
Each distinct grouping will have a separator bar providing the basis for the grouping and the number of documents found within this group. To the left of this information is a +/- button that can be used for collapsing the group. To quickly collapse or expand all groups, right-click in the blue area above the grid and select the appropriate option.
Documents can also be organized by more than one group simultaneously. To add an additional grouping, click an additional field; drag the field over the blue area, and release. Now documents will be grouped using both fields.
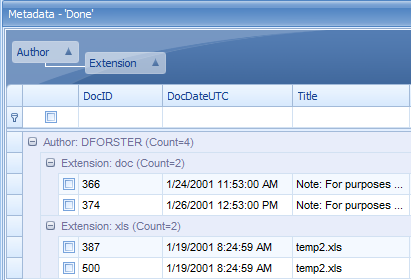
Documents in the above screenshot were grouped first by the author (DFORSTER) and then by extension (doc and xls).
Removing Fields#
Fields can be removed from the grid. To do this, click and hold the field header you wish to remove. Then drag this field outside of the header area and release the mouse button. A black ‘X’ symbol will appear over the field name to indicate the field will be removed. This functionality can be seen in the following screen:
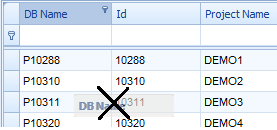
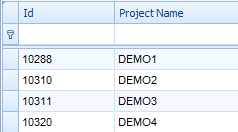
The DB Name field has been removed from the grid.
Filters#
A single project within Viewpoint can contain millions of documents. Navigating to a single document or subset of documents can be difficult when having to consider the entire project at once. To ease navigation, Viewpoint uses filters to help users concentrate on smaller sets of data.
Selector Filters#
Selector filters allow users to filter documents on a broad scale. Each filter and its contents are defined, as follows:
Filter | Description |
|---|---|
| The source selector combines filtering for custodians, scopes, and medias. A custodian is a descriptor of ‘who’ a processed set of data belongs to. A scope is a single piece of evidence that is attributed to a single custodian. It is made up of one or more medias and is named after the Custodian and Data Location options selected during cataloging. A media is a subset of a scope. Each E-mail container (PST, OST, NSF, etc.) within a scope becomes its own media. All documents within a scope not originating from an email container create a single media. |
| A FileID is a file type recognized by Viewpoint. During processing the file type of each document is determined via file OLE or file signature. The document’s actual extension is only considered if the file OLE or file signature is not detected. |
| A file category organizes sets of FileIDs into broad groupings of file types. These groupings are based on the relevant functionality of the FileIDs. For example, users can filter on all multimedia files at once instead of selecting each document ID one-by-one in the FileID filter. |
| The Folder Explorer displays the file structure of the processed data. This allows users to filter based on specific folder locations within processed data. For example, you can filter the documents grid to show only the documents in the Deleted folder of an individual .PST file. |
| A View is a subsection of data created in the review application. This filter allows users to select subsets of documents that have been isolated for review. This function is used most frequently to select all documents requiring tiffing. |
| A Dedupe set is an organizational grouping of files checked for duplicates against one another. The Dedupe set filter is unique in that it is the only filter that will not filter documents from the processing grid. Instead, a field called ‘Is Duplicate’ can be used to determine whether a particular document is considered a duplicate within the selected Dedupe set. |


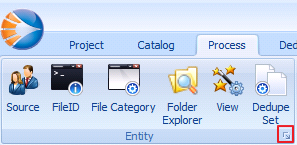
Note: To clear all filters at once, hit the small button located in the bottom right hand corner of the Entity section.
Field Filters#
Filter Documents by Text#
- Type the desired filter text in the blank cell located between the column header and the document list.
- If desired, use the * symbol to apply a wildcard at the beginning of a filter.
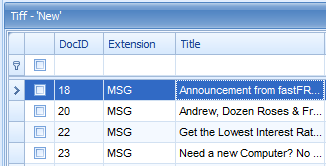
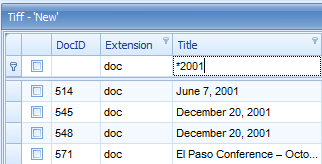
In the above example from the Process tab, filters were added to show only documents that had an extension of ‘doc’ and a title containing ‘2001’.
Search Fields#
All fields currently displayed on a panel can be searched simultaneously.
Use Ctrl + F to open a search box. Any alphanumeric string inputted in this box will highlight in the panel no matter the field. To search for a phrase input the alphanumeric string with double quotes on each side (Ex. “Samuel Chan”). To search for multiple strings at once apply a space between each (Ex. “Samuel Chan” MSG).
Filter Documents by Exact Contents#
- Hover over the field header requiring a filter.
- Click the key symbol that appears in the top right corner of the field header. A list will appear that displays each unique variation that currently exists in that field.
- Click the desired values to filter that field.
Note: For date field filtering we recommend using the ‘Advanced Filter’ functionality described as follows:
Advanced Filters#
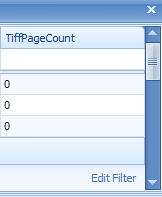
Once a field filter has been applied, an option in the lower right corner of the grid will appear called Edit Filter. Click this filter provides additional settings for creating filters. This window is also available by selecting ‘Custom’ from the Filter and Groups section of the right-click menu.
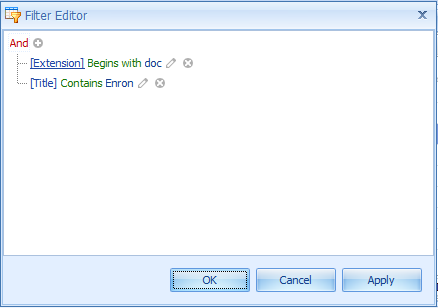
Current filtering options are shown in the display. Users can add additional filters with the following steps:
- Click the red text at the top of the filter to choose the type of Boolean operator to apply to this filter.
- Click the plus sign next to the operator chosen in step 1. A new filter will appear pre-populated with filter options.
- Click on the left blue text of the newly created filter. A list will appear with all available fields available in this grid. Click the field you wish to add a filter to.
- Click on the green text of the newly created filter. A list will appear with all available operators. Click the operator that provides the scope of the desired filter.
- Click on the right blue text of the newly created filter. Type in the value of the filter you wish to apply to the field.
- Repeat steps 1-5 as necessary to create additional filters.
- Click OK to exit the advanced filter window. The field grid will now reflect the results of all applied filters.
Calculate Field Data#
- Right-click on the light blue area beneath the field you desire to calculate information from in a grid.
- From the list of options that appear, click on the appropriate calculation to apply to the field.
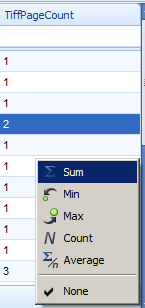
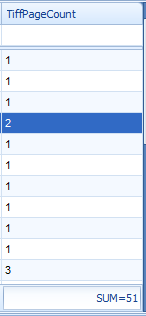
Note: Some fields, such as DocID, have default calculations.
Hide and Remove Field Filters#
Once a filter has been applied to a grid, a summary of the filter will appear in the lower left hand corner of the grid. Click the check box to temporarily hide the filter and display an unfiltered grid. The filter can be reapplied by clicking the check box once again. To completely remove all filters, click the X button to the left of the check box.

Panels and Viewers#
Each tab of the processing application has a number of panels that can be customized to your viewing preference. Any window within the application that you can close by clicking an X button in the upper right hand corner is considered a panel. These panels display information pertinent to each processing phase.
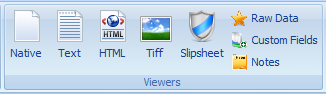
A viewer is almost identical to a panel except that it displays a document rendering rather than information. Viewers exist only on the ‘Process’ tab and will render individual documents selected from a processing grid. Each viewer corresponds to a rendering of the document either found or created by Viewpoint.
Dashboard#
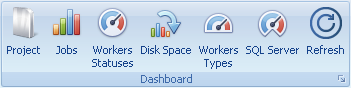
The buttons on the Dashboard section control which panels are visible on the Project tab. The positioning of these panels can be changed by using the  Customize button in the lower-right corner of the Dashboard section of the toolbar.
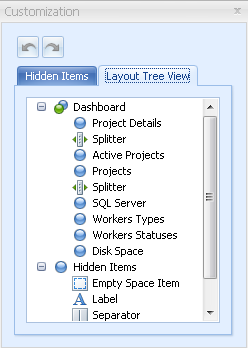
This will open a Customization window that allows the user to make changes to the panels. Right-clicking on an item from this window displays the customization options.
Projects#
The Projects panel displays information about a selected project.

Jobs#
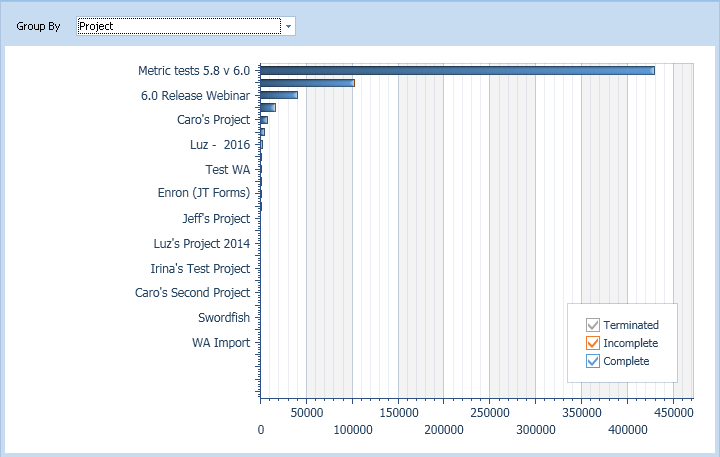
The Jobs panel displays the number of workflows for the selected Group By option. This graph can be grouped by Project, User, or Task.
Worker Statuses#
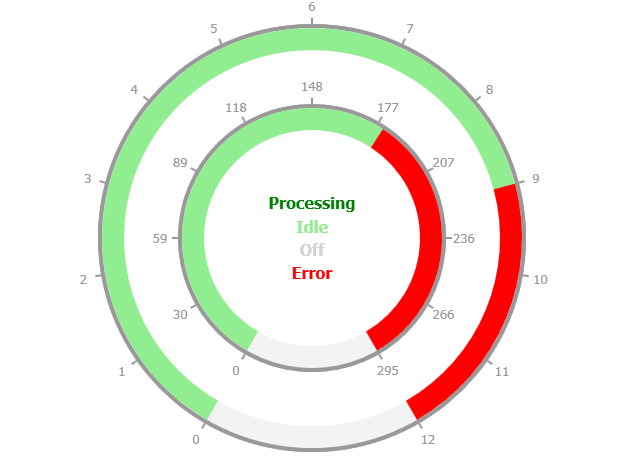
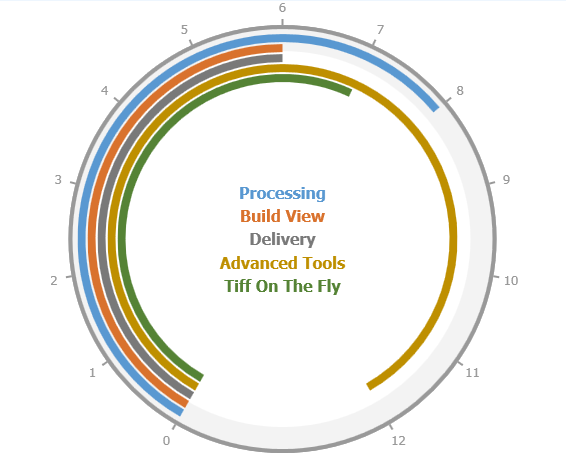
The Worker Statuses panel the current state of workers. The outside circle displays the total number of workers, while the inside circle displays the total number of workflows.
Disk Space#
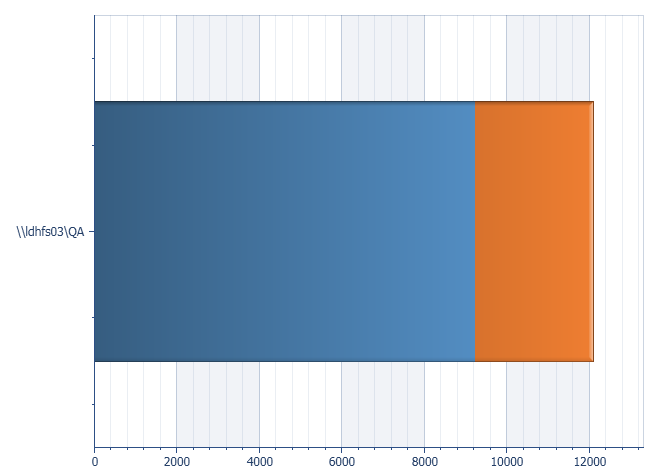
The Disk Space panel displays the file server locations used by Viewpoint projects. Hovering over a section of the graph shows the used vs. free space of that location. Disk space is measured in Gigabytes.
Worker Types#
The Worker Types panel displays the total number of workers on the outside circle. The data inside the circle shows how many workers are set to perform each type of task.
SQL server#
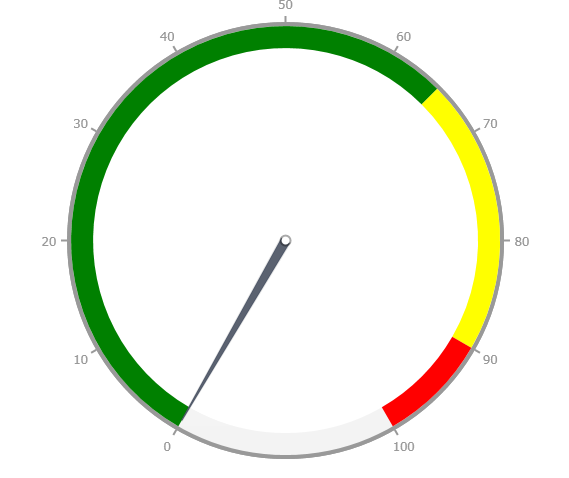
The SQL Server panel displays the percentage of CPU usage of the SQL Server.
Resize a Panel/Viewer#
You can resize docked or floating panels/viewers. Docked panels/viewers display a thick border, called a splitter, between the panel/viewer and the rest of the work area. Dragging the splitter allows you to increase or decrease the size of the panel/viewer. For floating panels/viewer, drag any border or corner to resize its length and/or width.
The Docking Function#
You can dock a panel/viewer vertically or horizontally on the right, left, top or bottom edge of the work area or float it anywhere on top of the Viewpoint window. To move a floating or docked panel/viewer, drag it by its title bar.
When you drag a panel/viewer, two sets of icons appear to help you select a position for docking the panel or positioning multiple panels. One set displays icons around the perimeter of the work area and docks the panel/viewer at the corresponding edge. The other set, which initially appears in the center of the work area, helps you layer multiple panels/viewers in a single stack or position them adjacent to one other.
To dock a panel/viewer, drag its title bar to an icon corresponding to the desired docking position. To float the panel/viewer, drop it anywhere on the work area except on an icon.
The following table describes the function of each icon:
Icon | Function |
|---|---|
| Docks the panel/viewer at the top of the work area. If this icon appears within another panel/viewer then it will be positioned above the existent panel/viewer. |
| Docks the panel/viewer at the bottom of the work area. If this icon appears within another panel/viewer then it will be positioned below the existent panel/viewer. |
| Docks the panel/viewer on the left side of the work area. If this icon appears within another panel/viewer then it will be positioned to the left of the existent panel/viewer. |
| Docks the panel/viewer on the right side of the work area. If this icon appears within another panel/viewer then it will be positioned to the right of the existent panel/viewer. |
| Stacks panels/viewers on top of one another in layers. Tabs appear at the bottom of the panel/viewer area for displaying a panel/viewer in the stack. |


Move a Panel/Viewer#
- To dock a panel/viewer, drag it by its title bar and drop it on an arrow icon corresponding to the desired docked position. Release the mouse button when the shaded image of the panel/viewer appears in the desired position
- To float a panel/viewer, drag it by its title bar and drop it anywhere in the work area, except on an arrow icon.
Options for Displaying Multiple Panels/Viewers#
When you open multiple panels/viewers, you can display them in any of the following positions.
Individual Docked or Floating Panels/Viewers #
If you dock one panel/viewer in a vertical dock (left or right side) and another panel/viewer in a horizontal dock (top or bottom), the first panel/viewer you dock sizes to the full docking space, while the other panel/viewer resizes to fit the remaining docking space.
Stacked in a Single Docked or Floating Panel/Viewer with Multiple Layers #
Stacked panels/viewers layer one on top of another, with the most recently opened panel/viewer on top.
The name of each panel/viewer in the stack appears in a tab at the bottom of the panel/viewer area. Clicking a tab moves that panel/viewer to the top of the stack so that you can view it. Both floating and docked panels/viewers support stacking. When you move the stack, all of the panels/viewers move at the same time.
Adjacent Panels/Viewers Sharing the Same Docked Area #
Panels/viewers can share the same docked or floating area. You can position panels/viewers adjacent to one another in any direction, above, below, left, or right.
Display Adjacent Panels/Viewers#
- Drag one panel/viewer on top of the other until a set of icons appear on top of the dragged panel/viewer. The icons that appear on top of the dragged panel/viewer correspond to adjacent positions rather than the perimeter of the work area. For example, the up icon places the dragged panel/viewer above the panel/viewer under it.
- Drop the panel/viewer on the arrow icon corresponding to the desired adjacent position. Release the mouse button when the shaded image of the panel/viewer appears in the desired position.
Stack Panels/Viewers#
- Drag one panel/viewer on top of the other until a set of icons appears.
- Drop the panel/viewer on the stack icon
 in the center of the icons.
 - To display a panel/viewer in the stack, click the tab of the panel/viewer.
- To separate stacked panels/viewers, drag the tab of the panel/viewer you want to move to another location in the work area.
Auto-hide Function#
There are two behaviors for a docked panel/viewer; to always appear on top of the work area, or to hide automatically when not in use. This behavior is controlled by the  Pushpin icon, which appears in the right corner of the title bar for docked panels/viewers. The pushpin points down when enabled and points left when disabled. By default, the pushpin is enabled and the panel/viewer always appears on top of the work area, sticking the panel/viewer to the window. Clicking the Pushpin icon unpins the panel/viewer.
Three things happen when you unpin a panel/viewer:
- The direction of the pushpin changes.
- A tab for the panel/viewer appears.
- The panel/viewer disappears into the border of the work area as soon as you move the mouse pointer off the panel/viewer. You can auto-hide multiple docked panels/viewers.
To display a panel/viewer, either point to, or click the tab you want to view, or click the Pushpin icon to disable the auto-hide behavior. For stacked panels/viewers, the pushpin controls the pinning actions for all panels/viewers in the stack and creates a tab for each stacked panel/viewer.
Saving and Loading Layouts#
After all settings have been customized to a user’s preference, they should be saved to the database for future log-ins. All saved layouts within Viewpoint are saved to the SQL server and not the local machine. This means that after a profile has been saved, it will remain with the user regardless of what machine they log on from. Please note that only one layout can exist per user.
To Save, Load, or Reset Panel/Viewer Placement Settings#
- Click the Viewpoint logo in the top left corner of the application window.
- Click the appropriate layout option.
- Save Layout – Saves current display layout to the user’s profile.
- Reset Layout – Changes the display to the last saved user layout.
To Save, Load, or Reset Grid Field Settings#
- Right-click on the grid with the settings you want to save or reset.
- Hover over the option labeled Layout.
- Click the appropriate layout option.
- Save Layout – Saves current display layout to the user’s profile.
- Reset Layout – Changes the display to the last saved user layout.
Note: Each grid has its own unique layout and must be saved for the settings to be saved. Choosing to save a layout will not universally save all current grid settings.
Project Creation and Settings#
Creating a New Project – Project Tab#

- To create a new project, click the Project tab. Then, place the cursor over the Project list grid, right-click and select New.
- Select the appropriate Company from the drop down list, type in the Project name, select ‘Active’ as the Status and specify the Time Zone. It is recommended that the Daylight Savings option is also checked. If a new company name is necessary, it can be added through the Security Management button.
Note: The Initial Identity Value is for advanced troubleshooting and should remain at 1 unless you are directed to change it by CLCS staff.
- Select the appropriate Process Server and File Server share or directory where all data will be copied to during data processing. There are options to specify individual directories for HTML, Text, TIFF, Index, and Report files. When left blank, these options will default to the path specified in the File Server field. Before data processing begins, confirm that all processing and reviewer users have read/write permissions to the File Server location listed.
Note: The Company and Process Server cannot be changed once data has been staged into the Project. However, any of the file server fields can be changed by right-clicking on the Project and selecting Update.
- Click Save and the project will be created. You will see the Project defaults as shown below in the main PMC screen. You will also be shown a prompt asking if you would like to create the Review database. Clicking Yes will open the Review Database Wizard. Clicking No will just close the prompt.

Note: The DB Name/Project ID is how the database is identified on the SQL server and will auto increment by 1 as new projects are created. End users select Projects by the contents of the Name field in the review application.
Custodian Info#
- Click the Custodian button in the toolbar and the Custodian panel will appear.
- This information answers the question: Who does the data belong to? Type the First and Last Name of a custodian in the last row on the list. Hit Enter to save and move on to the next entry. Last Name is a required field, the First Name is optional. To reduce the likelihood of spelling errors, it is recommended to copy and paste the names of custodians when possible.
- To bulk insert multiple Custodians at once, simply copy corresponding columns from a Microsoft Excel file.
- To insert Custodians directly from Active Directory, right-click in the Custodians grid and select ‘Import from Active Directory’.
Data Locations#
- Click the Data Locations button in the toolbar and the Data Location panel will appear.
- This information answers the question: How did you physically receive the data? Typical examples include FTP, CD, DVD Hard Drive or Thumb Drive. Type the first applicable Data Locations in the last row on the list and hit Enter to save and move on to the next entry.
Media Sources#
- Click on the Media Source button in the toolbar and the Media Source panel will appear.
- This information answers the question: What kind of data is this? Typical examples include Active Email, Forensic Image or project specific data types. Type in the first appropriate Media Sources and hit Enter to save and move on to the next entry.
Project Settings#
- Click the Project Settings button on the Project Toolbar to display the Project Settings menu, as shown in the following screen:
Note: These settings can only be changed if the user has been granted the ‘Allow to Modify Project Settings’ permission in Security Management.
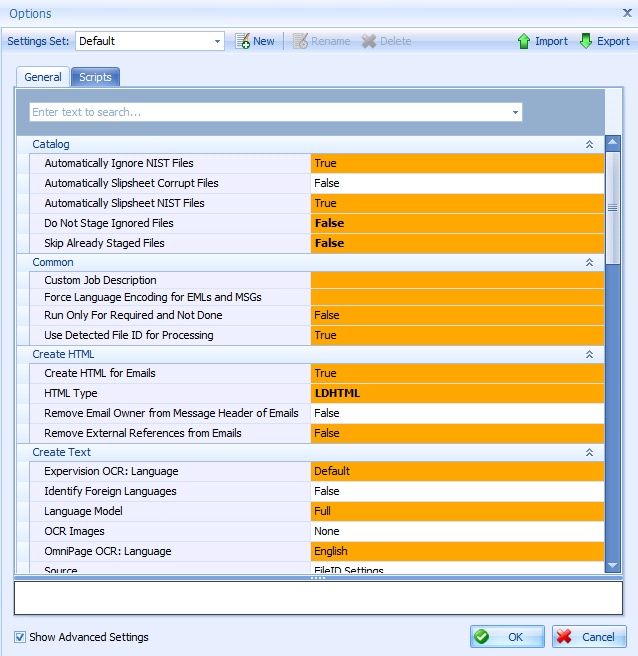
Multiple Settings Sets can be created to quickly handle different types of processing jobs so that the user does not have to change individual settings for each processing job.
- To create a new set, click New at the top, type in a name and then click OK.
- Select the new set from the dropdown list before making any changes to the settings.
- Click OK at the bottom will save the changes to the Settings Set.
Note: All options apply to the entire Project. Settings that show True and False can have no other entries. Orange highlighted fields denote advanced settings, and bolded text denote that the setting has been changed from default Viewpoint settings.
Standard Processing Settings#
By default, the only settings shown are those most commonly configured on a given project. To see all project settings, checkbox the Show Advanced Settings button on the lower left hand corner of the window. Descriptions of all processing settings can be found below.
Catalog – Standard Settings | ||||
|---|---|---|---|---|
Setting | Description | Recommended Setting | ||
Automatically Slipsheet Corrupt Files | A true selection means any document detected as corrupted by Viewpoint will be given a placeholder file information sheet during processing. | False – Documents may be described as corrupt due to insignificant user permissions, network storage space, or other configuration issues. To avoid documents being slipsheeted as a result of human error, CLCS recommends this setting remain false. | ||
Create HTML – Standard Settings | ||||
Setting | Description | Recommended Setting | ||
Remove Email Owner from Message Header of Emails | A true selection will have E-mail HTMLs created using the LDHTML and LMHT methods omit the message owner. | False – Typically the message owner information corresponds to the custodian name and provides a clean looking representation of an e-mail. However, in certain circumstances when e-mail is collected from a repository the rendering will contain irrelevant information. In those situations, this option should be set to true. | ||
Create Text – Standard Settings | ||||
Setting | Description | Recommended Setting | ||
Identify Foreign Languages | A true selection means documents with successful text extraction will be checked for 64 distinct languages. Any detected languages will be found in the Languages field. | False – Detecting languages in documents will slow down data processing and should not be turned on if it is unnecessary for the project. However, if languages need to be detected at a later point in the case, new text will need to be created for every document. | ||
Nuance OCR De-skew | A true selection means an image will be slightly rotated so the lines of text are straightened if they are crooked. | True – Straightened lines of text tend to generate better OCR results. | ||
Nuance OCR Rotation | A true selection means the image will automatically be rotated so it is read left to right. | True – Changing the orientation to read left to right tends to generate better OCR results. | ||
OCR Images | Any selection other than false indicates that documents with no text extraction will attempt to have text generated through the OCR tool selected. | None – OCR is a slow process and is not recommend being turned on for initial data loading. Depending on the nature of the case, users may isolate common text image file types (pdf, tiff) and OCR this subset. Other file types that typically contain only graphics (jpg, png, ect) may not require OCR text. Each project should be evaluated independently to determine pertinent OCR needs. | ||
Include High Color Images | A true setting will include high-color images for OCR processing | False – Images with lots of colors generally aren’t ideal candidates for OCR. With this set to False, high-color images will be skipped during OCR to save time. | ||
Include Photos | A true setting will include photos from mobile phones or digital cameras for OCR processing | False – Photos from phones or digital cameras generally aren’t ideal candidates for OCR. With this set to False, photos from cameras will be skipped during OCR to save time. | ||
Minimum Images Height | The minimum pixel height of an image to be included in OCR processing | 200 – Small images often do not contain useful text to be extracted through OCR. To save time during OCR, images smaller than this pixel height will be skipped. | ||
Minimum Images Width | The minimum pixel width of an image to be included in OCR processing | 200 - Small images often do not contain useful text to be extracted through OCR. To save time during OCR, images smaller than this pixel width will be skipped. | ||
Page Marker | Text separator for OCRed page with text (Nuance or Expervision only). Use [Page] for page number and /or [Pages] for total page count | Empty String | ||
Raise Error | Document will have a text status of Error if any of the OCR options are off or not compatible | False – Documents that don’t match OCR requirements will set the text status to Not Required | ||
Source | Determines the source to be used for creating searchable text of a document. | FileID Settings– The ‘FileID Settings’ option means the system will create text based on the settings of the detected FileID (not the file’s extension). For documents with redacted text the ‘TIFFs’ settings should be used to create new OCR text. The ‘TIFFs’ feature can also extract text from other file types that don’t contain native text (psd,eps,ps) by tiffing and then running OCR on the generated tiffs. | ||
Create TIFF – Standard Settings | ||||
Setting | Description | Recommended Setting | ||
Color Settings for Efiles | Users indicate if edocs will be printed in black and white, grayscale, or full color or b&w. | Black and White for Better Images – Black and white is the required setting for the majority of electronic discovery agreements. It is also the fastest setting and will provide the smallest available file size per tiff. The setting ‘Black and White for Better Images’ provides half-toning tiffs, creating grayscale quality images that still meet black and white production requirements. | ||
Color Settings for Emails | Users indicate if emails will be printed in black and white, grayscale, or full color or b&w. | Black and White for Better Text – Black and white is the required setting for the majority of electronic discovery agreements. It is also the fastest setting and will provide the smallest available file size per tiff. The setting ‘Black and White for Better Text’ performs no half-toning. The resulting tiffs print with clean fonts and crisp edges. | ||
Tiffing Method | Determines the source to be used for creating tiffs of a file. | FileID Settings – The ‘FileID Settings’ option means the system will create tiffs based on the settings of the detected file ID (not the file’s extension). For problematic documents, users can attempt to tiff with Quick View Plus, Microsoft Word, or Web Kit. | ||
Extract – Standard Settings | ||||
Setting | Description | Recommended Setting | ||
Email (EML, MSG, EMLX, DXL) Embedded Images Extraction Mode | Specific to email, inline images (such as signature logos) can be extracted as separate documents. | Do not extract inline images as attachments – Inline images in emails will not be extracted as separate documents. Prior to Viewpoint 7.5, inline images were processed as separate documents for specific file types automatically. If a project has new data to process AND has data processed prior to 7.5, Legacy should be selected for consistent processing. | ||
Extract Embedded Images from MS Office Documents as Separate Documents | A true selection means any image found in a Microsoft Office file will become an individual record in the processing and review databases. | False – Embedded images will be visible in the review Doc viewer and any tiffs created for production. Unless these images require separate tagging from the MS Office document, they do not typically necessitate their own record. | ||
Extract Icon Embedded Objects from MS Office Documents as Separate Documents | A true selection means any icon embedded object found in a Microsoft Office file will become an individual record in the processing and review databases. | True – An icon embedded object comes from a file that has an icon link to another distinct encased file. A common example of this is a word document with an icon link to a Microsoft Excel or PowerPoint file. These documents are not rendered in the Doc viewer and are recommended to be their own distinct documents. This also avoids confusion during production as embedded icons will be visible in any created tiff images. | ||
Extract Inline Embedded Objects from MS Office Documents as Separate Documents | A true selection means any inline embedded object found in a Microsoft Office file will become an individual record in the processing and review databases. | False – An inline embedded object comes from a file that has either another complete document or subsection of a document encased within. A common example of this is a Microsoft PowerPoint document with an Excel chart or table inserted. These inline embedded objects are still fully searchable within Viewpoint and do not typically require their own record. | ||
Import – Standard Settings | ||||
Setting | Description | Recommended Setting | ||
Convert Images with more than 24-bit depth to 24-bit | A true selection means that any images with more than 24-bit depth will be converted to 24-bit during the import process. | True – Converting to 24-bit saves space. | ||
Enforce 300 DPI on Imported Images | A true selection means all imported images will be converted to 300 DPI. | False – Converting to 300 DPI will increase file size. | ||
Jpeg Quality | JPEG Quality slider – 1 to 100. Affects color TIFF quality for TIFFs which are ingested through Imported or updated through the Process tab’s Import/Replace File feature. Higher quality images use more file space. | 80 | ||
Maximum Image Dimensions | If an image has at least one dimension (height or width) larger than specified, it will be proportionally downsized to the setting value upon import. | 4961 – Default value (A3 paper at 300 dpi) and minimum 3300. If you do not want the image to be resized, input 0 as the value of this setting. | ||
Maximum Size of Image Files to Import (MB) | This is a size limit for TIFF images during import. It does not apply to native file mapping. Must be a non-zero value. | 100 – This is to help avoid Out of Memory errors when importing very large TIFF images. | ||
Index – Standard Settings | ||||
Setting | Description | Recommended Setting | ||
Force new index for Documents with file size greater than (bytes) | Creates a new index when a document exceeds the file size instead of grouping document into one index. | 100000 | ||
Index Slipsheeted Documents | A true selection means DTSearch will attempt to index slipsheeted documents. | False – Typically slipsheeted documents such as system files or application specific files will be difficult to index through DTSearch. By changing this option to false, DTSearch will not attempt to index these problematic files. Changing this setting to true will have DTSearch attempt to index all non-ignored files, but risks sticking on each problematic files. | ||
Maximum Number of Documents per Index | This setting tweaks the maximum number of files that can exist within a DTSearch index. | 20,000 – Each media within Viewpoint receives at least one index. Once the maximum files setting is reached, an additional index is created for the media. 20,000 files has been found by CLCS to be a number that typically allows for optimal balance between the size of the indexes and number of indexes to search. | ||
Miscellaneous – Standard Settings | ||||
Setting | Description | Recommended Setting | ||
Expose all Excel content in Native | A true selection means all hidden content in Microsoft Excel files will be revealed during the metadata process and visible during Viewpoint Review. | False – If this setting is set to true, processing throughput will diminish significantly. There is no chance of accidentally missing content as hidden text will be searchable through the review interface’s Text viewer. Hidden content will also be revealed during tiffing and present on all produced tiffs. For documents where this functionality during review is necessary, the process can be run only on the relevant subset. | ||
Sentiment Analysis Document Types | Determines which type of documents can be sent for sentiment Analysis. | Emails Only – Only documents with IsEmail set to True can be sent for sentiment analysis. | ||
Sentiment Text Max Size | Maximum characters in the document. Anything over will not be sent. | 2000, Do not exceed 5000 | ||
Transcription: Line Break Tolerance (Seconds) | Determines the number of seconds of no speaking (or a pause) in an audio recording being transcribed before transcribed text is placed on a new line. | 2 – Two seconds of silence will result in new line once speaking continues. | ||
Transcription: Number of line breaks to insert | Determines the number of blank lines inserted once speaking resumes after a pause. | 2 – Once speaking resumes, transcribed text will follow two blank lines. | ||
Advanced Processing Settings#
Note: The below settings are items that typically do not need to be configured per project. They should only be changed by experienced users that have a specific non-standard requirement to address.
Catalog – Advanced Settings | ||
|---|---|---|
Setting | Description | Recommended Setting |
Automatically Ignore NIST Files | A setting of true means any standalone files found to belong on the National Institute of Standards and Technology (NIST) system files list will be ignored during processing. | True – Keeping this setting as true will prevent any files known to be system created from being posted to review. This list is maintained by the Department of Justice and used for filtering as standard practice of e-discovery requests. |
Automatically Slipsheet NIST Files | A setting of true means any files found to belong on the National Institute of Standards and Technology (NIST) system files list will be slipsheeted as system files during processing. | True – Keeping this setting turned to true will prevent any files known to be system created from being posted to review. This list is maintained by the Department of Justice and used for filtering as standard practice of e-discovery requests. |
Do Not Stage Ignored Files | Users can select this option to skip staging of ignored files due to them being system files or having specific file extensions. | True – A setting of True will speed up processing time without risk of skipping staging of needed files. |
Skip Already Staged Files | A setting of true means that a previously staged document will not be processed again as a separate record in the same media. | True – This setting is useful when processing data from a location where cataloging failed due to a file server failure. Keeping the option to true ensures that a folder can be re-catalogued without having two copies of a file be processed. |
Skip staging errors when cataloging | On cataloging jobs, skip errored files (such as those with too long paths) and continue processing. | True |
Common – Advanced Settings | ||
Setting | Description | Recommended Setting |
Custom Job Description | When utilized, the Workflow tab will display the provided name rather than a generic name describing the submitted tasks. | Leave Blank – Typically individual jobs do not need to be tracked after they have successfully completed processing. This option should be used in situations where you are submitting similar jobs that are otherwise indistinguishable, or you want to tie it to a non-Viewpoint tracking system, such as a work request number. |
Force Language Encoding for EMLs and MSGs | For EML and MSG files where the language encoding has been saved incorrectly, users can indicate the actual encoding. | Leave Blank – This setting is only used for advanced exception handling and should not be used without direction from CLCS. |
Run Only For Required and Not Done | When tasks executed against individual documents, if set to true, the task statuses will not be reset to Submitted. In general, if set to true tasks will be only executed for documents with current task statuses are not Done and not Not Required and have assigned processors. | False |
Use Detected File ID for Processing | A setting of true means that where needed, the system will temporarily change the file extension to match the file id while processing. This is only required when files with an incorrect extension cannot be opened with the native application pertaining to the file id. | True – A true setting means the system will temporarily change the file extension to match the file id. There is no negative outcome of the process. It is assumed that where needed, the user will want this to occur automatically. |
Create HTML – Advanced Settings | ||
Setting | Description | Recommended Setting |
Advanced dtSearch Logging Mode | This log grows fast. Logs detailed DTSearch information when creating HTML. Located in DTSearchRoot\\DTSearchLogs in AppData. | Off |
Create HTML for Emails | A true selection means all e-mail document types will have an HTML rendering created upon staging. The HTML type generated links to the ‘HTML Type’ setting. | True – All e-mails must have HTML files generated for Viewpoint review and tiffing. Only turn this option off if a very small number of e-mails will need to be reviewed or produced and you would like to run this process on the data subset. |
HTML Type | Determines the type of HTML to be generated for e-mails. | LDMHT – The LDMHT setting will provide the best formatted version of an e-mail with all embedded images present. The LDHTML setting will provide a formatted version of the e-mail without images present. The DTSearchHTML will provide an alternative formatted version of the document in instances where the LDMHT/LDHTML version throws an exception. |
Remove Email Owner from Message header of Emails | A true selection will have E-mail HTMLs created using the LDHTML and LMHT methods omit the message owner. | False |
Remove External References from Emails | A true selection means any processed email will be stripped of any non-text content. | False – This setting is only used for advanced exception handling. It should not be used without direction from CLCS. |
Create Text – Advanced Settings | ||
Setting | Description | Recommended Setting |
Expervision OCR: Language | This option is used to force Expervision to look for and prioritize a specific language when creating OCR text. | Default – Users will typically not know the language of an image document without a human review. Forcing Expervision to a specific language should only be done after a user confirms what language to look for. |
Extract hyberlinks from the email’s text | If true, hyperlinks will be extracted from email's text.
| None |
Language Model | Will use a Short list of common languages or a Full list of all languages, when determining languages present in document text. | Short – Will only identify the most common languages, as that improves the speed of language detection. Common languages include Arabic, Chinese, English, French, German, Hebrew, Hindi, Italian, Japanese, Korean, Portuguese, and Spanish. |
OCR Service start up delay time (ms) | Delay when starting up OCR service (in milliseconds). | 2000 |
OmniPage OCR: Language | Set document language For OmniPage OCR | English |
Tiff and OCR Documents with Text Errors | A setting of true will cause any document with a Create Text error to be tiffed and OCRed. The tiffs used to generate the OCR will be deleted. | False – This option should only be used in situations where all image file types (jpg, png, ect.) require OCR text. To disable this option for a certain File ID, open the File Identity Details window and select the Ignore Auto Tiff/OCR Setting checkbox. |
Use alternative text generation for RTF emails | If true, system will use alternative texts generated from HTML or body text tag if it's 20% larger than text parsed from RTF body | False |
Use DTSearch for MS Office Documents) | A setting of true means that Microsoft Office documents will be indexed and searchable through DTSearch. | True – This setting should only be turned to false in cases where DTSearch cannot index a non-corrupt document. Changing the setting to false forces the system to attempt to copy out any visible text from the document. |
Use VP 6.2 Changes for MSG Text Extraction | If true, generated text will use updates originating in Viewpoint 6.2 to fix missing spaces in text from certain MSGs. This will affect deduplication and is recommended for new matters only. | True |
Create TIFF – Advanced Settings | ||
Setting | Description | Recommended Setting |
Complete Printing Timeout (min) | Users can toggle the maximum number of minutes allowed for a document to finish tiffing. If a document does not finish tiffing in this time period, an error is generated. | 20 – The default setting of 20 minutes gives ample time for the majority of documents to tiff completely. This setting should only be moved up to complete tiffing of files with very large page counts. |
Detect margin overruns while TIFFING | Give a warning message if image context is greater than the margins | True |
Override Redacted TIFFs | A setting of ‘Allow redacted TIFFs to be overwritten’ will allow users to override existing redacted tiffs with new un-redacted tiffs. | Do not allow redacted tiffs to be overwritten – Users should never replace redacted tiffs unless they are certain they will no longer be used again. Once tiffs are replaced, they cannot be regenerated. Any redacted files needing new tiffs should be fixed in isolation. |
Start Printing Timeout (min) | Users can toggle the maximum number of minutes allowed for a document to begin tiffing. If at least one tiff image is not created in this time period, an error is generated. | 2 – The default setting of 2 minutes gives ample time for the majority of documents to begin tiffing. This setting should only be moved up to complete tiffing of files that either take a very long time to load prior to tiffing or documents that spool printed pages. |
Tiff Orientation | Users can choose whether all generated tiffs should be portrait or a possible mix of landscape and portrait orientation. | Force Portrait – Having all documents in portrait format leads to a uniform review and production process. Documents should be printed in original format if the parties involved would like to have all images printed in a way more true to the original content. |
Extract – Advanced Settings | ||
Setting | Description | Recommended Setting |
Bloomberg: GMT Date Offset | When processing Bloomberg emails, this option can be used to adjust the time zone of the emails positively or negatively to correspond to GMT time. | 0 – This option should only be used when processing Bloomberg emails that were not collected in standard GMT format. |
Bloomberg: Regular Match Expression for Attachment Archives | This option can be used to indicate what character should be used to indicate an attachment in a custom Bloomberg XML formatted email. | Leave Blank – This setting is only used for advanced data handling and should not be used without direction from CLCS. |
Bloomberg: Regular Replacement Expression for Attachment Archives | This option can be used to indicate what character should be replaced to indicate an attachment in a custom Bloomberg XML formatted email. | Leave Blank – This setting is only used for advanced data handling and should not be used without direction from CLCS. |
Chat: Skip messages of specified types | Skip messages of specified types. Chat entries of selected types will be skipped during extraction.
| None |
Chat: Split conversation idle hours | Split conversation mode is set to By Day, this is the threshold to start a new document | 1 |
Chat: Split conversation mode | Conversations will be split to different documents either by days, hours (see Chat: Split conversation idle hours), or not split at all.
| By Day |
MS Teams: Chat Message Processing | When processing PST files, chat messages or emails may be ignored.
| Everything |
MS Teams: Clear database cache after processing | MS Teams database cache will be cleared after processing. | True |
Skip Extraction of Errored Items from Email Archives | A setting of true means that Viewpoint will skip over problem e-mail archives during extraction without stopping at error files. | False – This setting should be set to true for error handling only. Certain e-mail containers (pst, nsf, etc.) may have extraction errors occur during processing. For these documents, attempt to resolve the extraction issues on an individual basis. Any containers that cannot be resolved through manual exception handling should be reprocessed with this setting turned to true. |
Treat Portfolio PDFs as Archive Containers | If true, Portfolio PDFs will be treated as archive containers, and each direct attachment will be considered the parent of a new document family. If false, Portfolio PDFs will be treated as electronic files and all attachments will be treated as embedded objects to the PDF. | True |
Hash – Advanced Settings | ||
Setting | Description | Recommended Setting |
Deduplication Hash Type | Determines whether documents will be hashed using the MD5 or SHA1 method. | MD5 – There is no difference in functionality when choosing the two hash methods. This selection should be made based on user preference or project specifications. |
Index – Advanced Settings | ||
Setting | Description | Recommended Setting |
Alphabet File (ABC) for DTSearch Indexing | Users can link to the UNC path of an .abc file that contains indexing rules for all documents to be indexed with DTSearch. | Leave Blank – Users can use a custom alphabet file to index characters such as ‘%’ and ‘+’ that are not normally searchable within DTSearch. Making special characters searchable will slow down indexing and potentially alter search strategies and results. Therefore, this option should only be used in cases where indexing these characters is paramount. |
Create Accent Sensitive Index | A setting of true means that Viewpoint will consider accented characters as distinct from unaccented characters during keyword searches. | False – There are a variety of words that are often represented in either accented or unaccented form interchangeably. A good example of this is the word résumé which is more commonly written as resume. This option should be set to true only in instances where considering an accent has a notable impact on search results. |
Create Case Sensitive Index | A setting of true means that Viewpoint will consider the case of letters within a word during keyword searches. | False – In most instances, case sensitivity should be turned off to prevent a word from not being searched if it is capitalized at the start of a sentence. This option should be set to true only in instances where a commonly used word is also used as a proper noun or acronym in your data set. |
File Type File (XML) for DTSearch Indexing | Users can link to the UNC path of a XML file that contains all file types to be indexed with DTSearch. | Leave Blank – This setting is only used for advanced exception handling and should not be used without direction from CLCS. |
Hyphen Treatment | Users can decide if they want to treat hyphens as spaces, treat them as searchable, ignore them, or all of the above. | Enable all options – Enabling all options will help ensure that keyword searches bring back all expected results. When enabling all options, a hyphened word is added to the index multiple times, once for each option formatting. The word “first-class” for instance would be indexed as first-class, first, class and firstclass. |
Maximum Word Length (32-128) | Users can increase the maximum character count per string allowed for indexing. | 32 – This setting should be left as is unless adjustment is specifically required. Deviating from the default value will decrease index speed. |
Noise File (DAT) for DTSearch Indexing | Users can provide a full UNC path to a text file of words that should be ignored during searching. | Leave Blank – By default, Viewpoint does not using a Noise File and therefore all words are indexed. Use a custom file here to skip indexing of certain words such as ‘the’, ‘if’ or any others. |
Only Index Non-Indexed Documents | A setting of True means that only those documents which have not been indexed will be indexed for the selected media. | False – This setting should only be used when indexing large medias in order to speed up the index process by only indexing those documents which have not been indexed yet instead of re-indexing the entire media. |
Specify Metadata or Custom Fields to Index | User can input any desired ex field to index by inputting table name followed by field name with a period in between (e.g. EDocFileSystem.OrifileFolder). Custom Fields and email addresses may also be indexed by inputting ‘EDocCustomFields’ or ‘EDocEmailAddressee’. This will index all custom fields or email addresses respectively. | Leave Blank – User can specify metadata that needs to be indexed. Those metadata values will be added to the text file indexes and available as part of the normal search functionality. |
Specify Phrases to Exclude from Indexing | Users can select one or more phrases to be excluded from the index during keyword searching. | This setting can be used to help remove phrases that obfuscate keyword search results. When using this option, each line represents an individual phrase. We recommend that you copy the text directly from a documents text file, rather than from one of the Viewpoint viewers, for the best possible results. |
Metadata – Advanced Settings | ||
Setting | Description | Recommended Setting |
Collect Non-Standard Email Metadata | A setting of true will collect email metadata not available in standard Viewpoint fields and place them in a single field called Metadata, available for viewing in the Raw Data panel under the EDocEmail heading. | False – The metadata information should only be collected only in situations where this information needs to be searched or made visible in some way. Collecting this information unnecessarily will result in much larger than typical databases. |
Specify additional email headers to add into custom fields | Users can specify a portion of an email header to be inserted into a previously created custom field. (ex. pr_conversation _index) | Leave Blank – This should only be used in situations where specific header information needs to be extracted and inserted into a custom field. |
Miscellaneous – Advanced Settings | ||
Setting | Description | Recommended Setting |
Analyze Email Sentiment | When set to true, emails will automatically be sent for sentiment analysis through Azure Cognitive Services during indexing. Sentiment analysis incurs additional costs. | False – Emails will not be sent for sentiment analysis during indexing. |
Lotus Notes ID File Path | Users can set the ID file to be used for extracting the contents of an NSF file. | Leave Blank – Typically, the same id file will not work for all NSF files in a project. It is therefore recommended to use this option on a job basis rather than a project-wide basis. Any passwords required for opening the NSF should be utilized with the Password File Path option. |
Maximum number of GPU modules for breaking | When running password breaking tasks, define maximum number of possible GPU modules (0 – unlimited) | 0 – This is the default value. |
Passwords Dictionary File Path | Users can link to the UNC path of a text file that contains a list of passwords. Each password on this list will be attempted on all password protected e-mail containers, PDFs, Microsoft Office documents, and archive containers. | Leave Blank – This option should be used with a commonly found dictionary file or one generated by the user. |
Remove Restrictions from PDF Documents | A setting of True means that Viewpoint will attempt to remove restrictions on a PDF document for printing, content copying, and so on. | False – This option should be used on PDFs that can’t be tiffed or processed correctly and can be used in conjunction with the Password Dictionary File Path option. Removing restrictions will affect the format in which the document is ultimately delivered, so it is recommended only to do so when necessary. |
Run Automation | True setting will automatically execute any applicable Pipes in Review once data has been successfully posted. | False – Pipes will not be executed automatically after posting data to Review. |
Use Full Email Address in HTML and Text Rendering | If true, generated text and HTML files (except DTSearchHTML) will include the full email addressee information, rather than just the display names. Because of the effect this has on the quality of deduplication, this option should only be changed at the start of a Project. | False – This option should only be used if the entire Project is also using this option. |
Use GPU for Password Breaking if Available | When running password breaking tasks, use GPU if hardware is available and supported | False – This is only recommended when the requisite hardware is available and supported. |
Configuration Settings#
Application administrators can make changes to many of the global configuration settings without needing to use the Viewpoint Installer package. Please pay close attention to any changes made here, as they can have serious effects on the functionality of the application. Contact support if there are any questions prior to making any changes.
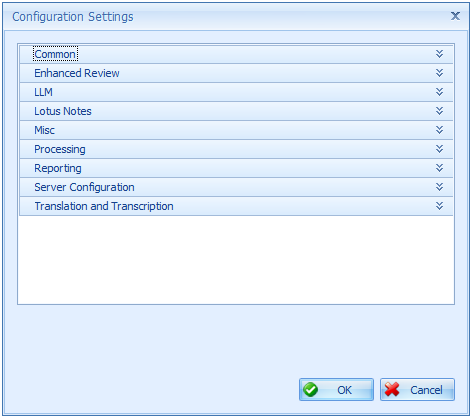
Configuration Settings | ||
Common Settings | Description | Recommended Setting |
Check LDControl | Internal Use Only | False |
Impersonation Staging Area | Internal Use Only | |
Login Message | Message shown to users at the time of login | |
Omi Ocr process count | The number of processes Omni Ocr can use | 4 |
Use PsExec | Allows for restarting, stopping workers remotely | True |
Enhanced Review | ||
Setting | Description | Recommended Setting |
Enhanced Review Analyze Endpoint (GCP) | URL for Enhanced Review Analyze Endpoint (GCP) | |
Setting | Description | Recommended Setting |
Enhanced Review API Key (GCP) | API Key for Enhanced Review endpoints | |
Enhanced Review Document Batch Size | The number of documents to process at the same time | 10 |
Enhanced Review Prepare Protocol Enpoint (GCP) | URL Endpoint for Enhanced Review Protocol Endpoint (GCP) | |
Enhanced Review Provider | Enhanced Review Provider | Vertex |
Enhanced Review Vertex Pause Milliseconds | Amount of time to delay between api calls. | 500 |
Google Vertex Json Key | The JSON Key for Google Vertex AI | |
Google Vertex Model Name | The name of the model to use with Google Vertex AI | Gemini-2.5-flash |
Google Vertex Project ID | The project ID to use for Google Vertex AI | |
Google Vertex Region | The region to use for Google Vertex Ai | |
Max Criteria Hits | Max Criteria Hits | 10 |
Vertex Input token limit | Maximum number of tokens allowed for input | 1,000,000 |
Vertex Output token limit | Maximum number of tokens allowed for output | 8192 |
Vertex token to byte multiplier | Multiplier of converting tokens to bytes | 1 |
LLM | ||
Setting | Description | Recommended Setting |
LLM (Large Language Model) Folder Path | LLM (Large Language Model) Folder Path | |
Summary Azure Endpoint | The Azure endpoint for summarizations | |
Setting | Description | Recommended Setting |
Summary Azure Key | The Azure key for summarizations | |
Summary Service Provider | The provider that performs a summary, | |
Lotus Notes | ||
Setting | Description | Recommended Setting |
Lotus Notes Registry Keys | Comma separated list of Lotus Notes Registry Keys roots. | |
MISC | ||
Setting | Description | Recommended Setting |
PluginRootLocation | Plugin root location for Viewpoint – Internal Use Only | |
Processing | ||
Setting | Description | Recommended Setting |
AppFabric Native Max Size | Internal Use Only | 15360 |
AppFabric Servers Native | Internal Use Only | |
Dedupe Panel Max Doc Count | 10000 | |
GoogleApiKey | API Key to interact with google cloud | |
Keep Printer Colors | Internal Use Only | False |
Nuance OmiPage License File | ||
Nuance OmiPage License Key | ||
Sentiment Analysis API Key | Sentiment Analysis API Key | |
Sentiment Analysis API URL | Sentiment Analysis API URL for capturing sentiment analysis of email text. | |
Simultaneous Dedupe Posting timeout in minutes | Number of minutes to wait while dedupe set is being processed before either continuing to post or stopping. | 3 |
Tesseract13 Data | Internal Use Only | |
Configuration Setting | Description | Default |
Use Advanced Sources | Internal Use Only | True |
Use WebView2 as Document Viewer | When, True uses WebView2 for displaying Documents in viewer. Please close and reopen PMC for changes to take effect. | True |
Web Service OCR | Internal Use Only | |
Web Service OCR Type | Internal Use Only | Omni |
Worker Password | Service account to run workflow host on remote machines. | |
Worker UserName | Service account to run workflow host on remote machines. | |
XLS Force Seek | Internal Use Only | |
Reporting | ||
Setting | Description | Recommended Setting |
Default Idle Time | Used by the User Productivity report to determine log of after inactivity - Internal Use Only | 15 |
Server Configuration | ||
Setting | Description | Recommended Setting |
Database name next number | Next number to use when naming new databases | |
Database name prefix | Prefix used when naming databases | |
Database Server | Database server name | |
File Server | File server location | |
Model DB Name | Name of the model database | |
NSRL database name | Name of the NSRL database | |
NSRL Server | Name of the NSRL server | |
Review database server | Name of the review database server | |
Translation and Transcription | ||
Setting | Description | Recommended Setting |
Speech to Text Service Endpoint | Speech to Text Service Key | |
Speech to Text Service Key | Speech to Text Service Key | |
Translation Service Region | ||
Translation Service Supported Languages | Translation Service Supported Languages |
Auto Slipsheet Settings and Auto Ignore Settings#
The Auto Slipsheet and Auto Ignore settings are settings that automatically handle file types that are known to be non-reviewable or not visible without an application specific viewer. A file’s type is determined during the FileID task where the signature and header of a document is read. The extension of a document is not used to determine file type unless a valid file header or signature cannot be detected.
A slipsheet is an information sheet that is visible during review and production in lieu of a document that cannot be rendered within a near-native viewer. An example of this is an AVI document that needs to be reviewed in a video application.
The ignore function of Viewpoint prevents a document from being copied from the processing to the review database. Ignoring documents will not remove them from any reporting but will hide them from unintentionally attorney review. An example of this would be a PST file. Once the PST file is extracted, all the found e-mails and attachments are copied to the review database for potential attorney review. The PST file itself should not be reviewed and is automatically ignored by Viewpoint after extraction is complete.
To Apply Auto Slipsheet Settings#
- In the toolbar of the Project tab, click the Auto Slipsheet Settings button.
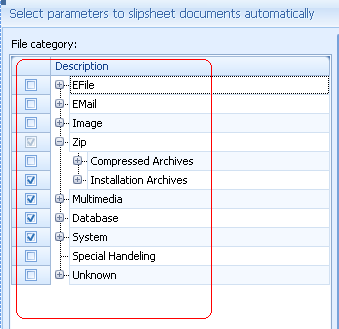
- Checking a box on the left side, which contains categories of file types, will automatically check all the boxes for the applicable FileIDs on the right side. Conversely, unchecking a file category box will uncheck all of the individual FileIDs on the right side.
- Individual FileIDs can be slipsheeted by checking the box for that specific FileID from the right side.
- Click OK to confirm.
Recommended Auto Slipsheet Settings#
To Apply Auto Ignore Settings#
- In the toolbar of the Project tab, click the Auto Ignore Settings button.
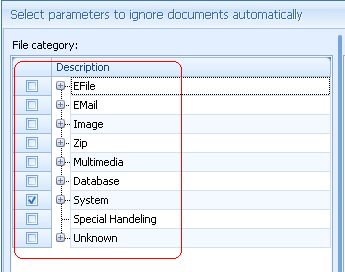
- Checking a box on the left side, which contains categories of file types, will automatically check all the boxes for the applicable FileIDs on the right side. Conversely, unchecking a file category box will uncheck all of the individual FileIDs on the right side.
- Individual FileIDs can be ignored by checking the box for that specific FileID from the right side.
- Click OK to confirm.
Recommended Auto Ignore Settings#
Slipsheet Template Modification#
- Click on the Project tab and click on the Slipsheet Template button.
- In the Slipsheet Template window that appears make any desired changes to the HTML code.
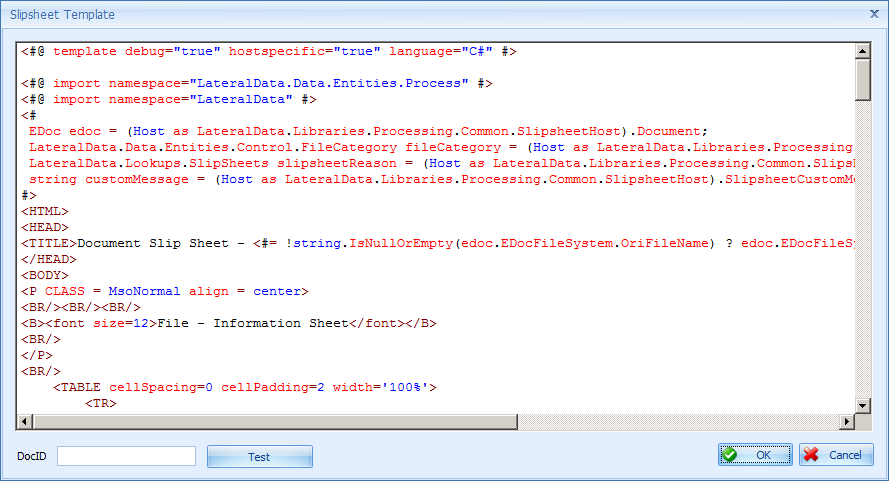
- Once any desired changes have been inserted, insert a value into the DocID field and click test. This will allow you to generate a sample slipsheet based off any changes that have been made.
- Once changes have been verified, click OK to finalize the alterations. All new slipsheets created for the selected project will be based on this code.
Custom Field Management#
Click the Custom Fields button on the Project tab to display the Custom Fields Manager, as follows. Custom fields are used for reviewer coding and document metadata not mapped to a Viewpoint system field. For information on loading information in bulk to a custom field, refer the Import section of this manual.
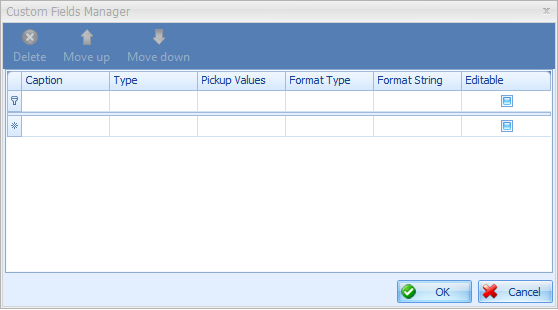
- Type a caption for the desired custom field.
- Select the type of field. You can choose between text, single value pick list and multi value pick list.
- If a pick list is chosen for either the single select or multi select type, enter in the list of available selections. The first entry should be a blank space followed by a comma, so end users are able to remove a selection. Each entry should be comma separated without a space between.
- Choose from among the available format types. If pick list was chosen for type, string must be selected.
- The format string is used to specify the formatting of the values input. This will most commonly be used for dates. In the screen shot above you can see the most common example, dd/MM/yyyy.
- Editable determines if the custom field is read only.
Note: Refer ‘Appendix A - Custom Field Guideline’ for additional format syntax.
Other Project Phase Options#
- System Status – Opens the System Status panel where you can view all active processing across the SQL server. The Clear and Clear for Completed Jobs button removes workflows from this panel.
- Security Management – Opens the Security Management window where user permissions are managed. This is also the window where new company names must be added.
- Reports – Opens the Reports window allowing users to run reports.
Copy Settings/Layout from Existing Project or Create Project Template#
Right-click over an existing project in Projects window and select Duplicate Project Structure. This will create a new project based on the settings from the current project. You can save this as a template or use it as a new project. If you want to save as a template, make sure to change the name and the status to Template.
Update/Change Project Information#
- Click the Project tab and locate the Projects window.
- Right-click over the project and select Update from the drop-down menu to display the Create Project window.
- Make the desired changes and click OK to save.
To Create a Review Database#
- In the Project tab, right-click over the appropriate project and select Create Review Database to display the Create Review Database wizard, as follows:
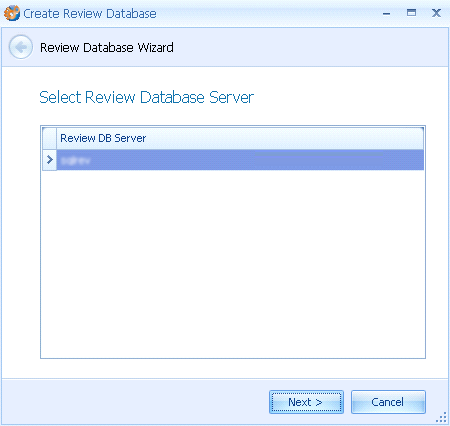
- Choose the SQL server that will house your data review and click Next.
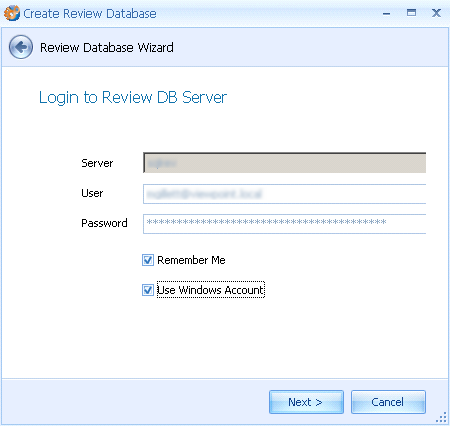
- Input your user name and password and click Next.
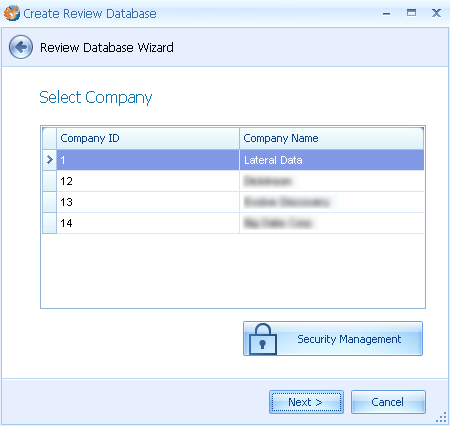
- Select the company to associate with this database and click Next. If the company name required is not present, it must be created in the review application. If you have permission to modify security within the review application, click on the Security Management button to quickly move to the review Security Management module.
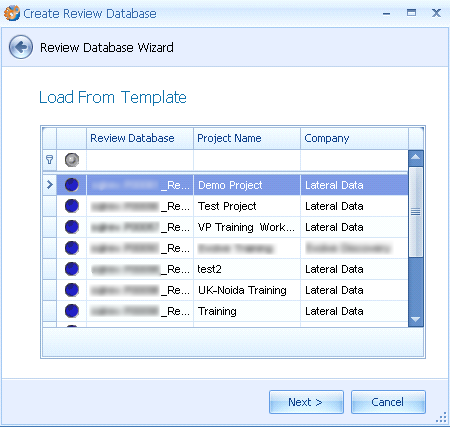
- On the Load From Template window you can select a currently existing database to use as the basis for your new review database. Choosing an existing database will copy all folders, tags, automation levels, and keyword lists from that database to your new project.
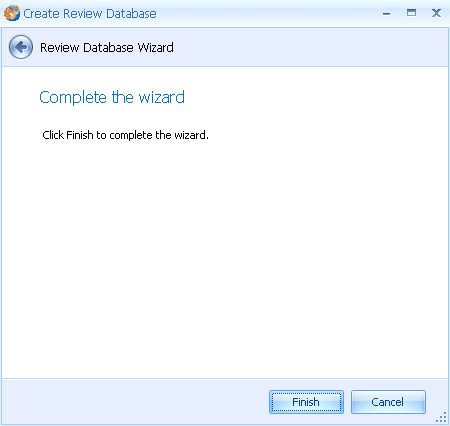
- Click Finish to complete the wizard.
Launch Processing - Catalog Tab#

The toolbar above is used to dictate which processes will run when you launch data for processing. The processes and options are described as follows.
Click each button for the process you want to run. The recommended selections for processing are highlighted in the above screenshot.
- FileID – Captures the type of file being processed by reading the file OLE or signature information rather than the extension. File extension is used if no matching OLE or signature is found.
- Hash – Calculates the MD5 or SHA1 Hash Code values for each document.
- Extract – Will extract all attachments from email files, compressed archives and loose electronic files. Microsoft Office embedded content extraction is based on the project settings.
- Metadata – Collects the metadata from each document. This includes file system data as well as the document’s application specific metadata properties.
- Text – Extracts text from email and e-files. Runs OCR for image files.
- Recursive – Enables the system to continually process the complete contents of an archived file. The system will continue to drill down until all archived files have been extracted and processed. This option only applies to jobs utilizing the extract task.
- Local – Allows for processing of a small number of jobs on the local machine versus launching to the worker machines. Required when staging from a local drive.
- Process – After all appropriate settings have been assigned this button is used to begin data processing.
- Custodian – Allows users to add/edit Custodians on the Custodian drop-down list.
- Data Location – Allows users to add/edit values on the Data Location drop-down list.
- Media Source – Allows users to add/edit values on the Media Source drop-down list.
- Auto Slipsheet Settings – Opens the Auto Slipsheet settings grid.
- Auto Ignore Settings – Opens the Auto Ignore settings grid.
- Project Settings – Opens the Project settings.
- Slipsheet Template – Opens the Slipsheet Template window.
- Custom Fields – Opens the list of Custom fields for adding/editing.
Select Data to Stage and Process#
- Enter in the file path to the folder containing the data that is to be staged, either by typing the path directly into the Path text box, clicking the ellipsis button to the right and browsing to the folder location, or clicking the + to the right of the ellipsis to open the Catalog Source Wizard. Once a path has been selected, click the green + icon to display the folder and its contents in the catalog window. To remove a folder from the catalog window, right-click on the folder and select Remove.
- If the data is in folders named by custodian, check the Use folder name as default custodian option for the custodian info to propagate to all the folders automatically. If this option is checked, do not fill in a value for Custodian as described in step 5 below.
- Verify that the Efile Path, Text Path, Html Path, PDF path, TIFF path, XML path and Slipsheet path are all mapped to the appropriate file servers. By default, they will map to the path set in the initial Project settings under File Server. If any of the paths are incorrect, go back to the Project tab and update the paths by right-clicking on the project and selecting the Update option.
- Click the + to the left of a folder icon to expand the contained files and folders. To recursively expand a folder tree to display everything contained within, right-click on the folder and select Expand. Users can also browse to the directory storing a file or folder by right-clicking and selecting Navigate to…

- Click the check box to the left of any data to be processed. Checking a folder will also check any contained items within the folder. Fill in the Description (if applicable), Data Location, Custodian, and Media Source fields for each checked item. The Media Load ID field is an optional field that can be used to assign a user-defined external tracking number, if desired.
- You can add new values to the Data Location, Media Source and Custodian drop down options at any time by going back to the Project tab, selecting the appropriate category, and inputting new values. Media Sources and Data locations can also be added from the Catalog tab by clicking the applicable option from the toolbar at the top and adding a new value in the box that appears.
- To load the same information to multiple folders at once, check all pertinent folders, right-click, and select Fill Checked Fields. In the window that appears, fill in all details pertinent to all selected items. Once everything is confirmed the data will be ready to launch for processing.
- Folders/files that have already been staged into the Project will have the name column highlighted in green and the Stage Date column will be populated.
- Folders where some, but not all contents have been staged will have the name column highlighted in yellow.
- Folders that the user has not expanded but has contents that have been partially staged will be highlighted in blue.
Note: The scopes created from cataloging will be named ‘[Custodian] [Media Source] [Data Location] (YYYYMMDD)’. To load multiple sets of data from one custodian into multiple scopes, users should add the ‘Force New Scope’ field from the column chooser. If this option is not selected, multiple selections for the same custodian may combine into one scope.
Process Data#
- Once all of the data has been designated with the appropriate Custodian, Data Location, and Media Source for each data source and the FileID, Hash, Extract, Metadata, Text, and Recursive buttons have been selected, click the Process button.
- On the command wizard window, confirm that the tasks selected match the five tasks selected in step 1. There is no need to utilize the ‘CreateTiff’ or ‘CreateHtml’ tasks at this time. After confirming the settings, click Next.
- Confirm that the recursive option is selected and that the priority is set to 0. Click Next.
Note: The Priority setting is used to determine the urgency of a submitted process. All submissions should have a priority of 0 unless they need to occur before previously submitted process.
- The project settings pane will appear. Confirm that all settings match the project specifications. Once all the settings have been confirmed, click Next.
Note: Changing any processing option from what is set in the Project Settings requires the user to have the ‘Allow to Modify Job Settings’ permission from Security Management.
- The Select Scripts page provides the ability to automate some tasks that are typically handled manually after processing. If used together, data can go from staging to posting in a single step. Furthermore, if used in conjunction with the Pipes feature in Review, data can go from staging to culled and tagged Views in Review.
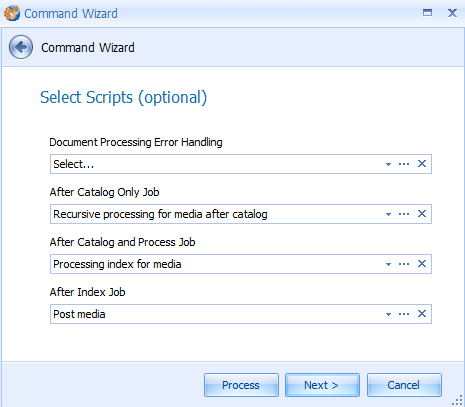
- Document Processing Error Handling – Users can customize scripts to handle and clean all errors in desired way after processing has been completed. ‘Full Error Cleanup’ and ‘Partial Error Cleanup’ scripts are built into the wizard for exact use or as templates for unique scripts.
- After Catalog Only Job – The ‘Recursive processing for media after catalog’ option will immediately start a new job to recursively process the data once the catalog only job completes.
- After Catalog and Process Job – The ‘Processing index for media’ option will immediately start a new job to index the data once the processing job is complete.
- After Index Job
- Post Index – This option will post the media automatically after it is indexed.
- Post with Custodian Deduplication – This option will take all processed media, add them to their associated Custodian Dedupe Set (or create one if it does not exist), process the new media in the Dedupe Set and post the Set to Review.
- Post with Global Deduplication – This option will take all processed media, add them to the Global Dedupe Set (or create one if it does not exist), process the new media in the Dedupe Set and post the Set to Review. The Global Dedupe Set is determined by which Set is designated as the Global in the Dedupe tab.
- A summary of all settings selected will appear. Click Process to begin loading the data into Viewpoint. A notification will appear in the lower-right corner of your monitor when processing is complete.
Note: The Process button is located on each page of the process wizard. Select this button at any point to skip the subsequent wizard pages.
To Catalog Data Locally#
- Once all the data has been designated with the appropriate Custodian, Data Location, and Media Source for each data source be sure that the FileID, Hash, Extract, Metadata, Text, and Recursive buttons are all deselected.
- Click the Process button.
- On the command wizard window, confirm that no tasks are selected. After confirming the settings, click Next.
- Confirm that the recursive option is selected and that the priority is set to 0. Click Next.
Note: The Priority setting is used to determine the urgency of a submitted process. All submissions should have a priority of 0 unless they need to occur before previously submitted process.
- The project settings pane will appear. Confirm that all settings match the project specifications. Once all settings have been confirmed, click Next.
- A summary of all settings selected will appear. Click Process to begin loading the data into Viewpoint. A window will appear in the lower right-hand corner of your monitor when processing is complete.
To Process Data on a Specified Worker(s)#
- Once all of the data has been designated with the appropriate Custodian, Data Location, and Media Source for each data source and the FileID, Hash, Extract, Metadata, Text, and Recursive buttons have been selected, click the Process button.
- On the command wizard window, confirm that the tasks selected match the five tasks selected in step 1. There is no need to utilize the ‘CreateTiff’ or ‘CreateHtml’ tasks at this time. After confirming the settings, click Next.
- Confirm that the recursive option is selected and that the priority is set to 0. Click on the Batch button. On the Worker Selector window that appears, check the worker(s) to be used for processing data and then click Ok.
Note: The Priority setting is used to determine the urgency of a submitted process. All submissions should have a priority of 0 unless they need to occur before previously submitted process.
- The project settings panel will appear. Confirm that all settings match the project specifications. Once all settings have been confirmed, click Next.
- A summary of all settings selected will appear. Click Process to begin loading the data into Viewpoint. A notification will appear in the lower-right corner of your monitor when processing is complete.
Monitoring Processing – Workflow Tab#

The Workflow tab is used to monitor any ongoing and completed processing. The tab is also used to clear historical information about data processing. This tab requires frequent maintenance to ensure Viewpoint runs efficiently.
Workflow Glossary#
- Processing – The general term for the act of submitting one or more tasks (such as Create Text or Create Tiff) for completion.
- Job – Once data is submitting for processing, all tasks within that process are considered a single job. The status of any submitted job can be tracked with the Jobs panel.
- Workflow – Each job is made up of workflows. Each file gets one workflow per task. In addition, one workflow is created to handle distributing the files among workers. For example, if a user submits 10,000 files for both the Create Text and Create Tiff tasks within Viewpoint they are submitting a total of 20,001 workflows. 10,000 workflows for the Create Text task, 10,000 workflows for the Create Tiff task, and 1 workflow to distribute the tasks among workers.
- Event – Events describe what actions have occurred to a particular workflow. A typical example would be when and on what worker machine a task was completed.
Worker Selector#
The Worker Selector controls the status and properties of all Viewpoint worker machines.
Worker Color Coding#
- Dark green – Indicates the worker is actively processing.
- Light green – Indicates the worker is idle.
- Red – Indicates the worker has stopped processing or is stalled.
- White – Indicates the worker is not running.
To Start a Worker Machine#
- Click the Worker Selector button in the Workflow tab to display the Worker Selector window, as shown in the following screen:

- Select workers with a Host Status of ‘NotRunning’ by highlighting them or clicking the check boxes to the left of their name.
- Once the workers are selected, right-click and select Start Workflow Host. The window below will appear.
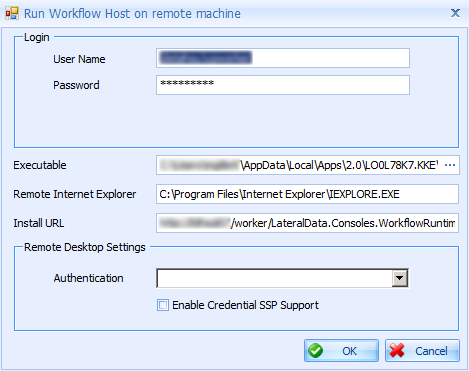
- Confirm the Login, Executable, Remote Internet Explorer and Install URL information is correct and click OK to start the workers. Once they are started and available they will each have a light green background upon refresh.
Note: Use the Configuration Settings on the Project tab to store the Worker credentials in an encrypted format on the database. By storing the credentials, the login information will be pre-populated when starting the Workflow Host.
Entering credentials in from this window will only be used for this session and the credentials will not be stored for later use.
To Stop a Worker Machine#
- Select workers by highlighting them or clicking the check boxes to the left of their name.
- Right-click and select the Shutdown Workflow Host option.
To Assign/Un-assign Workers to a Project or User#
- Select Workers by highlighting them or clicking the check boxes to the left of their names.
- Right-click and select the Assign Project, Assign Project Exclusively, Assign User, or Assign User Exclusively option. Workers can be assigned to multiple projects or users at once by using the Assign Project or Assign User selection. Workers are assigned to only one project or user if the Assign Project Exclusively or Assign User Exclusively option is selected. Processing jobs submitted from other projects or users will not be picked up by these Workers.
- To un-assign workers from a project, right-click and select Unassign.
Note: In order to assign or un-assign Workers, the user requires the “Allow Assign/Un-assign Workers” permission in Viewpoint Security Management.
Monitoring Worker Status#
The Worker selector screen can be auto refreshed by selecting the appropriate option in the right-click menu. Users can also refresh manually by selecting Refresh on the right-click menu. For any Workers found to have a red background, users can log directly into the machine to investigate. To look at a remote desktop rendering of a Worker, click on the Remote Desktop button on the ribbon and then select a Worker from the Worker Selector. This will allow the user access to the machine through the credentials saved in the Start Workflow Host option. Once logged in, users can check the status of the machine and perform troubleshooting.
Flagging Supported Features#
Some software within Viewpoint is considered optional and can be installed on a subset of workers in your environment. To let Viewpoint know which workers have this software the Supported Features field is used. When processing occurs that require these software, only workers with the appropriate designations in the Supported Features field will be used.
A listing of all software supported is as follows. The entries for this field are case sensitive and must be entered exactly as shown.
- MountImagePro – Indicates that Mount Image Pro is installed on a worker. This software is used to extract the contents of forensic images.
- WebserviceOCR – Indicates that ExperVision OCR engine is installed on a worker.
Assigning Workers to Applications#
Viewpoint allows workers to be utilized in both the processing and review applications. In most situations, it is recommended to limit the number of workers available for both applications. This will allow end users to perform all requested tasks without interfering with any ongoing data processing. Using the Use Worker For field, users can indicate a worker to be used exclusively for actions from the processing application, exclusively for actions from the review application (including Build Views, Delivery, Advanced Tools, TIFF On The Fly, Assisted Reaction, Entity Management System, Azure Services, and/or LLM), or available for both applications. A value of Any means that worker can be used for any action across Processing and Review. Use the drop-down menu in the Use Worker For field to designate the appropriate option for each worker.
Edit Worker Settings#
Settings of multiple Workers can be changed simultaneously by highlighting them or clicking the check boxes to the left of their names, then right-clicking on one of them and selecting Edit Worker Settings.
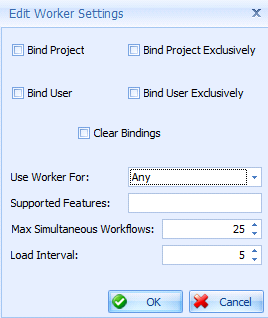
Workflow Lifecycle#
When a job is submitted, a number of actions occur before it is completed. To begin, Viewpoint determines if the workflows will be executed on the local machine, on a single worker, or distributed to all available/assigned workers. If the job is not completed locally, the first workflow will be sent out to the selected or first available worker to act as a distributor. This workflow will then distribute the workflows across all available machines. Once a worker has been loaded with the number of workflows set in the Max Simultaneous Workflows field of the Worker Selector panel, other workers will be assigned remaining workflows. It is recommended that the Max Simultaneous Workflows setting is set to 10 for each worker to ensure even workflow distribution. If the Max Simultaneous Workflows setting is kept too high, workers may sit idle unnecessarily.
Once workflows have been assigned, the worker will complete each workflow in order. While workflows are being completed, the distributor workflow will automatically assign out any remaining workflows. This continues until all workflows are processed and the job is complete. Multiple jobs can be run simultaneously so there is no need to wait for one job to finish before the next is submitted.
Jobs Panel#
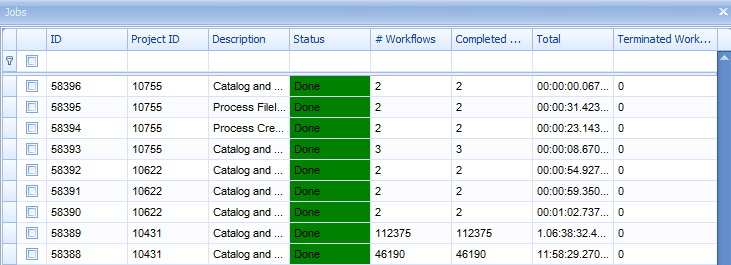
The Jobs panel is accessed by clicking the Jobs button on the taskbar. A description of the Jobs, the current status of those Jobs, and the number of associated workflows are displayed. The ID of each Job is assigned in the order it was submitted. A completed Job will have a status of Done. Any ongoing Job will have a status of InProgress. For most tasks, users can determine the progress of a given Job by looking at the difference between the contents of the # Workflows and Completed Workflows fields.
For Jobs where extraction or cataloging is occurring, the # Workflows field will continually rise as new documents are discovered for processing. In these circumstances, the difference between # Workflows and Completed Workflows may not provide an accurate assessment of current progress.
Cancel a Job#
To cancel a job, perform the following steps:
- Open the Jobs panel by clicking the Jobs button in the taskbar.
- Select the Job(s) you wish to cancel by either highlighting or clicking the relevant checkbox.
- Right-click in the Jobs panel and click the Cancel Job option.
- The panel will refresh and the status of the cancelled jobs will change to Aborted.
Note: For cataloging and extracting it is recommended that after a Job is cancelled, any worker that was handling the cancelled workflows should have the Workflow Host shutdown and restarted. This will ensure that no further extraction or cataloging occurs. After a Job is cancelled, the distributor workflow will cease to hand out more work, but all workflows already assigned will continue unless the Workflow Host is shutdown.
Job Filtering#
The Jobs panel lists Jobs from all the Projects the user has permission to see. The Job Filter options are used to narrow the list of Jobs down to a more useful list. For example, a user can now see all the Jobs that are have a status of In Progress across all Projects in the environment.

- Status – Indicates the status of the Jobs being searched. The status can be set to All, InProgress, Done, Error, or Aborted.
- Project – Indicates the Project to filter by. Clicking the dropdown box will display the list of all the Projects. Users can either scroll through the list and click on a Project, or start typing the name of the Project to filter the list of Projects in the dropdown box.
- # Jobs – Indicates the maximum number of Jobs to display in the Jobs panel.
- Created By – Indicates a username to filter by. Clicking the dropdown box will display the list of users who have started a Job in the past. Users can either scroll through the list and click on a User, or start typing the name of the User to filter the list of Users in the dropdown box.
- Not Cleared Only – Checkbox that controls whether or not to include Job records that have already been cleared.
Once all the applicable filters have been applied, click Apply to see the applicable Jobs in the Jobs panel.
Workflow Filtering#
To determine details about a workflow, users can use the filtering options in the toolbar of the Workflow tab.

- Status – Indicates the stage of workflow being searched. If searching for errors, change this filter to Terminated.
- Workflow – Indicates the kind of task the workflows utilized.
- # Workflows – Indicates the number of workflow results to return.
- DocID(s) – Users can provide a comma separated list of specific DocIDs to search.
- Process – Indicates the type of application used to process the workflows.
Once all the applicable filters have been applied, click Apply to see the applicable workflows.
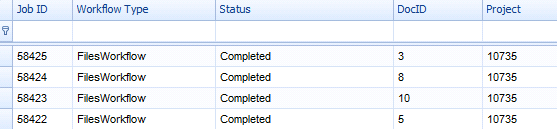
All pertinent information for the filtered items can be seen in the workflow window as shown above. To see detailed information about a particular workflow, users can highlight a workflow and then click the Events button.
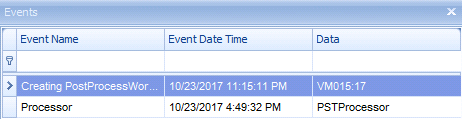
The Events panel will show specific details about when and where a specific workflow was executed. It will also show any errors that occurred during completion of the workflow. This information is typically used to troubleshoot a broad problem, such as a particular worker not having correct configuration settings. Instances where specific information about the worker name or time of completion is not necessary, users can simply troubleshoot from the Process tab.
Status Panel#
The Status panel provides information about all workflows across all projects. Its primary purpose is to give users a summary of how much data has recently been submitted and completed in the processing application.
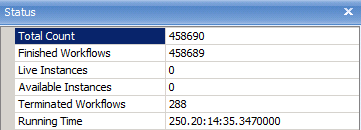
- Total Count – The total number of workflows submitted or completed across all projects.
- Finished Workflows – The total number of workflows that have completed across all projects.
- Live Instances – The total number of unfinished workflows.
- Available Instances – The total number of workflows created but not yet assigned to a worker machine for completion.
- Terminated – The total number of workflows that completed with errors.
- Running Time – The time elapsed since the first reflect workflow was submitted.
Clearing Workflows#
All the workflow information described above is written to the processing SQL database. Although this information is valuable for troubleshooting, it should be cleared out periodically. If the information is not cleared, the tables hosting this information become very large and begin affecting the speed of data processing. To keep Viewpoint running smoothly, we recommend clearing out the workflow information at least once a week, after all outstanding errors have been resolved. Although error information will still be stored in the LDControl database’s Log table even after clearing workflows, all other information about completed items will be lost. To begin clearing workflows, click Clear on the taskbar.
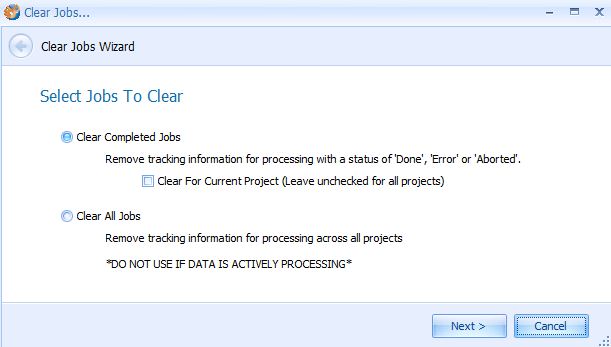
Using the Clear Completed Jobs option will clear workflow information from Jobs that have a status of ‘Done’, ‘Error’, or ‘Aborted’. Click the Clear for Current Project checkbox to only clear for Jobs currently selected Project.
Using the Clear All Jobs option will clear all workflows in the database, including workflows from Jobs that might be in progress. This option should only be used when no Jobs are currently running and want to completely clear out the workflow information.
After selecting an option, click the Next button. This window will show the number of Jobs and workflows that will be cleared if the user continues by clicking the Clear button. Once the process completes a summary of all cleared Jobs data and the total amount of time it took to complete will be displayed.
Cleaning Data - Process Tab#
Once all the data finishes initial processing, it is ready to be cleaned. Cleaning refers to the act of ensuring that all data has been processed completely and all errors have been addressed.

Processing Task Grid#
Each document cataloged in Viewpoint must undergo a number of tasks, before it can be considered completely processed. In the processing grid, each task is represented as a column. The processing tasks occur in order, from left to right, as shown in the following screen:

Documents are given a status for each task of processing. All columns labeled as Filtered display the number of documents in each category as they relate to any applied filters. The second column, Stage, displays the number of documents in each category for the entire database, regardless of filtering. Additional fields are available by utilizing the Field Selector available on the right-click menu. The definition for each processing status is listed, as follows:
- New – Indicates files that have not yet received a designation for processing in this task. Typically these are files that have been cataloged, but have not yet had their FileID identified. Once the FileID is identified, files will be moved to their appropriate status category.
- Need to process – Indicates files that require this task to be run, but have not yet been completed.
- Submitted – Indicates the total number of files submitted to jobs for processing. Please note, any job that is cancelled will still have the files submitted stored in this category. Those files will not be redistributed to their original status.
- Error – Indicates files that have not successfully completed the task.
- Done – Indicates files that have successfully completed the task.
- Not Required – Indicates files that do not require this task to be run. An example of this is an image file such as a JPG, will have a status of Not Required for the Extract task as image files do not conventionally store additional files.
- Bad – This is a user created status. For any errors that cannot be corrected, users can change the task status to Bad rather than keep them stored in the Error category.
To View Files by Status#
- To see all documents for a specific status and a specific processing task (such as all documents with an extract error), double click on the cell containing the desired information.
- To see all documents for a specific status across all processing tasks, double-click the name of the processing status.
- To see all documents from across multiple statuses across all processing tasks, select each category with the checkbox functionality. Then, right-click within the status window and choose Show Results.
- To see all documents in the project right-click and choose Show Results with no status chosen via checkbox.
Processing Task Descriptions#
Stage Task#
This task involves finding a document, extracting system file metadata (created date, last modified date, file size, etc.), and creating a copy of the file saved in the standard Viewpoint structure with a unique DocID.
Troubleshooting#
All categories except Done and Slipsheeted should display a zero. A staging error indicates that a document was found, but could not be copied to the network. This error may indicate an incorrectly configured permissions setting, such as the processing account does not have access to the file share where the files are being written. Other times, Viewpoint may be unable to extract an attachment to a file. In the Stage panel, right-click in the grid and then click Stage to attempt to restage any error files. If the file is an attachment, rerun the Extract task on the file’s parent. If re-staging is unsuccessful, errors should be slipsheeted as Unable to Extract.
Extract Task#
This task involves finding documents within documents. The most common types of documents with extracted content are e-mail containers (PST, NSF, etc.) and compressed archives (ZIP, RAR, etc.). Other documents, such as Microsoft Office documents, may have embedded content which is extracted based on project settings.
Troubleshooting#
All the categories except Not Required, Done and Slipsheeted should display a zero. An extract error means the container is corrupt or that Viewpoint was able to find data within the container but not extract it. Any time an extract error occurs, users should attempt to re-extract the data a second time. If the second attempt is unsuccessful, browse to the network location storing the container and attempt to open it. If it is corrupt, the container should be slipsheeted as such. Password protected containers should attempt to be cracked with the Passwords Dictionary File Path option. For more details on password cracking, please refer to the Viewpoint Password Removal document on our support site.
File ID Task#
This task involves determining the true extension and function of a document. The file’s signature and header are read to determine if the file’s extension matches the file type. For example, a Microsoft PowerPoint document saved as ‘File1.xls’ would have an extension of ‘xls’, but a FileID of PowerPoint. If Viewpoint is unable to determine the documents FileID through signature or header analysis, the extension will be used.
All documents in the FileID task should be viewed to search for extension and ID mismatches. To locate mismatches, open the FileID window. In the grid, bring in the field column Extension Match. Filter on this column to any documents that do not have a checkbox. These documents should be checked individually to make sure they have been identified correctly.
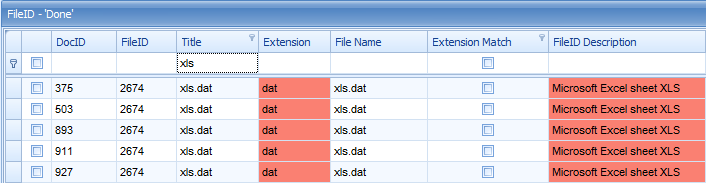
In the above screenshot, five documents with an extension of ‘dat’ have been detected as Microsoft Excel documents. To see if these documents are Excels, the user would double click on that document in the grid. If the document opens successfully in the detected FileID application, no further action is necessary. If the detected FileID is incorrect, users can bypass the FileID task and assign the document’s true ID. Please see the section titled ‘Setting a FileID’ to learn how to perform this action.
Troubleshooting#
All the categories except Done and Slipsheeted should display a zero. FileID errors are extremely uncommon. If an error is found, rerun the FileID process.
Note: By default this task is not represented in the processing grid as errors for this task are rare.
Hash Task#
This task involves determining the MD5 or SHA1 hash for a document. Every file, regardless of size or content, will have a unique hash code as determined by the MD5 or SHA1 algorithm. These codes are compared to a list of system files to find items with no user generated content. Files found to be on that list can be auto-ignored based on your project settings. The hash code for a document is also used for deduplication. Files where the hash codes of entire families are identical can be located and removed from attorney review.
Troubleshooting#
All categories except Done and Slipsheeted should display a zero. Hash errors are extremely uncommon. If an error is found, rerun the Hash process.
Note: By default this task is not represented in the processing grid as errors for this task are rare.
Create Text Task#
This task involves creating a text extraction of processed documents. For documents that have a text layer (where text can be copied and pasted from), DTSearch will extract all contained text to individual files. For documents with no text layer (image files), a selected OCR engine can be used to create text.
Troubleshooting#
All categories except Done and Slipsheeted should display a zero. Text extraction errors are very common as most data populations contain image files. For files with an error message indicating that OCR was not turned off, these files can be reprocessed with OCR turned on. For files that have text, but have errors during text extraction, users can attempt to OCR the tiff images. To do this, create tiffs of the files in question. After the tiffs have been generated, run OCR over the files with the setting ForceTiffs in the Create Text Source setting.
Create HTML Task#
This task involves creating HTML/MHT rendering for certain file types. Typically, the only file type that requires a HTML rendering is an e-mail. E-mails without HTML renderings cannot be indexed or posted for review. When tiff images are created, the HTML rendering of the document rather than the original MSG/DXL file will be used as the source.
Troubleshooting#
All categories except Not Required, Done and Slipsheeted should display a zero. Errors only need to be corrected if they pertain to e-mail file types. Occasionally Viewpoint is not able to create a LDHTML or LDMHT rendering of an e-mail file. If this occurs, attempt to recreate the HTML using the DTSearchHTML method.
Create TIFF Task#
This task involves creating single-page tiff images for redaction or delivery. Please note that any color settings (black and white, grayscale, or full color) that are applied at this time cannot be altered without recreating the tiffs. In the delivery module users have the option to export generated tiffs in single-page tiff, multi-page tiff or PDF formats.
Troubleshooting#
All documents are found in the New or Slipsheet category until they are requested to be tiffed. For tiff errors, first check to make sure the FileID is correct. If incorrect, set the revised FileID and resubmit. If the FileID is correct, users should attempt to change the setting of the Tiffing Method option to ForceQVP. This will try to force the document to be printed in Quick View Plus. If a document cannot be printed, slipsheet it as Untiffable by following the below steps.
- Right-click on the document in the Create Tiff panel, hover over Slipsheet, and select Slipsheet.
- Select Untiffable as the slipsheet reason and click OK.
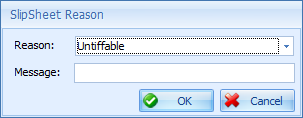
Metadata Task#
This task involves extracting application specific metadata. This includes e-mail header information (from, to, cc, etc.) as well as Microsoft office information (author, company, etc.). In addition, the Expand Excel function occurs during the metadata extraction.
Troubleshooting#
All categories except Not Required, Done and Slipsheeted should display a zero. For any errors, rerun the metadata task.
Note: By default this task is not represented in the processing grid as errors for this task are rare.
Slipsheet Task#
This task indicates files have been slipsheeted. All necessary tasks will be performed on a file before it is placed in this category. For example, a PST will have a status of Need to process for extract. If it does not finish successfully, it will be placed into the Error category. If the PST does successfully extract, it will then be placed into this Slipsheeted section. Documents categorized as Slipsheeted will not appear in the status column for any other task.
Doc IDs and Family Relationships#
Each document processed within Viewpoint is given a unique identification number. This number is called the DocID and is used for tracking documents throughout Viewpoint. A document that has been extracted will have an additional value called ParentDocID. The ParentDocID field shows the DocID of the document this item was extracted from. Files that were not extracted will have a value of 0 in the ParentDocID field.
The term “Family” refers to documents that have direct association. The relationship between an e-mail message and its attachments is considered a family. The same is true for documents with extracted embedded content. However, items extracted from a container are not considered part of a single family. E-mails extracted from a PST, for example, will all have the same ParentDocID, but are not considered part of the same family as they are not directly related.
In a family, the source document (where the extracted files originate from) is considered the “Parent”. Any extracted files are considered “Children” of that parent. Some families have documents acting as both a parent and a child. If an e-mail has a ZIP file attachment the e-mail is considered the parent and the ZIP file is considered the child. However, when the contents of that ZIP are extracted, the ZIP now becomes the parent to any contained files. It is possible to have many families all originating from a single e-mail message.
All families, regardless of complexity, will share the same BaseDocID. The BaseDocID is the DocID of the first parent document in the family. This field can be used to quickly show all documents from a given family.
To Isolate All Parent or Children Files#
- In any processing task panel, click on the key symbol that appears in the top right corner of the DocID field header.
- Select Custom from the filter list.
- To display only parent files, use the filter DocID equals BaseDocID as shown below.
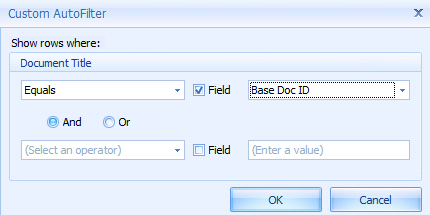
- To display only children files, use the filter DocID does not equal BaseDocID, as follows:
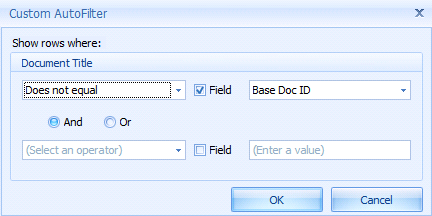
To Find a File’s Parent or Children#
- Select the documents in any Process results panel.
- Right-click, hover over Find, and select either All Parent Documents or All Child Documents.
- The results will appear in the Search Results panel.
Searching by Doc ID#
In the Process tab toolbar, the Search can be used to look-up a single DocID.
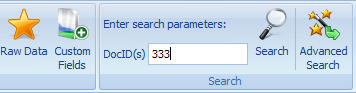
Input a single DocID and click search to see the document in the Search Results panel, as follows:

To input a list of DocIDs, click on Advanced Search button on the Process toolbar to display the window, as follows:
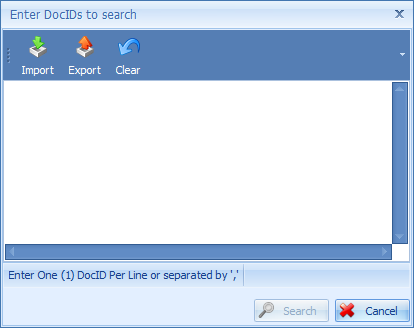
One DocID should be input per line. A list of DocIDs can be loaded from a text file by using the Import button.
User Interface Scripts#
User Interface scripts can be used within Viewpoint to run pre-configured or custom C# scripts over processed data in order to search for documents based on specific elements. This open-ended approach allows users to have a large amount of flexibility when needing to display specific documents. The following scripts come pre-configured with Viewpoint:
- All Emails with Tiff Warnings
- All Errors
- Documents from Last Media
- Errors and Errored Slipsheets
- Latest Job Results
To Run a User interface Scripts#
- Select the desired script from the drop-down menu located in the Process tab ribbon
- Click the ‘Execute UI Script’ button
- The results will populate in the documents grid
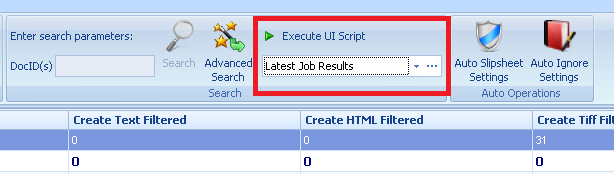
To Create a New User Interface Script#
- Click the ellipses located to the right of the script drop down.
- Right-click in the Maintenance Wizard and select New.
- Replace the ‘New Script’ text with that of your choosing.
- Click Next.
- Input the custom c# and use the Verify button to confirm the correct syntax. It is recommended to base your code on one of the defaults scripts.
- Click Finish when completed.
Project Notes#
Project Notes can be used to store historic information about documents or a particular notable occurrence. For example, if some documents required special handling users may choose to leave a note about how and why documents were processed a particular way. Users may also choose to leave notes about important events in the project life cycle such as the date a delivery was produced or the date of a deposition. Project Notes are meant to easily allow users to look up and review this information after a project has been inactive for some time.
Create a New Project Note#
- Click the Notes button on the Process tab task bar.
- Right-click and click New.
- In the description box type in your full note.
- In the documents box, you can click the ellipses button to open a dialogue to paste in a large number of DocIDs. This list is for situations where you may want to quickly reference specific documents in the future.
- By default each note is private. To make this note available to all users with access to this project, click the Is Public check box.
- Click Update to finish.
Create a New Project Note from DocIDs#
- In any processing grid with a list of DocIDs, select one or more documents which require a note.
- Right-click and click ‘Create Note’.
- In the description box type in your full note.
- In the documents box, you can click the ellipses button to open a dialogue to append any relevant additional DocIDs.
- By default each note is private. To make this note available to all users with access to this project, click the Is Public check box.
- Click Update to finish.
Deleting a Project Note#
Once a note is created, it cannot be edited. To permanently delete a note, right-click a note from the grid and click Delete.
Processing Grid Functionality#
Reprocess a Document#
Reprocessing a document is necessary to adjust task settings for a specific group of files without affecting the general settings for the entire database. It is also necessary to resubmit files for tasks that have not yet been completed, such as Create Tiff.
- Select all documents to reprocess.
- Right-click the documents and click Process to display the Command Wizard, as follows:
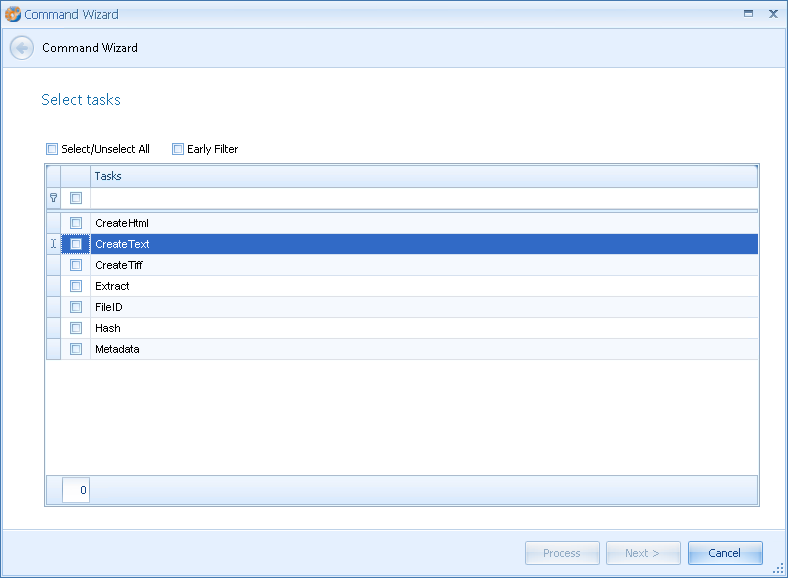
- Select the tasks to be submitted and click next to show the menu below.
Note: Double click specific task in process wizard to check that individual task and un-check all others. To skip subsequent options and skip directly to the last page of the wizard, click the Process button.
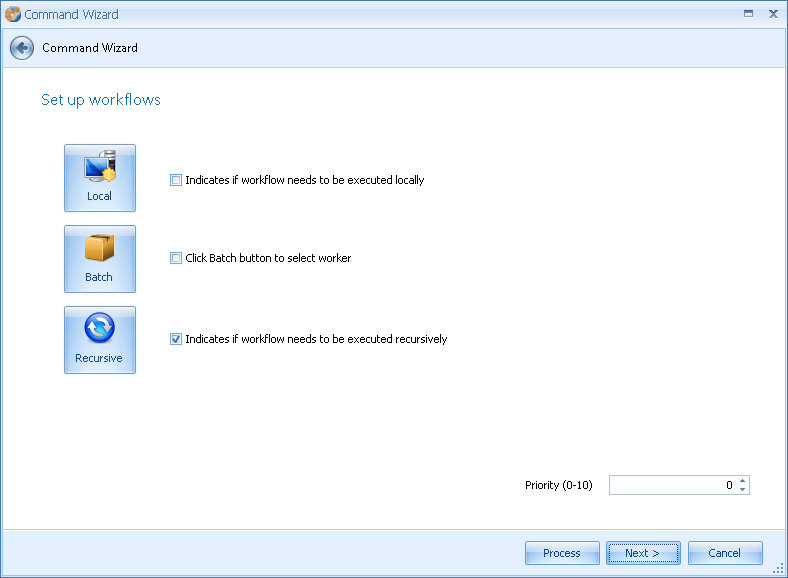
- Select Local to reprocess locally or Batch if you want the job processed on a specific worker(s).
- Click Next.
- This window will appear with the default project settings related to the tasks submitted for completion.
- Change any settings as and when required and click Next.
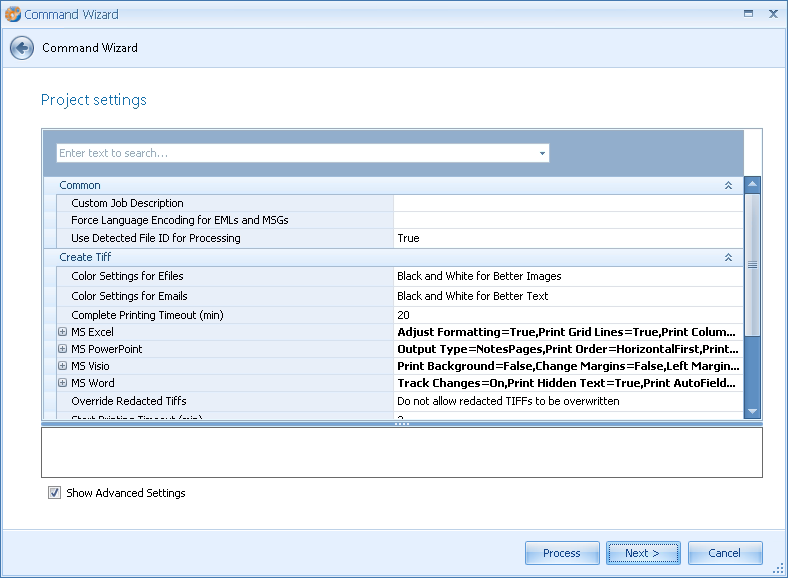
- Review the information and click Process to complete the wizard and begin processing the job.
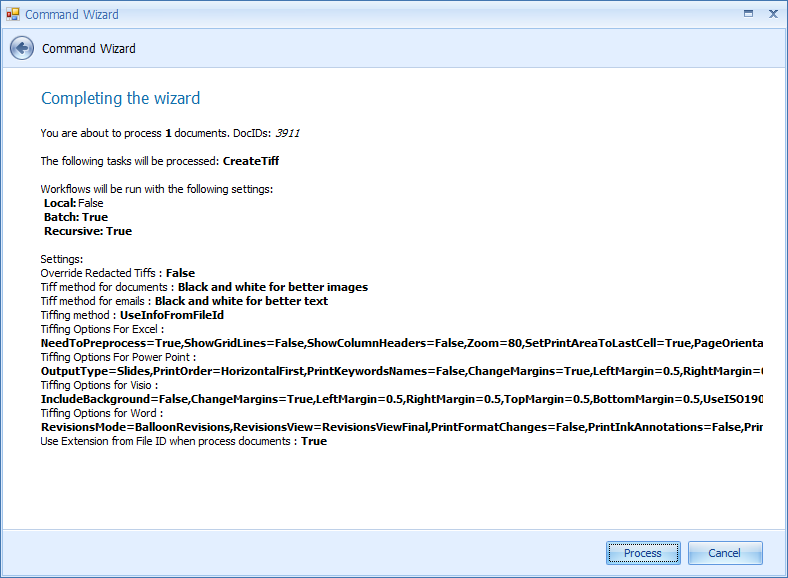
Set Task Status#
This process allows a user to manually change the task status of selected documents. It is not necessary to change the status of a document to re-process, but the functionality is useful for keeping any troubleshooting organized. For example, if there were multiple issues affecting a large amount of files, users may change the status of these error files to Need to Process, and then begin submitting them from this status. If additional errors occur, they would be clearly separated from data that has not yet been submitted for reprocessing.
- Select the a document or documents with that particular FileID
- Right-click and select Set Task Status from the menu to display the window below.
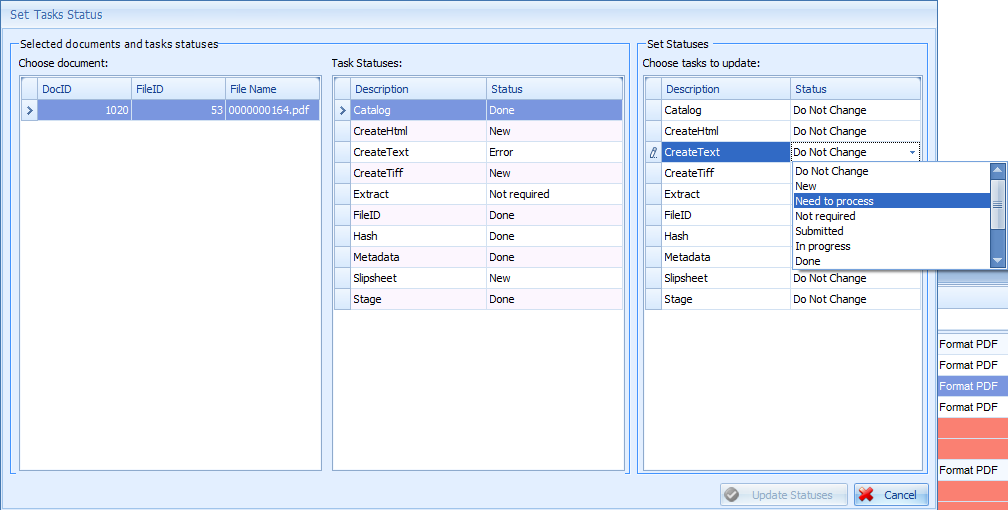
- Modify the appropriate status on the right and click Update Status to save changes.
View a File#
Files can be viewed in a number of ways. Utilize the Viewers to see the corresponding rendering of a selected file during grid navigation. Double-click on a file to open it in its native application. Users can also browse to the network location of where a document is stored by right-clicking a selected document, hovering over Browse to, and then selecting the appropriate document rendering. Lastly, the user can use the below shortcuts to open a specific rendering of the file.
- Double clicking will open the Native file.
- Holding down ‘CTRL’ and double clicking will open the Text file.
- Holding down ‘ALT’ and double clicking will open the HTML file.
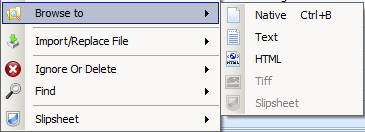
If a rendering for a document does not exist, it will be greyed out, as seen above.
If there is a file that is corrupt and you have obtained a replacement for it, you would use this command to place it in the correct location on the server.
Media Player#
Using the Doc and Native Viewers, many multimedia files can be played directly in the application without the need to open the file outside of Viewpoint. If the file is compatible with the player and the Doc or Native Viewer is visible, it will automatically begin playing when the file is selected from the document panel. Viewpoint’s media player makes use of Windows Media Player in the background.
Note: Not all media file types will be compatible with the media player. If the file is unable to play directly in Windows Media Player outside of Viewpoint, it also will not be able to be played inside of Viewpoint. Users can, however, find and install 3rd party codec packs for Windows Media Player, which will increase the number of supported file types that the Viewpoint Media Player will be able to play.
Import or Replace a File Rendering#
For some error files, it may be necessary to take a file outside of Viewpoint for error handling. The most common example of this is password protected files. If a file is exported and has the password cracked, users can import the non-password protected version into Viewpoint for reprocessing. The version previously found on the network will be replaced with the newly imported version.
- Select the document you wish to have a rendering replaced for.
- Right-click over the document, select Import/Replace and select the appropriate rendering as shown below.
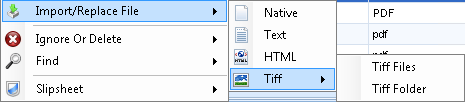
- Map to the replacement file and click Open to execute the replacement.
Export Grid Results to a Spreadsheet#
- Configure the grid to your specifications. Column width and field order in this view will be reflected in the resulting Excel spreadsheet.
- Highlight everything in the grid by pressing CTRL + A. Then right-click and select Export Selected Rows to Excel.
- Select the name and network location for the spreadsheet.
Export Documents#
- Highlight everything in the grid by pressing CTRL + A. Then right-click and select Export.
- Use the checkbox functionality to select whether you want to export the associated Native, Text, or HTML versions of the files. Select if you want to export by original file names. If that box is left unchecked, exported files will be named after their Viewpoint DocIDs.
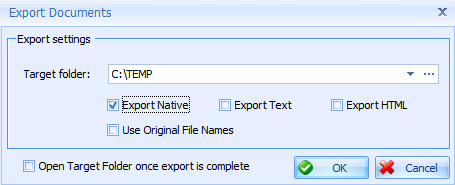
- Check the bottom option if you want to open the folder of the exported files upon export completion and click OK to complete the menu.
Export All Documents in a Media#
- Select the media containing the files requiring export.
- Right-click on the media and select Export to display the Browse For Folder dialogue box.
- Select the folder to export and then click OK. All top level (non-extracted) documents from that media will be exported to the selected folder, maintaining the original folder hierarchy.
Slipsheet a File #
- Right-click the file, hover over Slipsheet and select Slipsheet…. to display the following window:
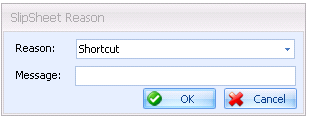
- Select the appropriate reason for the slipsheet.
- Type an optional message to provide additional information as necessary.
- Click OK to create the slipsheet.
Un-Slipsheet a File#
Right-click the document, hover over Slipsheet and select Un-slipsheet.
Ignore or Delete a File#
Users can ignore or delete documents from your filtered list by right-clicking and selecting Ignore or Delete and then choosing the task to perform.
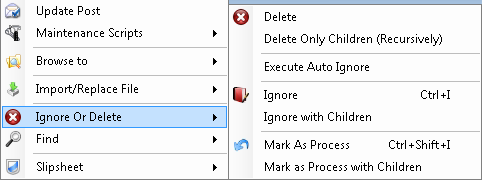
- Delete – Removes the file from the database. The database record and the file on the network will be deleted.
- Delete Only Children – Removes all of the children for the selected file from the database recursively. This process deletes the records from the database and the files from the network. Performing this task will enable the files to have the children re-extracted if necessary.
- Execute Auto Ignore – Ignores all files based on the settings from the Auto Ignore Settings window.
- Ignore – Marks a file as Ignored. The file is kept in the processing database, but it is prevented from being posted to the Review.
- Ignore with Children – Marks a file and its immediate children as Ignored. The files are kept in the processing database, but are prevented from being posted to the Review.
- Mark as Process – Removes the Ignore status from a file.
- Mark as Process with Children – Removes the Ignore status from a file and its children.
Note: Files with a status of Ignore will have a grey background in all processing grids. They will also have a status of Ignored in the Document Filter field.
Documents that have been either locked or delivered in the Review application cannot be deleted.
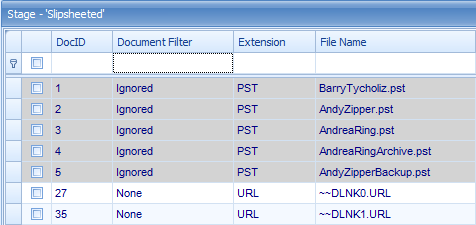
Search Fields#
Use Ctrl + F to open a search box. Any alphanumeric string inputted in this box will highlight in the panel no matter the field. To search for a phrase input the alphanumeric string with double quotes on each side (Ex. “Samuel Chan”). To search for multiple strings at once apply a space between each (Ex. “Samuel Chan” MSG).
Note: This search functionality can be used in any Viewpoint interface grid.
Copy as URL#
Users can create a link to a specific file to be sent to other users for quick reference. If the link is opened outside of Viewpoint, users will be prompted to log-in and the link will then automatically take them to the appropriate project and DocIDs. If a user already has Viewpoint open, they will need to confirm that they are in the appropriate project and then paste the link into the search or advanced search options in the Process tab. This will open up the DocIDs from the URL for the currently open project. To create a URL select one or more DocIDs, right-click and click ‘Copy as URL’.
File ID Manipulation#
During the FileID task, each document has its extension determined. It is sometimes necessary to reassign a document to a different FileID or create a FileID for a new file type. The FileID tells Viewpoint how to interact with a document during each task of data processing.
Note: Any FileID manipulation that occurs will affect the entire Viewpoint environment, not just the project you are working on.
View or Modify FileID Details#
- Right-click the document, hover over FileID and select FileID Details to display the File Identity Details window, as follows:
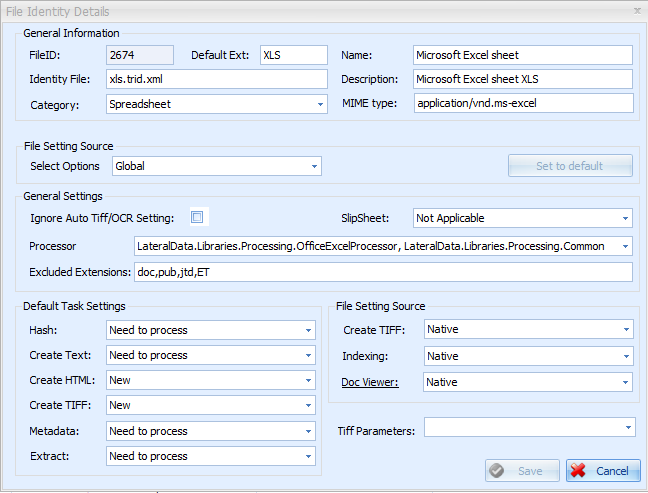
- General Information - The listed settings detail all relevant information on how this file will be handled within Viewpoint.
- FileID – The number associated with this FileID.
- Default Ext – The expected extension associated with this FileID.
- Name – The application name and description for this FileID.
- Identity File – Indicates the file used by TrID to determine the document’s extension.
- Description – The application name, description, and extension for this FileID.
- Category – Indicates the category a document can be found under in the File Category filter.
- MIME type – The Multipurpose Internet Mail Extension identification for this FileID.
- File Setting Source
- Global – Default Option - Ability to override File Identities at a Project level in a multi-tenant environment.
- General Settings
- Ignore Auto Tiff/OCR Setting – If this box is checked, documents will not be tiffed and OCRed when utilizing the Tiff and OCR Documents with Text Errors setting.
- Slipsheet – Indicates the slipsheet the FileID will receive by default if it is checked in the Auto Slipsheet Settings of a project. The Not Applicable setting should be used for files that don’t receive slipsheets by default.
- Processor – Indicates the processor that will be used to perform any data processing tasks.
- Excluded Extensions – Lists extensions to never associate with this FileID. This is used to prevent certain file types from being improperly processed.
- Default Task Settings – Indicates the default status for each processing task.
- File Setting Source – Indicates which rendering of the document will be used as the source for a task.
- TIFF Parameters – If a file needs to be tiffed with a specific application, users can input that application’s file path and command line for printing.
- Make any adjustments to the settings (if necessary) and hit Save to finish.
Set a File ID#
- Right-click the document, hover over FileID and select Set File ID to display the FileID Selector window, as follows:
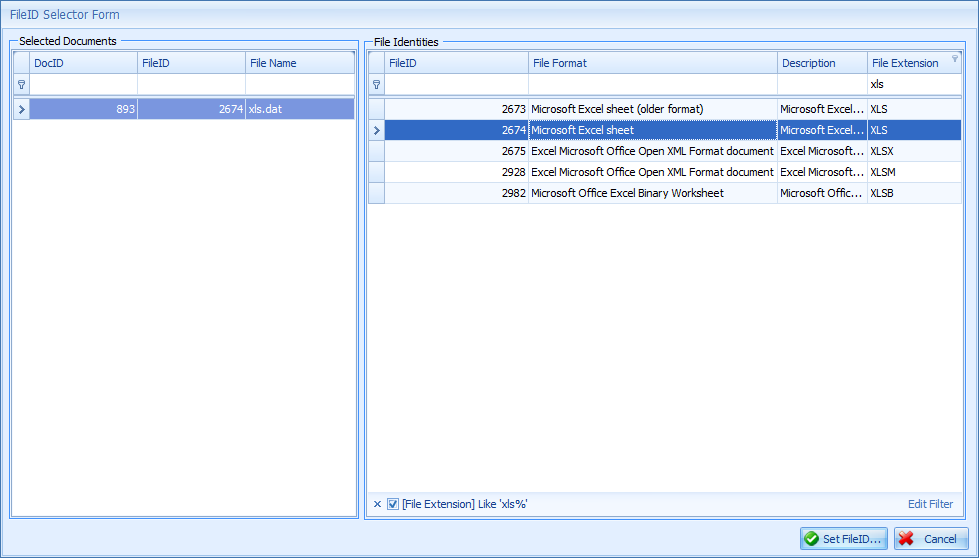
- Select the appropriate FileID from the File Identities list on the right and click Set FileID.
Create New FileID#
- Click the File ID button from the Process tab to open the FileID panel.
- Right-click and select New to display the File Identity Details window, as follows:
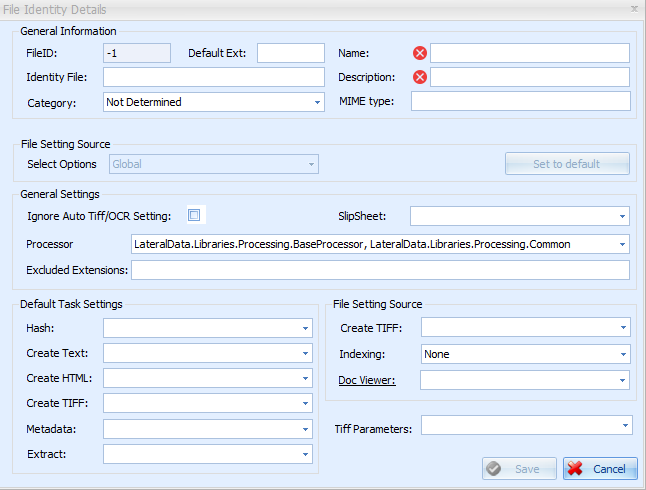
- The following fields should be filled out for new FileIDs:
- Default Ext
- Name (required)
- Description (required)
- Category
- Adapter (If no adapter in the list pertains to this FileID, the LateralData.Libraries.Processing.BaseProcessor, LateralData.Libraries.Processing.Common processor should be used)
- Default Task Settings
- File Setting Source
- Standard Default Task Settings for a new FileID:
- Hash à Need to process
- Create Text à Need to process
- Create HTML à Not required
- Create TIFF à New
- Metadata à Need to process
- Extract à Not required
- Standard Default Source Settings for a new FileID.
- Create TIFF à Native
- Indexing à Native
- Doc Viewer à Native
- Click Save to complete the wizard.
Create TIFF Settings#
Viewpoint can be used to create tiffs from almost any viewer application that has a print command. Viewpoint can be taught to use these systems with the Create Tiff option in the File Identity Details window. There are two ways of creating tiffs with this functionality:
Command Line Print#
Some applications are already preprogrammed to accept command line statements. Using a command line allows a user to utilize a function of the application without having to first open the program and select the option from an interface. Check the documentation of the application you are attempting to tiff with to see if command lint printing is supported. Below is an example of a command line print from the image viewer IrfanView.
"C:\Program Files\IrfanView\i_view32.exe"| "{0}" /print
In this situation there are two parameters needed for command line printing in IrfanView. Each parameter is separated with the ‘|’ character. The first parameter “C:\Program File\IrfanView\i_view32.exe” points directly at the executable file being used for tiffing. This complete file path should be surrounded by quotes and be found in the same location on every worker. In the second parameter “{0}” represents the file path and name of the file to be printed. This will always be constant and should not be changed by an end user. The /print switch is the command line option for printing within IrfanView. The above describe guidelines can be used as the basis for printing from any application utilizing a command line print.
Keystrokes#
Keystrokes are used when a viewer application can be used to print a document, but does not have a command line print option. Viewpoint can be given a series of keystrokes to perform in order to send a print command for a particular application. Below is an example of printing with keystrokes for DWGSeePro (an AutoCAD viewer).
"C:\Program Files\AutoDWG\DWGSee\DWGSeePro.exe"| "{0}" |^(p){ENTER}
In this situation there are three parameters needed for printing using key strokes with DWGSeePro. The first parameter "C:\Program Files\AutoDWG\DWGSee\DWGSeePro.exe" points directly at the executable file being used for tiffing. This complete file path should be surrounded by quotes and be found in the same location on every worker. The second parameter “{0}” represents the file path and name of the file to be printed. This will always be constant and should not be changed by an end user. The third parameter indicates the key strokes to be used. ^(p) represents the Ctrl+p key stroke on your computer. In the case of DWGSeePro Ctrl+p will bring up a print dialogue box. The next keystroke {ENTER} represents hitting the enter key on the keyboard. This submits the files for printing in DWGSeePro. For a full list of all key stroke commands please see the following Microsoft website: http://msdn.microsoft.com/en-us/library/system.windows.forms.sendkeys.aspx
Early Filter#
The Early Filter tool can be used to filter select Media by file type, date range, email address or keywords and visualize the resulting data reduction.
To run the Early Filter tool, select the Early Filter button from the navigation bar of the Process Tab.
- In the window that displays, select the media or Medias you would like to filter. Upon selection, the bar graph in the bottom window will populate with the applicable aggregate count of the selected Medias. At this stage, each bar will be the same height as no filtering has occurred.
Note: In each window of the Early Filter, only the information about parent documents is displayed and the bar chart displays the count of families. If: a parent is filtered out, its entire family will be filtered out too.
- Check the “Include Filtered Documents” box if you wish to include previously filtered out documents. If filtered documents are checked upon running the filter, they will be unfiltered.
- Check the “Include Slipsheets” box if you wish to include slipsheeted documents in your filter.
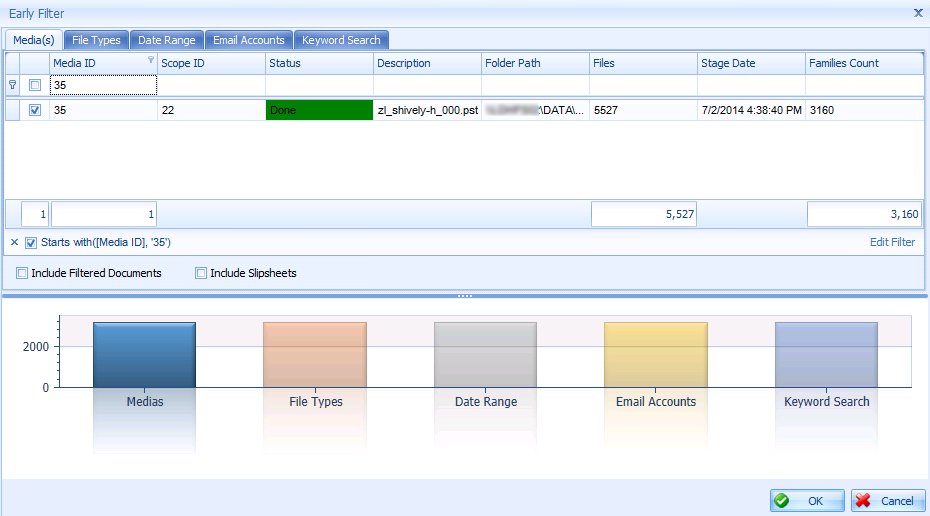
- Move to the File Types tab to filter by select file types. By default, all available file types for the selected media will be checked. Any file types which are unchecked will be filtered out of your document set. The bar graphs will display the resulting counts at the stage that filter would be applied.
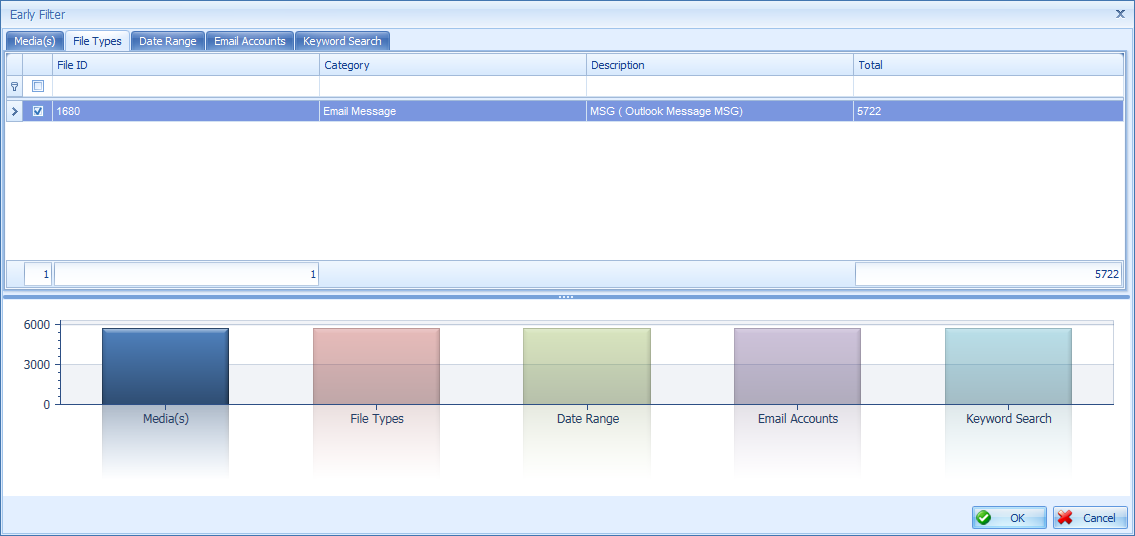
- Move to the Date Ranges tab to filter by specific date ranges for emails and efiles. Set your desired operator and date range for both emails and efiles. Hit “Override” on either to uncheck dates not matching the filter. Any dates which are unchecked will be filtered out of your document set. The bar graphs will display the resulting counts at the stage that filter would be applied.
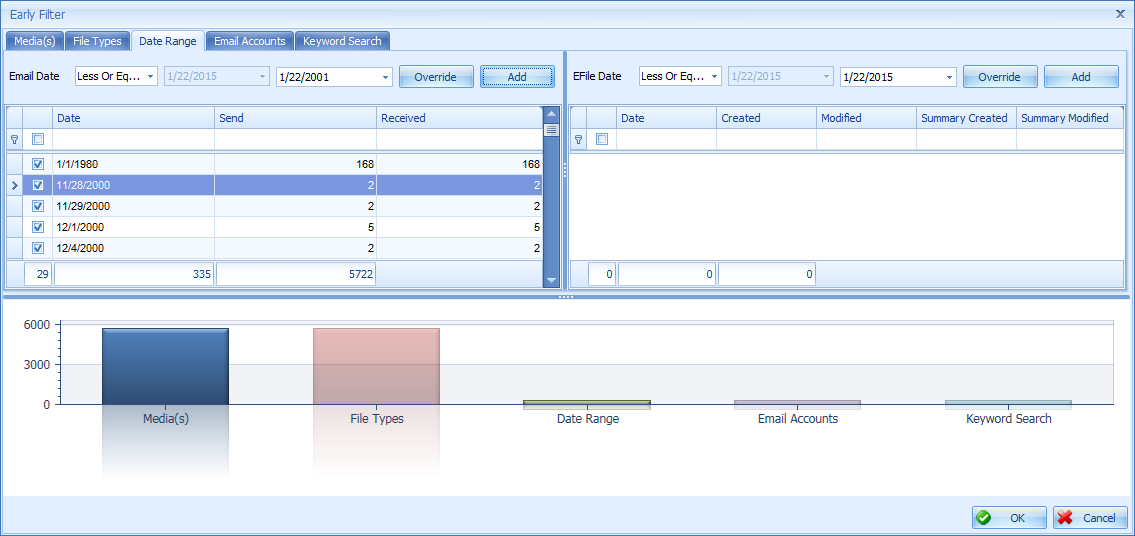
- Move to the Email Accounts tab to filter by specific email addresses. Uncheck any email addresses you wish to be filtered out of the document set. You can also load a specific list of keywords to include or a specific list to exclude. The bar graphs will display the resulting counts at the stage that filter would be applied.
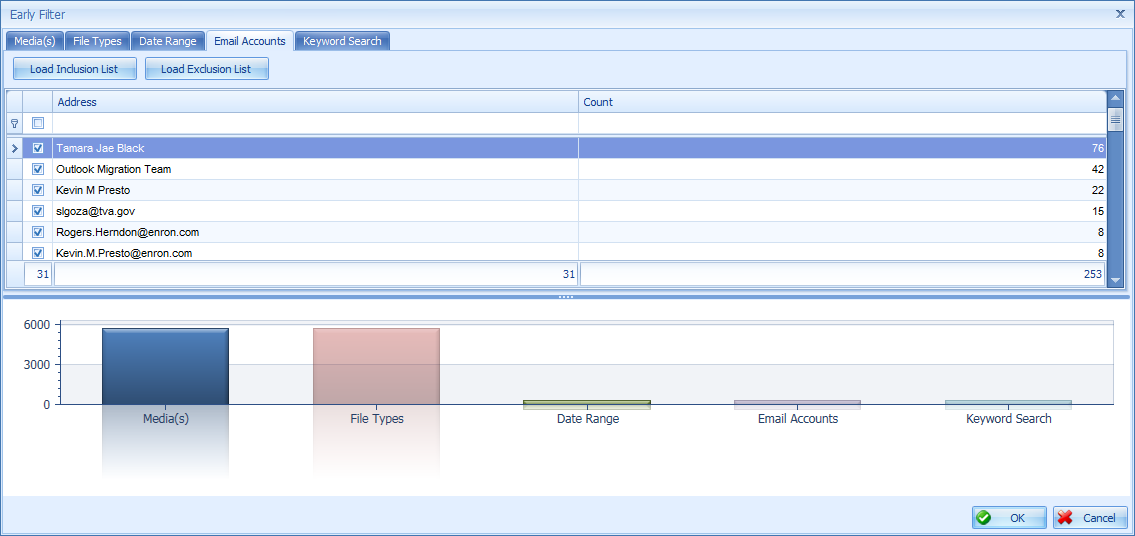
- Move to the Keyword Search tab to filter by a specific set of keywords. Input in a list of keywords you wish to include or exclude matching hits of from your document set. If you wish to include the hits, go ahead and hit Apply. If you wish to exclude the hits, check the “Exclude Search Term Hits” box before hitting Apply. The bar graphs will display the resulting counts at the stage that filter would be applied. Check the “Include Unindexed Documents” box to add those to the count.
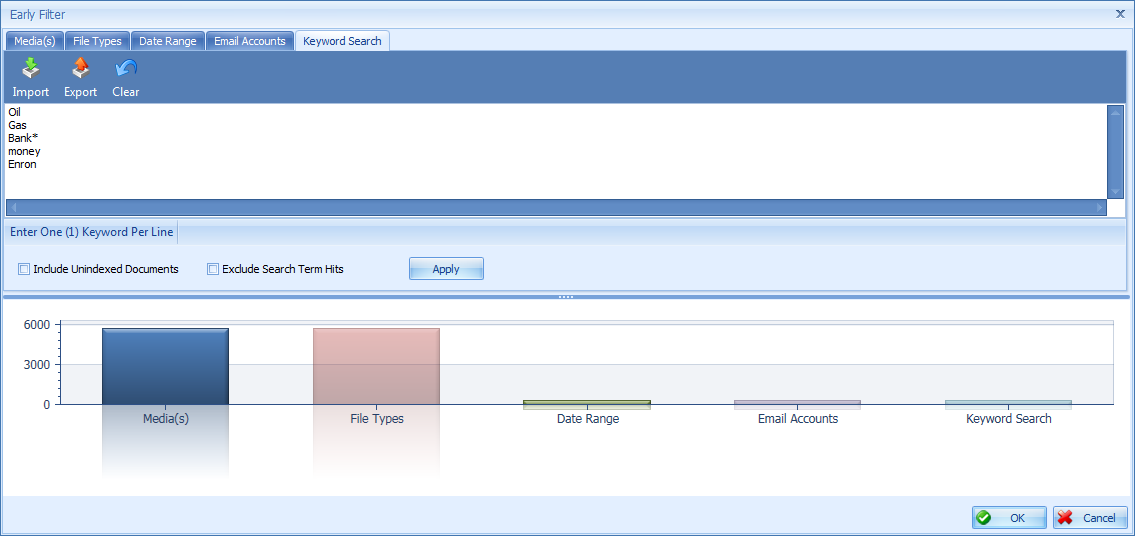
- Once all criteria have been set, hit “OK” to apply the specified filters to your document set.
Note: In each window of the Early Filter, only the information about parent documents is displayed and the bar chart displays the count of families. If: a parent is filtered out, its entire family will be filtered out too.
Dedupe Tab#
Deduplication is the process of identifying sets of completely identical stand-alone documents and document families. In Viewpoint, either the MD5 hash or SHA-1 hash (depending on project settings) is used for determining duplicate families of data. If an exact match is found, all instances uncovered after the first are considered a duplicate and added to the assigned Dedupe Set.
Multiple Dedupe Sets can exist within a single project database but are not necessary. Typically, one set is created that contains all files for the project. Making a single Global Dedupe Set will help ensure that any distinct families will only be made available once in Review.
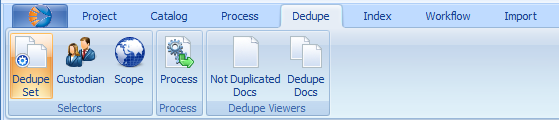
Note: Placing a file into a Dedupe Set will not prevent it from being made available for Review. In the Review application, users will indicate if they want to remove files found in a particular Dedupe Set.
Create a Global Deduplication Set#
- Click the Dedupe Set button to bring the panel into the display.
- Right-click over the Dedupe Set Panel and select New to display the window below. Type ‘Global’ in to the description box and click OK to create the group.
- Select all medias in the project in the Unselected Entities window and click the right arrow to move them to the Selected Entities window.
- Items are checked for duplicates from top to bottom. Medias can be moved up and down with the green arrows below the Selected Entities window.
- Once the media deduplication order has been set, click the Process button on the Dedupe toolbar.
- Once the Dedupe process completes, the status of the medias will change from Need to Process (orange) to Processed (yellow).
- In the Dedupe Set panel, right-click on the global set and select Post. On the next screen click Yes to confirm. The status of the medias and Dedupe Set will change from Processed (yellow) to Posted (Green).
Note: The review database must be created for Post to be an available option. If the review database has been created, you will be auto prompted to post the Dedupe Set. The Dedupe Set must be posted to Review before duplicates can be excluded from Review.
Create Custodian Deduplication Sets#
- Click on the Custodian button to bring the panel into the display.
- Select each custodian requiring a new deduplication set.
- Right-click in the panel and select Create Dedupe Set.
- A new Dedupe Set will be created and named after each custodian selected. All of the custodian’s medias will be automatically moved to the Selected Entities window.
- Items are checked for duplicates from top to bottom. Medias can be moved up and down with the green arrows below the Selected Entities window.
- Once the media deduplication order has been set, click the Process button on the Dedupe toolbar.
- Once the Dedupe process completes, the status of the medias will change from Need to Process (orange) to Processed (yellow).
- In the Dedupe Set panel, right-click on the first Dedupe Set and select Post.
- In the window that displays, select the specific (or all) media dedupe information which you desire to be posted. Click Next.
- On the next screen click Post. The status of the medias and Dedupe Set will change from Processed (yellow) to Posted (Green).
Note: The review database must be created for Post to be an available option. The Dedupe Sets must be posted to review before duplicates can be excluded from review.
Copy Dedupe Set#
- Right-click on the Dedupe Set to be copied and select the Copy Dedupe Set option. The copy will appear at the bottom of the Dedupe Set list.
- Rename the Dedupe set, if desired, by right-clicking on the new Dedupe Set and select the Update option. Enter in a new name and click OK.
- Though copied, changes can be made to the make-up and order of the Medias in the Dedupe Set.
Designate a Default Global Dedupe Set#
To designate a Dedupe Set as the Global Dedupe Set, right-click on the Dedupe Set and select “Set As Global.” The designated Global Dedupe Set is what will be used if the processing automation option to “Post with Global Deduplication” is used.
Dedupe Viewers#
These panels are intended to allow the user to verify and report on the status of the deduplication for any document in the database. It is not typically necessary to consult these viewers for most projects.
- Not Duplicated Docs – This panel will provide metadata for any document that was not added to the Dedupe Set selected. These files can be looked at in the Process tab by right-clicking on selected files and selecting Go To Document(s). This will automatically display the selected files in a Search Results panel in the Process tab.
- DeDupe Docs – This panel provides metadata showing the DocIDs and matching MD5 Hash for duplicative files from the selected Dedupe Set. These files can be looked at in the Process tab by right-clicking on selected files and selecting Go To Document(s). This will automatically display the selected files in a Search Results panel in the Process tab.
Index Tab#
Viewpoint utilizes the application DTSearch for indexing data. The Index process allows documents to be keyword searched. Before the processing is completed for a scope, all the contained medias must be indexed.
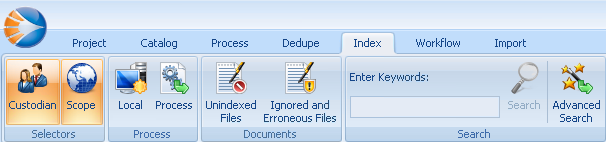
Index a Media#
- Select one or more scopes from the Scopes panel. All the medias from the selected scopes will appear in the Index window.
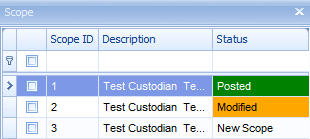
- Any medias with an Index Status of New or Need to Process should be submitted for indexing. Select the required medias to index.

- Click Process in the toolbar.
- In the Command Wizard, choose to Index locally, if required, choose a priority and click Next.
- Confirm all Project indexing settings before you click Next.
- From the Select Scripts page, select whether or not to automatically post the medias after the indexing task is completed.
- Click Next, when ready.
- Click Process to begin indexing the selected medias.
Index Tab Highlighted Colors#
- Orange – Indicates indexing has been submitted for this media
- Green – Indicates indexing is complete for this media
- Red – Indicates indexing has failed for this media
- White – Indicates indexing has not yet been performed or is In Progress for this media
- Pink – Indicates files that were not indexed for this media
Update File Counts#
During error-handling/ cleaning of files, the number of files attributed to a media is not automatically updated. If any new files are found via extraction or other processes, the database needs to be updated to reflect those changes. It is recommended that users always update file counts for all medias. The method for performing this update is, as follows:
- Select the medias to update in the Index window.
- Right-click in the window and select Update Number of Files.
- The number of files will update for all the fields in display.
Troubleshooting Index Errors#
Files that have not been indexed can be identified from the Index window. The Unindexed Files fields will provide the number of files that have not been indexed. If the project settings are set to not index slipsheets, cells with a value greater than 0 will be red within the Wrongly Unindexed Files field. If the project settings are set to index slipsheets, cells with a value greater than 0 will be red within the Wrongly Unindexed Files (including slipsheeted) field.
To quickly find the unindexed items, select the media with errors and click the Unindexed Files button in the toolbar to show the UnindexedFiles panel. The first thing to check is the IndexFileSourceFormat field to see which file rendering is being used for indexing. If, for example, the IndexFileSourceFormat shows the rendering of Text, but this file does not have a text rendering, users may attempt to change the indexing rendering to Native. To do this, select the files and right-click in the window. From the list, hover over Change Index file source format and then choose the appropriate source.
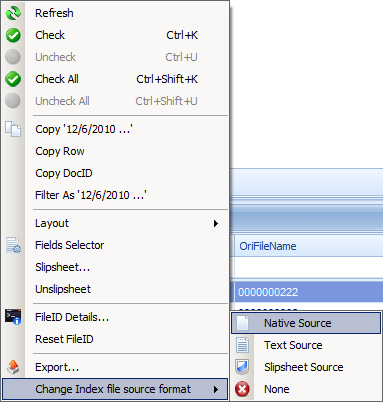
If the source is selected to None, DTSearch will not attempt to index this file again. This file will now appear in both the Unindexed Files and Error Files list. This can be helpful if you have a file that you cannot generate text for, but want to accommodate for it appropriately. In this case, upon reindexing, the number of files in the Slipsheeted Files field plus the number of files in the Error Files field should equal the number of files in the Unindexed Files field.
Users can also review any error files in the Process tab for potential resubmission by right-clicking on selected files and clicking the Go To Document(s) option. This will automatically display the list of files in a Search Results panel in the Process tab.
The Ignored and Erroneous Files panel is also helpful for troubleshooting. By default, Viewpoint will not attempt to index any file that has been ignored as those files will not be posted to review for keyword search culling. The Doc Status field can be used to filter to documents with a status of Error. These are all files that could not be indexed. These files should be viewed to determine if they should be slipsheeted or go through alternative text extraction. The most common method of alternative text extraction is to tiff the file and then attempt to generate OCR from the tiffs.
Keyword Searching#
Keyword searching in the processing application is available for obtaining an overview of search results. No advanced reporting, keyword highlighting, or advanced search options are available in this interface.
- To search a single term, enter it into the Enter Keywords box in toolbar and then click the Search button.
- To search for multiple terms, click the Advanced Search button in the toolbar. In the Enter Keywords window, enter one term per line and then click Search.
- All the documents that contain the entered search terms will appear in the Search Results panel.
Index Validation#
Viewpoint offers the ability validate the integrity of DTSearch indexes. The validation process should be run if users are receiving errors during keyword searches in the review module. It is not necessary to run this process on normally functioning indexes.
Validate an Index#
- Select the medias containing index errors.
- Right-click in the grid and select Validate Indexes.
Posting Data to Review#
Once all the phases of data processing have been completed, all the data information must be copied from the processing SQL server to the review SQL server. There are three stages of posting:
- Creation of the Review database. (This stage only needs to occur once per project.)
- Posting all applicable Dedupe Sets.
- Posting processed data to Review.
Post Data#
Perform the following steps:
- In the Index tab, check all scopes you want to post in the Scope panel, or check individual medias from the main Index panel. Right-click and select Post to display the menu below.
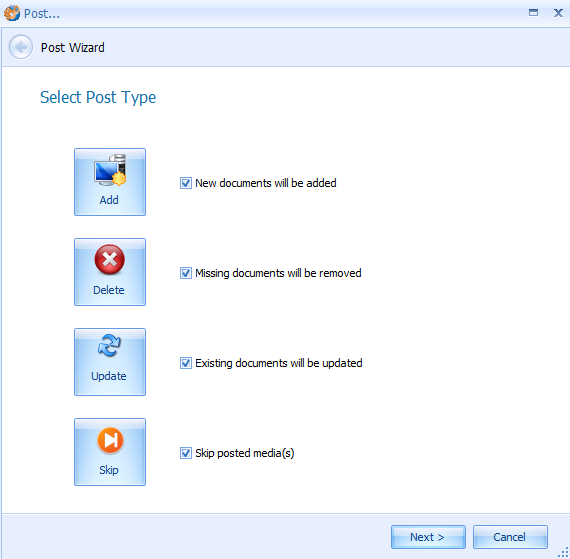
- Add – New files will be added to Review.
- New data that has finished processing.
- Files that have been un-ignored.
- New attachments that have been extracted from previously posted files.
- Delete – Deleted files will be removed from Review.
- Files have been deleted from the database.
- Files that have been ignored that were previously posted.
- Update – Existing files will be updated in Review.
- Files that have been tiffed at a later date.
- Files that were either slipsheeted or un-slipsheeted.
- Files that have had text re-extracted or new OCR generated.
- Files that were previously password protected that have been replaced. These would also need to be reprocessed and un-slipsheeted.
- If a media has been re-indexed, all files in the media should be updated to reflect the location of the new media.
- Skip – Only available when posting whole Scopes. When checked, this option will save time on the overall posting process by skipping medias that have already been posted to Review.
- Add – New files will be added to Review.
- Click Next after selecting the appropriate options for this post.
Note: When re-indexing documents that already been posted to Review you do not need to re-post the data to update index information.
- On this screen, select the breadth of the data you wish to Post.
- All - Performs posting tasks for all DocIDs of all selected Scopes.
- Selected Media(s) – Performs posting tasks for selectively chosen Medias from the selected Scopes.
- Selected Document(s) – Performs posting tasks for selectively input DocIDs from the selected Scopes. Each DocID must on a single line.
- Once you have selected the appropriate option, click Next.
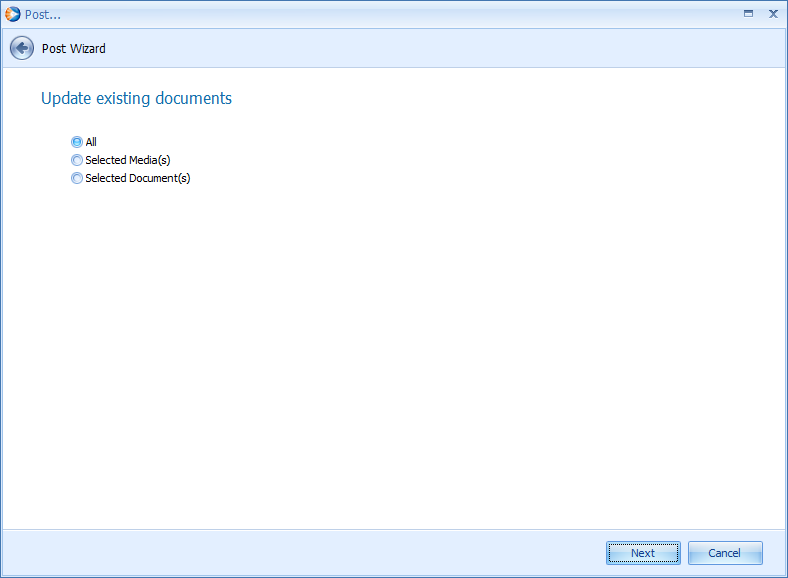
- Update existing documents
- Clear calculated data for advanced tools – A setting of true will remove all information related to the Near Duplicate Analysis and Email Thread Analysis tools. It is highly recommended that this option is set to False unless specifically requested by the user in charge of the review environment.
- Sync Custom Fields – A setting of true will synchronize the custom field information between the processing and review databases. This should be set to false in situations where data is being updated rather than added to the review database to speed up posting times.
- Sync email addresses – A setting of ‘Insert Only’ will add newly discovered email addresses to the review database for searching. A setting of ‘Full’ will delete all existing records and add all email addresses found across servers. A setting of ‘None’ will ignore synchronizing email addresses altogether.
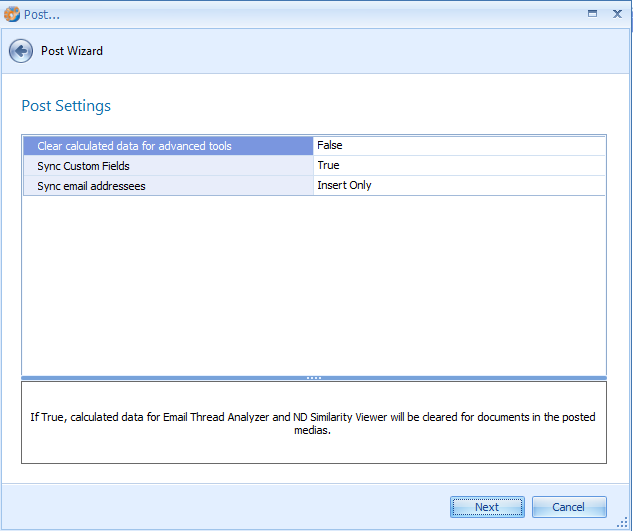
- Confirm all settings and click Post to complete the wizard.
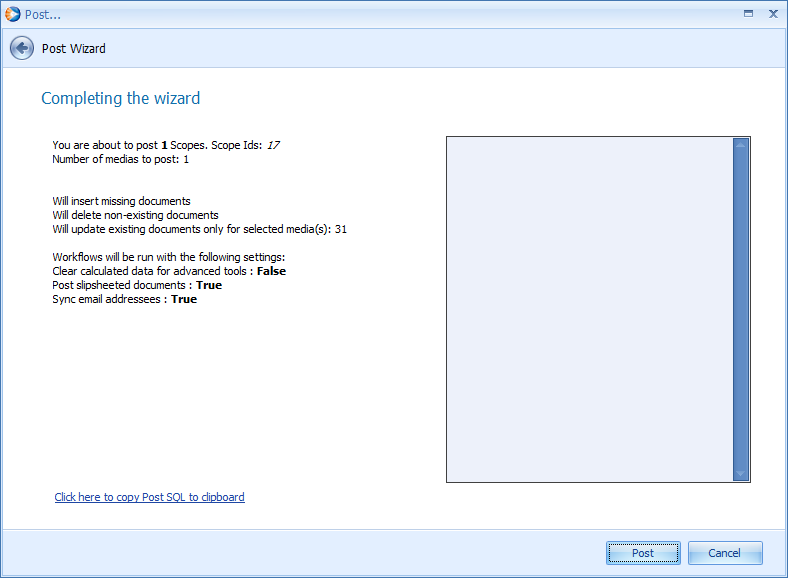
- A window will appear providing a progress of the posting process. When posting is complete, the text box on the right side of the window will provide full details on the number of documents added, deleted, and updated.
- After the Post process is complete, click Close to exit the window.
Update Post#
The Update Post function can be used to quickly update information in Review about a subset of files you have been working with. This function cannot be used to add or remove documents to the review database. It is most commonly used to update tiff information for files within the review database.
- Open the Processing tab and navigate to any panel containing the DocIDs of the files you wish to update.
- Select all DocIDs that require updating.
- Right-click in the grid and select Update Post.
- Confirm the Post settings for the project and then click Next.
- Click Post to update information on all selected documents.
- After the Post process is completed, click Cancel to exit the window.
TIFF Creation#
Creating tiffs is a necessary task for several functions within Viewpoint. In the review database, documents must be tiffed before they can be redacted by a reviewer. If tiffs are not created prior to review, users can create tiffs themselves but will have to wait for processing to complete. In the Delivery functionality of the Viewpoint Review application, tiffs must be created prior to an export of single-page tiffs, multi-page tiffs, color jpgs or PDFs.
Tiffs are created from the Process tab under the Create Tiff task. Not all documents in a project require tiffing so it is recommended that users work with filters to tiff only the required items. The View filter is most commonly selected for users wanting to tiff data intended for Delivery.
Generated tiffs can be reviewed for clarity and accuracy in the Viewpoint Quality Control application. Once all tiffs have been verified, they must be re-posted to have their records updated in the review application. The posted tiffs are now available in the review application for Delivery or redaction.
Tiff Settings#
Microsoft Excel | |||
|---|---|---|---|
Setting | Description | Default Setting | |
Adjust Formatting for TIFFS | This setting must be set to true for any of the Excel settings to be used. If set to false, the document will print as is. | True | |
Auto Fit | All cells will be ‘Auto Fit’ to match the size of all contained text. | True | |
Automatically Hide Empty Columns/Rows | Hides entire columns containing no text content. | True | |
Automatically Unhide Hidden Columns/Rows | Un-hides all sheets, columns, and rows hidden within the document. | True | |
Change Margins | Changes the margins of a document to the options selected in the Bottom Margin, Left Margin, Right Margin, and Top Margin settings. | False | |
Bottom Margin | Forces the bottom margin to this size (in inches). Change Margins option must also be set to true. | 0.5 | |
Left Margin | Forces the left margin to this size (in inches). Change Margins option must also be set to true. | 0.5 | |
Right Margin | Forces the right margin to this size (in inches). Change Margins option must also be set to true. | 0.5 | |
Top Margin | Forces the top margin to this size (in inches). Change Margins option must also be set to true. | 0.5 | |
Convert Pivot Tables | Converts Pivot tables to a range. | True | |
Custom Macro File | Insert a full UNC path to any user created macro files to be used during Excel tiffing. | Leave Blank | |
Maximum Number of Pages (0 – Tiff All Pages) | A value of greater than 0 indicates the maximum number of tiff pages to be created. After this number is reached, an additional placeholder tiff with the text ‘Following pages truncated by user’ will be appended. | 0 | |
Page Orientation | Users can choose to print pages in landscape, portrait, as is, or to be automatically optimally formatted. | Landscape | |
Print AutoFields | The keyword function allows users to use phrases such as Date or File Name and when the document is opened, the current date/filename will appear. If this setting is changed to ‘True’, instead of printing the date the document was opened the tiff will show the keyword names such as <date> or <filename>. | False | |
Print Column Headers | Prints the column header on each page of the document. | True | |
Print Comments | Shows and prints comments found on the Excel document. | True | |
Print Grid Lines | Prints an outline around every cell on each page of the document. | True | |
Print Order | Users can choose to print either horizontally or vertically first. | Horizontal First | |
Remove Empty Pages | Empty pages within an Excel will not be printed. | False | |
Remove Images | Embedded images will be removed from the document. | False | |
Reset Colors | Background colors in cells will be reset to white. Useful for black and white tiffs that have dark colored backgrounds. | False | |
Set Print Area to Last Cell | The document will not be printed beyond the last cell with content regardless of print area. | True | |
Zoom Percentage | Sets the zoom of the document. | 80 | |
Microsoft PowerPoint | |||
Setting | Description | Recommended Setting | |
Change Margins | Changes the margins of a document to the options selected in the Bottom Margin, Left Margin, Right Margin, and Top Margin settings. | False | |
Bottom Margin | Forces the bottom margin to this size (in inches). Change Margins option must also be set to true. | 0.5 | |
Left Margin | Forces the left margin to this size (in inches). Change Margins option must also be set to true. | 0.5 | |
Right Margin | Forces the right margin to this size (in inches). Change Margins option must also be set to true. | 0.5 | |
Top Margin | Forces the top margin to this size (in inches). Change Margins option must also be set to true. | 0.5 | |
Output Type | Users can choose to print in either the Notes Page or Slides format. Notes Page must be selected for comments to be printed. | Notes Page | |
Page Orientation | Users can choose to print pages in landscape, portrait, as is, or to be automatically optimally formatted. | As Is | |
Print Comments | Slide comments will be printed on the notes page (if selected) | True | |
Print Date AutoFields | The AutoField function allows users to use phrases such as Date or FileName and when the document is opened, the current date/filename will appear. If this setting is changed to ‘True’, instead of printing the date the document was opened the tiff will show the keyword names such as <date> or <filename>. | False | |
Print Order | Users can choose to print either horizontally or vertically first. | Horizontal First | |
Slide Orientation | Users can choose to print slides in landscape, portrait, as is, or to be automatically optimally formatted. | Landscape | |
Microsoft Project | |||
Setting | Description | Recommended Setting | |
TIFF Orientation | Specifies orientation of image.
| ForcePortait | |
Microsoft Visio | |||
Setting | Description | Recommended Setting | |
Bottom Margin | Forces the bottom margin to this size (in inches). Change Margins option must also be set to true. | 0.5 | |
Change Margins | Changes the margins of a document to the options selected in the Bottom Margin, Left Margin, Right Margin, and Top Margin settings. | False | |
Convert Pivot Tables | Converts Pivot tables to a range. | True | |
Left Margin | Forces the left margin to this size (in inches). Change Margins option must also be set to true. | 0.5 | |
Print Background | Users can choose to print the background layer of the Visio. | False | |
Print Comments | Print user comments. | True | |
Right Margin | Forces the right margin to this size (in inches). Change Margins option must also be set to true. | 0.5 | |
Top Margin | Forces the top margin to this size (in inches). Change Margins option must also be set to true. | 0.5 | |
Microsoft Word | |||
Setting | Description | Recommended Setting | |
AutoFit Tables to Content | Force tables to fit to page. | True | |
Bottom Margin | Forces the bottom margin to this size (in inches). Change Margins option must also be set to true. | 0.5 | |
Change Margins | Changes the margins of a document to the options selected in the Bottom Margin, Left Margin, Right Margin, and Top Margin settings. | False | |
Clear Paragraph Formatting | Clears any paragraph formatting when tiffing. | False | |
Convert Pivot Tables | Converts Pivot tables to a range | True | |
Left Margin | Forces the left margin to this size (in inches). Change Margins option must also be set to true. | 0.5 | |
Page Orientation | Users can choose to print pages in landscape, portrait, as is, or to be automatically optimally formatted. | As Is | |
Print AutoFields | The AutoField function allows users to use phrases such as Date or File Name. A setting of ‘Unlinked Values’ will print the values as the document was originally saved. A setting of ‘Linked Values’ will print the settings as they would appear the date of tiffing. If this setting is changed to ‘Macro Names’, instead of printing the date the document was opened the tiff will show the keyword names such as <date> or <filename>. | Unlinked Values | |
Print Comments | Prints document comments. | True | |
Print Hidden Text | Prints any hidden text. | True | |
Re-Tiff Emails with Side Margins Warning | When tiffing HTML representations of emails where there are left/right side margin warnings, Viewpoint will automatically rescale the image to attempt to fit content clipped by the side margins. | False | |
Force Landscape Orientation (first attempt) | Page orientation will be set to Landscape when at least one page of the document receives a right margin warning. Wide tables and images have a better chance to fit on the page. However, this can trigger a bottom margin warning if there are tall images that fit in Portrait, but do not when changed to Landscape. | False | |
Scale Page Image From Tabloid format (first attempt) | The page size will be set to Tabloid and then scaled down to Letter. This will cause the text in the image to be slightly disproportionate, though still readable. | True | |
Image Re-Scale Factor (first attempt) | When there is a margin warning, resize images in the Document by this percentage. (0 off) | 0 | |
Set Small Top and Left Margins (first attempt) | Top and Left margins will be forced to 0.25 inch (default is 1 inch). | True | |
Reset Paragraph Formatting (second attempt) | Second Pass. Paragraphs will have formatting reset to default. This helps mitigate many left margin warnings caused by incorrect indentation. | False | |
Remove Background Image (second attempt) | Second Pass. The background of the page (if any) will be hidden. | False | |
Set Large Tables Font Size to 8px and Remove Bolded Text (second attempt) | Second Pass. All tables will autofit to content. Font size will be set to 8px and bolded text will be removed on any table with 5 or more columns. | False | |
Right Margin | Forces the right margin to this size (in inches). Change Margins option must also be set to true. | 0.5 | |
Set Page Size to Letter | Forces the size of the document to letter prior to printing. | False | |
Top Margin | Forces the top margin to this size (in inches). Change Margins option must also be set to true. | 0.5 | |
Track Changes | Prints any track changes | On | |
Tiff Delivery Steps#
Perform the following steps:
- In the Review application, create a single View containing all documents that are required for delivery.
- In the Processing application, use the View filter on the Process tab to isolate the view created in step 1.
- Submit all the documents without tiffs in this View for tiffing using appropriate project settings.
- Quality control resulting tiffs and exceptions.
- When all required documents have been tiffed, open up the documents in this View from the process tab.
- Select all the documents, right-click, hover over the Maintenance Scripts option, and then click Update Tiff Page Count.
- Select all the documents, right-click, and then click Update Post.
- Change any post settings if necessary and then click Next.
- Click Post to transfer all relevant tiff information from these documents to the Review database.
Scope and Media Modifications#
Create a Scope#
Scopes can be manually created for receiving medias. The first method of receiving media is through the Import tab where previously processed data can be loaded into Viewpoint. The second method of receiving media is through the Import Media process on the Project tab.
- Open the Scopes panel on the Project tab.
- Right-click in the panel and select New.
- In the window that appears fill-in the appropriate information for the Scope Description, Custodian, and Data Location fields. Both the Custodian and Data location must be selected from previously input items.
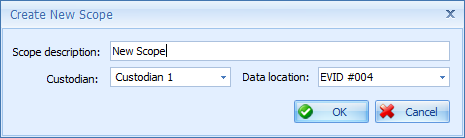
- Click OK to complete the wizard.
Update a Scope#
- Select the scope on the Project tab.
- Right-click and select Update.
- Update the information in the Scope Description, Custodian, or Data location fields.
- Click OK to complete the wizard.
Delete a Scope#
- All the medias within a scope must be deleted, before it can be deleted.
- On the Project tab, right-click on the empty scope and select Delete.
- The scope will be removed from the database.
Change a Media’s Stage Status#
- Select the Media in either the Project, Process or Index tabs.
- Right-click and select Set Status.
- Select the new status from the window that appears and click OK.
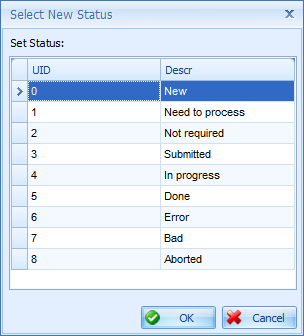
Import a Media#
Importing Medias is a process where all files within a media are copied to another scope in any project on the same SQL server. A new DocID will be assigned to all imported files, and the files will be copied the file share. If files are imported to a new project, reviewers must have permissions to the file location storing them.
- On the Project tab, select the scope that will be receiving the files via import.
- Right-click in the panel and select Import Media…
- Enter your credentials and click Next.
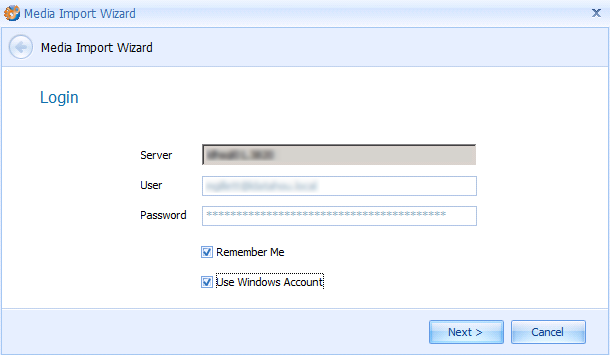
- Select the company that contains the media you wish to import and click Next.
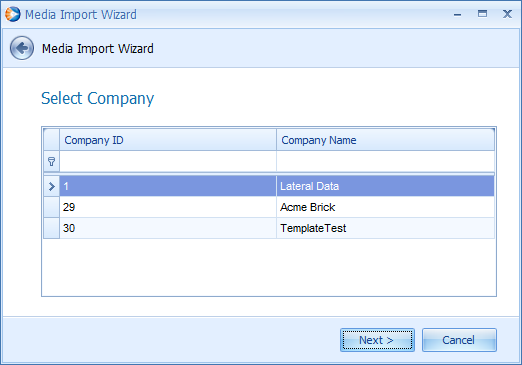
- Select the project that contains the media that you wish to import and click Next.
- Select the scope that contains the media you wish to import and click Next.
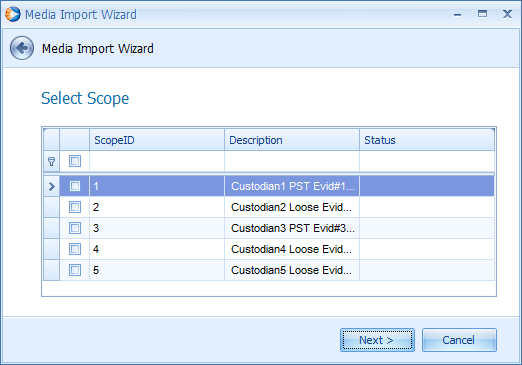
- Select the media you wish to import and click Next.
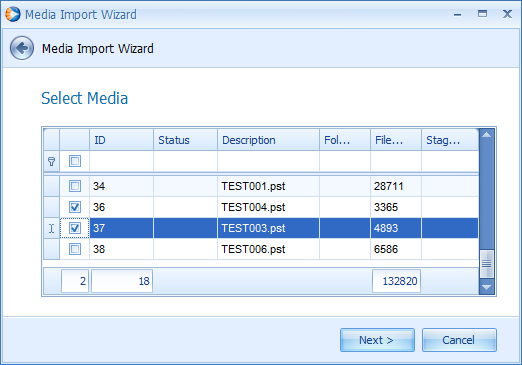
- Click Finish to complete the wizard and begin the import process.
- After the import completes, the receiving scope will have a new media created containing all of the media’s files.
Update a Media#
- Select the media on the Project tab.
- Right-click and select Update.
- Update the information in the Description field.
- Click OK to complete the wizard.
Delete a Media#
- Select the media in the Project or Process tab.
- Right-click and select Delete Media.
- Confirm that you wish to delete the media by clicking OK in the window that appears.
- If any files are found within that media, a second pop-up will appear indicating the number of files that will be deleted. Click OK to delete these files from the Viewpoint database and the file share.
Note: A media cannot be deleted from the processing application if any documents for that media are currently posted within the review application.
Import Tab#
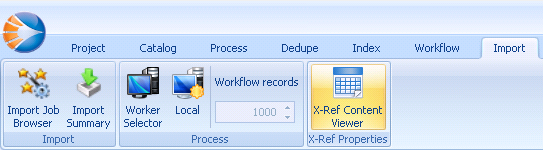
Viewpoint’s Import feature allows users to bring in files or file information generated from outside the Viewpoint environment. The most common use of this feature is to import native or tiff files generated from scanned documents or documents previously processed in another system. It can also be used to include new renderings of documents that have been exported from Viewpoint for translation, password cracking and other purposes. Importing can also be used for overlaying new metadata for existing documents. Please note that this section of the manual covers how to use the importing feature, but many aspects of data processing overlap with information already covered. Read all the sections on the Viewpoint Processing application tabs for use in conjunction with the information below.
Import Glossary#
- Import – The process of loading into Viewpoint file renderings and metadata information for documents that have been previously processed.
- Overlay – The process of adding new data or overwriting existing data for documents that are already present in a Viewpoint project.
- Load File – A file that contains metadata and file path information for data to be imported into Viewpoint.
- Reference Key – Also known as the Primary Key. This refers to the unique identifier (control number) assigned to documents during import. For documents processed through the Catalog tab, this will be the DocID. For files loaded through the Import tab it will be user defined, but typically set to BegDoc.
Import Walkthrough#
- Click on the Import tab within the Viewpoint Processing application.
- Select the type of Import (Single Custodian / Overlay, Multi-Custodian, Overlay, or Restart Failed Job) and click Next.
- In the X-Ref file path field, click the ellipsis to browse to the file location of the x-ref.
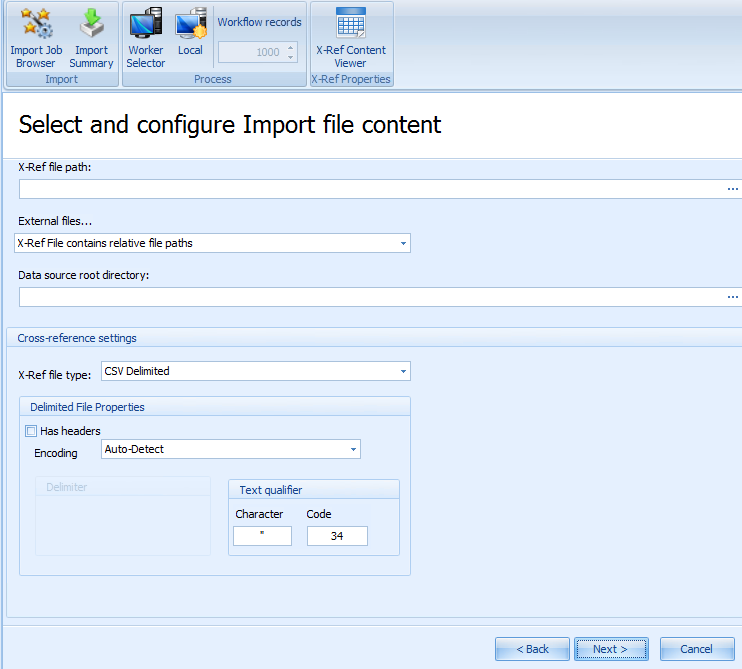
- Select an option from the External Files field:
- X-Ref File contains relative file paths
- X-Ref File contains absolute network file paths (Drive letters are not supported)
- X-Ref File does not contain file paths (metadata only import)
- Click the ellipsis in the Data Source Root Directory field to browse to the location of the files to be imported.
- In this window, click on the ellipsis button on the right side of the option to browse to the location holding the data in the load file. To find the data that requires importing, Viewpoint must understand the entire path of where these documents are located. The Data source root directory will contain the first half of this path. An example of how to determine what should be placed in this field is below:
- Data exists in the following structure: \\ViewpointData\Share1\Staging\VOL001\EFile\001\ABC0001.msg
- Load file contains a link to a native file in this structure: EFile\001\ABC001.msg
- The path for the Data source root directory should be: \\ViewpointData\Share1\Staging\VOL001
- In this window, click on the ellipsis button on the right side of the option to browse to the location holding the data in the load file. To find the data that requires importing, Viewpoint must understand the entire path of where these documents are located. The Data source root directory will contain the first half of this path. An example of how to determine what should be placed in this field is below:
In this example, the combination of the Data source root directory path combined with the path to the individual files in the provided load file provides the full path to the files being loaded.
- This option will be disabled if the External Files field is set to “X-Ref does not contain file paths”
- Select the X-Ref file type from the dropdown menu:
- The options listed are Concordance, CSV, Custom Delimiter, Pipe and Caret, Tab Delimited, and XML.
- Please see the Supported Load Files in this section of the manual for more detailed information on supported load files.
- Depending on the type of X-Ref file selected, the Delimited File Properties may be enabled for the user to select whether the X-Ref file has headers, adjust the text encoding, or to set custom delimiter characters.
- Once the load file is selected and configured, click on the button in the ribbon labeled X-Ref Content Viewer. This will provide a preview of the load file as Viewpoint currently interprets it. If the option Has Headers is not selected, the columns will be named in the format of Column0, Column1, etc. If Has Headers is selected, the first entry for every column will appear as the name for every column for mapping purposes. If everything has been confirmed as working appropriately, click Next.
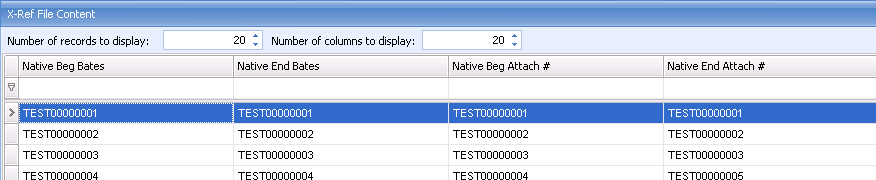
- On the next screen, you can either create a new template or select an existing one. For more details on configuring a template, please refer to the Template Management section below.
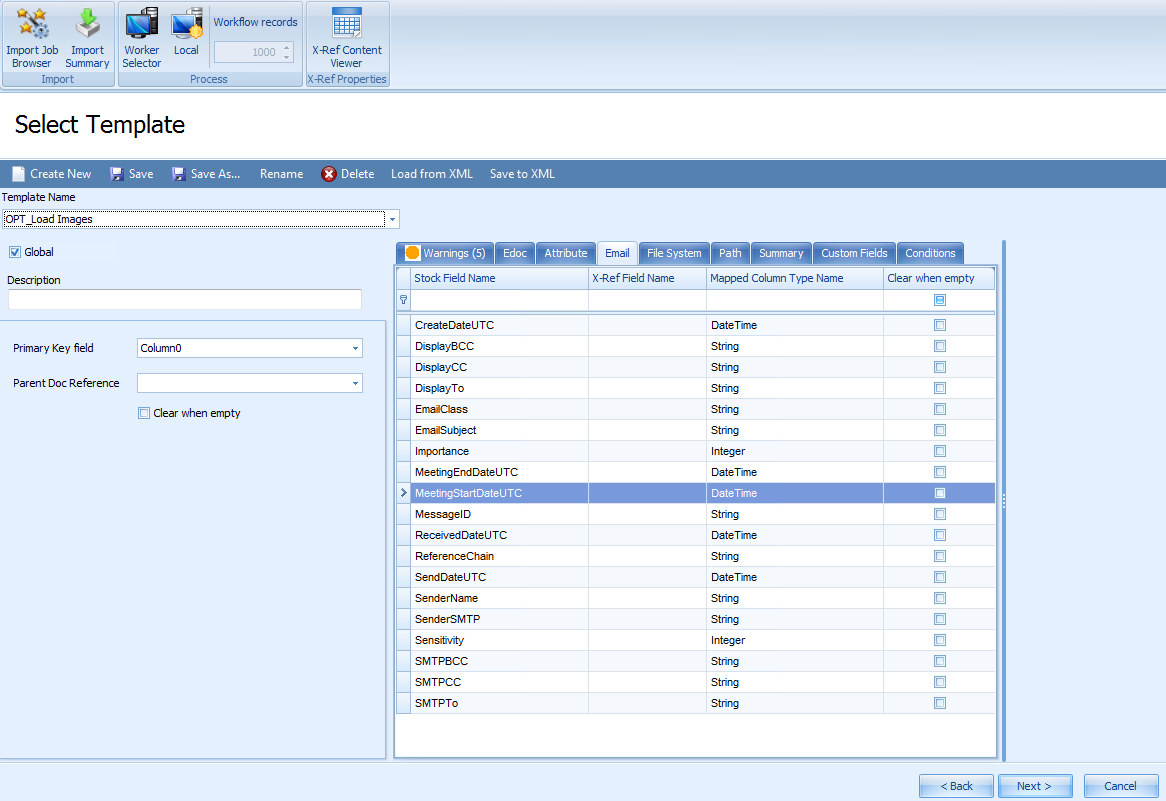
- After a template selection has been made, all fields found in the load file will map accordingly. If a new template is being selected, all options will be blank.
- In the Primary Key field option, use the drop-down list to choose the field in the load file that corresponds to the unique document identifier (typically the beginning bates number, or a control number generated in another system).
- In the Parent Doc Reference option, use the drop down list to choose the field in your load file that corresponds to a value that is shared by all documents that should be considered a document family within Viewpoint (typically the beginning attachment bates number or a family id control number generated in another system).
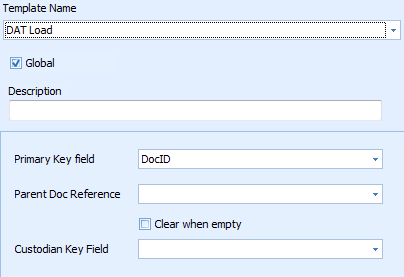
Note: The Custodian Key Field is only visible if Multi-Custodian Import was selected in step 2.
- Use the middle panel to map out the fields of the load file to the appropriate fields in the standard Viewpoint table structure. Please see the Field Mapping section below for additional details. Once all the fields from the load file have been mapped, click Next.
- If Single Custodian / Overlay was selected in step 2, click the radio button next to the Custodian and Scope that this data should be associated with.
Note: If this data should not be associated with an existing scope, a new one should be made following the steps provided in the section of this manual labeled Create a Scope.
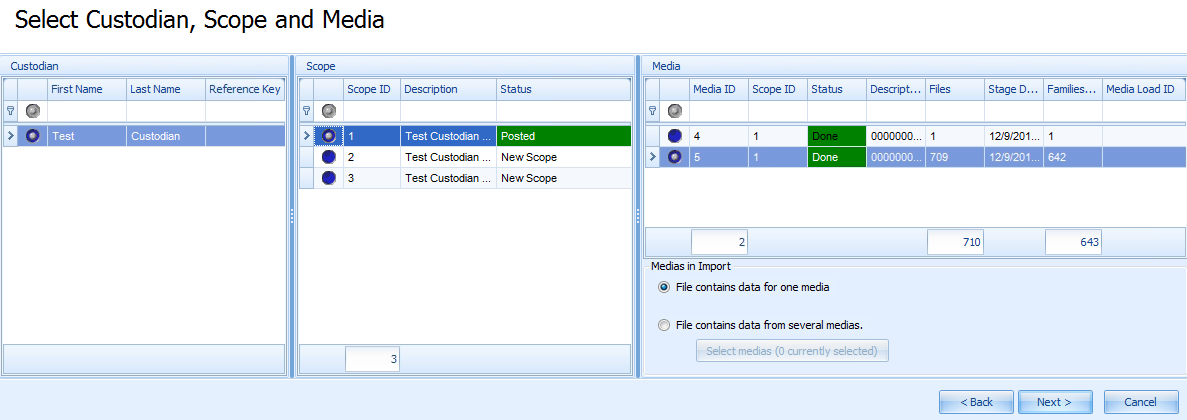
- For new data, it will not be necessary to choose a media or change any media options. If a data overlay is being performed, click on the pre-existing media that requires new data. To overlay data into multiple Medias, select the option File contains data from several medias and then click Select Medias. On this screen hold down the ctrl button on the keyboard and click all Medias that will be receiving overlay information. When complete, click the Next button to proceed to the next screen.
- If no medias were selected in the previous step, a Pop-Up will appear indicating that a new media will be created for these documents. If one or more medias were selected in the previous step, a pop-up will appear indicating that all documents in this import will be placed into one or more existing medias. Click OK.
Note: Regardless of the number of medias selected, this pop-up will only display the ID of the primary media selected on the media section of the screen. Even when importing to multiple medias, make sure that one of them is selected in the Select Custodian, Scope and Media screen.
- If Multi-Custodian Import was selected in step 2, click the Load Custodians from X-Ref File button to populate the grid with the custodian values found in the load file.
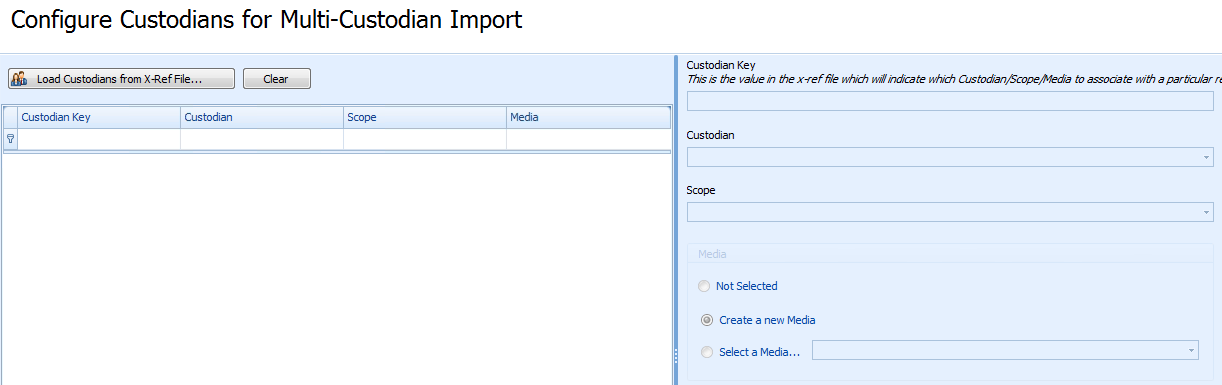
- Click on a custodian value in the grid to enable the options on the right. Each custodian value found in the load file will need to be associated to a custodian value in the Viewpoint project using the Custodian dropdown box on the right.
- Select a Scope from the dropdown box.
Note: If this data should not be associated with an existing scope, a new one should be made following the steps provided in the section of this manual labeled Create a Scope.
- Select the appropriate option from the Media section.
- Steps 15a-15c must be completed for each custodian record listed in the grid.
- Click Next to continue.
- On the next window that appears there is an option called Execute Trial Run. Checking this option allows you to verify the accuracy of your field mappings using the first 100 (default) records in the load file, as well as to ensure no exceptions exist.
- If the data has been processed in a time zone other than UC, click the option labeled Convert Date/Times to UTC from this Time Zone, and adjust the time zone accordingly.
Note: All imported times should be reflected as UTC. The time displayed to end users will adjust to the time zone of the project in the Viewpoint Review application.

- The option Automatically create missing Parent Documents should only be checked if you are working with a load file that has references to parent documents (usually an original e-mail container) that is not present. If this option is selected, Viewpoint will simply make an empty record for the missing parent and ignore errors for missing parents during processing.
- The EDoc Lookup option is used for data overlays. The Reference Key refers to the unique identifier (Primary Key) chosen for documents that were previously loaded into the system. Viewpoint DocID refers to documents that were natively processed through Viewpoint from the Catalog tab. This option is only pertinent in instances where an overlay is being performed.
- The Creation Options is another setting that should be adjusted for data overlays. The Create and edit is the default option and should be used whenever new data is being loaded or when importing a load file that combines a mix or old and new data. Selecting this option means that Viewpoint will overlay information to an existing document and create a new document record for any unfound documents. The Edit only option means that Viewpoint will only overlay new information to existing documents. New documents will not be created. Once this option has been finalized, click Next.
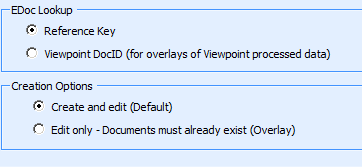
- The Apply Slipsheet rules to Native Files option apply to documents where native files are imported. If this option is selected, any document with a FileID that matches the Auto Slipsheet rules for the Project will be slipsheeted during the import process. It is recommended that this option is checked unless slipsheets were already provided for non-standard file types.
- If the Execute Trial Run was selected, Viewpoint will pre-load the designated number of records and show in a grid how the data will look for each record. The left side of the screen provides a summary of what is being loaded. In the Media summary, red lettering means that a new Media is being created. Blue lettering means that data is being appended or overlaid to an existing Media. The Process summary shows the total number of documents found in the load file. Directly underneath the Process summary will display whether document renderings for Native, Tiff, Text, and HTML are being processed with this load file. If any of these renderings are being provided, blue lettering is used to indicate the mapping. If a rendering is not being provided, red lettering is used. Finally, a box in the lower- left corner will show any errors that have been found during the pre-load. To resolve any errors or any incorrect mappings, use the Back button to change any previously configured settings. If no errors are found, all fields are mapped correctly, and the summary tab matches the expected outcome of your load file, click Next.
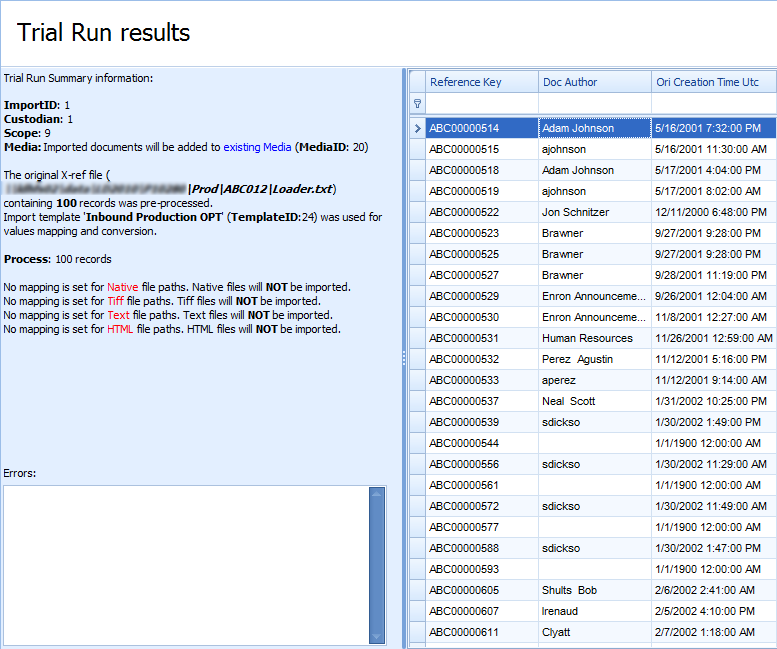
- The final screen will reiterate the trial run summary seen on the previous page. To finish the import process, click the Import button. If any errors are found, click the back button to resolve them. The import job can also be batched to a specific worker or executed on the local machine by clicking either the Worker Selector or Local buttons on the top ribbon menu.
- After the import begins, the screen will move to the beginning of the Import Wizard and all files are sent to the workers for data processing. After this point, please follow the instructions laid out in this manual for the Process, Index, and Workflow tab to finish data processing.
Field Mapping#
When importing metadata from a load file, users have two options. The first is to import metadata from a load file to an existing Viewpoint field (such as the CC line or whether a document is an e-mail or the created time of an electronic file). Whenever possible, it is recommended to map metadata to Viewpoint fields. This will make for the best possible user experience and allow for full use of Viewpoint’s advanced analytics. Please refer to the Viewpoint Advanced Tools Requirements document for more information on field mappings used for advanced analytics. The second option for importing metadata is to load fields as custom fields. This typically is used for fields that don’t have a default mapping in Viewpoint (such as a box number for scanned documents or pre-existing coding). For most load files, both kinds of field mappings are used.
Note: Each field can be mapped multiple times. For example, the beginning control number field can be mapped once to the system ‘DocTitle’ field and again as a custom field.
System Field Mapping#
System fields correspond to the first six tabs of the import field wizard. To map to a system field, click to the right of the field name and then select the appropriate field from the drop-down list that appears. For long lists of fields, users can type the first characters of the name for ease of filtering.
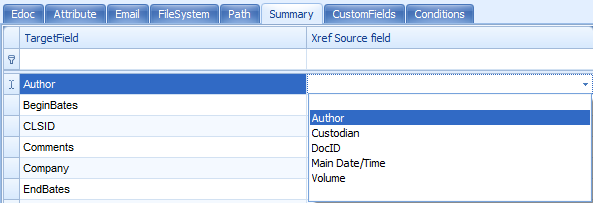
The list below defines what the contents of each system field should be mapped to. Please note that the field shown as DocDateUTC for processing files will be automatically populated during import as MainDate. The rules for generation of this field are based on the Viewpoint Date Hierarchy document.
EDoc | |
|---|---|
Setting | Description |
DocAuthor | Aggregate author information from electronic file (MS Office or PDF) or the Sender name from an email. |
DocTitle | Aggregate title information from electronic file (MS Office or PDF) or the subject of an email. If the document does not have a title or subject, the filename is used. Note: The beginning control number data is often mapped to this field. |
HashCode | MD5 or SHA1 Hash code generated. |
Attribute | |
Setting | Description |
IsEFileArchive | Indicates if a document is an email archive (pst, ost, nsf, etc.). |
IsEFileArchiveAttachment | Indicates if a document was extracted from an electronic file container (zip, rar, etc.). |
IsEFileEmbedded | Indicates if a document was an embedded object. |
IsEmail | Indicates if a document is an email. |
IsEmailArchive | Indicates if a document is an email archive (pst, ost, nsf, ect). |
IsSystemFile | Indicates if a document's hash was found on the NIST list. |
Setting | Description |
CreateDateUTC | Email creation date and time. |
DisplayBCC | BCC information from email. |
DisplayCC | CC information from email. |
DisplayTo | Recipient information from email. |
EmailClass | Type of email (message, calendar, contact, etc.). |
EmailSubject | Subject information from email. |
Importance | Email flag of low, normal or high importance. Documents that are not emails should receive a ‘normal’ value. |
MeetingEndDateUTC | Meeting end date of a calendar invite. |
MeetingStartDateUTC | Meeting start date of a calendar invite. |
MessageID | Message ID from email. |
RecievedDateUTC | Received date of email. |
ReferenceChain | Internal thread ID of an email. |
SendDateUTC | Sent date of email. |
SenderName | Sender information from email. |
SenderSMTP | Sender tracking protocol for the e-mail’s transmission across the internet. |
Sensitivity | Sensitivity email flag of Personal, Private, Confidential, or None. |
SMTPBCC | BCC tracking protocol for the email’s transmission across the internet. |
SMTPCC | CC tracking protocol for the email’s transmission across the internet. |
SMTPTo | Recipient tracking protocol for the email’s transmission across the internet. |
File System | |
Setting | Description |
OriAttributes | Attribute information from the document. |
OriCreationTimeUtc | Date and time of document creation. |
OriFileExtension | Extension of document. |
OriFileFolder | Path to original file location. |
OriFileName | Document filename. |
OriFileSize | Document file size (bytes). |
OriIsReadOnly | Indicates if a document was labeled as read-only. |
OriLastAccessTimeUtc | Last access date and time of the file. |
OriLastWriteTimeUtc | Last write date and time of the file. |
Path | |
Setting | Description |
EFileRelativePath | Relative path to native file rendering. |
HTMLRelativePath | Relative path to HTML file rendering. |
TextRelativePath | Relative path to text file rendering. |
TIFFRelativePath | Relative path to TIFF file rendering. |
Summary | |
Setting | Description |
Author | Microsoft Office/PDF author metadata. |
BeginBates | Beginning control number for an imported document. |
CLSID | Identifier for COM class objects. |
Comments | Microsoft Office/PDF comments metadata. |
Company | Microsoft Office/PDF company metadata. |
EndBates | Ending control number for an imported document. |
Keywords | Microsoft Office/PDF keywords metadata. |
LastAuthor | Microsoft Office/PDF last author metadata. |
Manager | Microsoft Office/PDF manager metadata. |
NbrPages | Microsoft Office/PDF number of pages metadata. |
Password | Microsoft Office/PDF password metadata |
ProdModifications | Microsoft Office/PDF subject metadata. |
RevNbr | Microsoft Office/PDF revision number metadata. |
SummCreateTimeUTC | Microsoft Office/PDF creation time metadata. |
SummLastPrintTimeUTC | Microsoft Office/PDF creation time metadata. |
SummLastSaveTimeUTC | Microsoft Office/PDF creation time metadata. |
Title | Microsoft Office/PDF title metadata. |
System Field Parameters#
When mapping system fields, additional parameters can be selected to provide additional detail on how to handle information in a field. After selecting a system field map, a panel on the right side of the screen will appear to provide additional options for each field.

The following is a definition of what each parameter is and in what circumstances it can be used in:
- Boolean-False – Available for fields containing only a yes/no or true/false value. This option indicates what option is mapped as ‘False’ in this field.
- Boolean-True – Available for fields containing only a yes/no or true/false value. This option indicates what option is mapped as ‘True’ in this field.
- ConversionMask – Available for fields containing date/time information. This option allows any exported date format to be integrated into the Viewpoint standard (ex: 1/1/2004 12:13:00 AM).
- PrefixString – Available for fields containing words and numbers. This option allows for predefined characters to be inserted before the contents of each field upon import.
- SuffixString – Available for fields containing words and numbers. This option allows for predefined characters to be inserted after the contents of each field upon import.
- Replace file extension – Available for fields containing file paths. This option is typically used in instances where two renderings of a file exist in a single location. With this option, one field can be mapped twice, but have the extension replaced during the second mapping. An example is reusing an e-file path for the text path. In this instance, users could insert txt into this field. Viewpoint would then know to look for text files with the same file naming structure as the native.
Note: For Boolean value fields, it is permissible to only have one value populated. For example, to populate the field IsEmail, the field could have a parameter of Boolean-True = ‘Email’ and no false value. You can add additional columns to set up multiple parameters. Ex. True = ‘MSG’ and True = ‘EML’.
Date/Time Field Mapping#
There are many ways for date and time information to be displayed. When loading any sort of date and time information into Viewpoint, users must indicate to Viewpoint which format is being used. This information will then be translated to a format compatible with Viewpoint.
- After mapping the date/time field, click on the ellipsis button in the parameters field named ConversionMask.

- In the Date/Time Mask window that appears, enter a sample of the data from the field in your load file. This information can easily be obtained from the X-Ref Content Viewer.
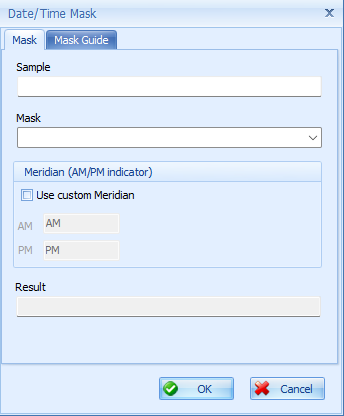
- In the Mask field, enter the format of the date and time. If this is not known, click on the Mask Guide tab to review the format syntaxes.
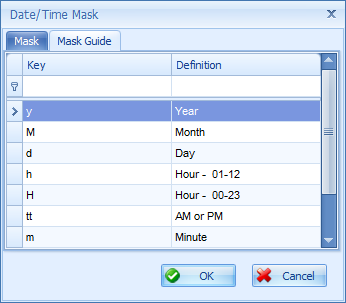
- If the Mask has been entered correctly, the result page will show the valid format as it will be presented within Viewpoint. If an invalid format is indicated, an error message will appear.
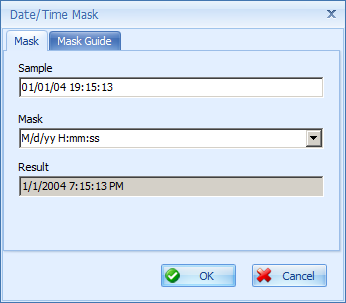
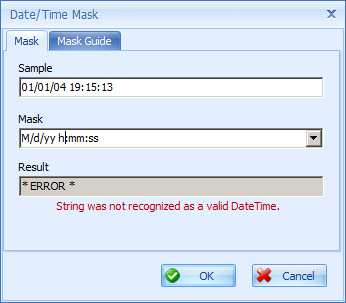
- Click OK. If the mask is the same for multiple fields, the mask can be entered in the ConversionMask field without the need for testing a sample.
Note: If date and time information are stored in separate fields, users will need to map the fields one at a time using the steps outlined in the Combining Fields header.
Combining Fields#
The contents of two or more fields can be combined into a single field during import. This is typically done for instances where date and time information are stored in separate fields but can be used in other circumstances (such as combining custodian first and last name into a single field).
- Map the first field to any system field.
- Click Add Column in the section beneath the parameters pane.

- In the Add Column window that appears, select the next field to add. Then, click OK.
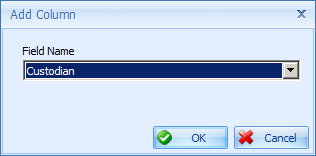
- Follow steps 2 and 3 above if additional fields should be combined.
- Test the outcome of your combination using the Trial Run feature.
Note: Separating characters such as commas and spaces can be placed in the PrefixString parameter. If no prefix is added, the contents of the combined fields will be placed directly together.
Custom Field Mapping#
Any field that does not map to a Viewpoint system field should be mapped as a custom field. This is done on the Custom Fields tab of the field mapping screen.
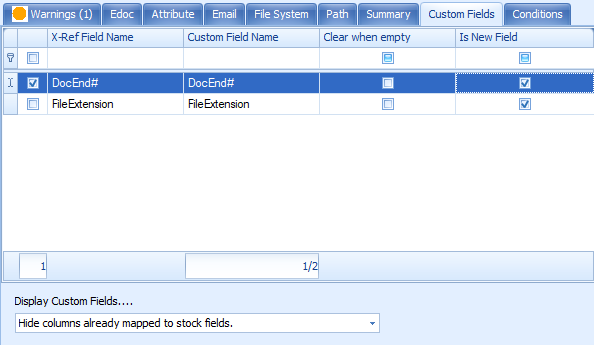
By default, all fields in the load file that are not already mapped to a system field are visible on this tab. The left-hand column, Xref Field Name, displays the name of the field as it is shown within the X-Ref File. The right-hand column, Custom Field Display Name, shows the name of the field as it will be displayed in Viewpoint. Place a checkmark next to each field that should be imported as a custom field. Once a field has been selected, additional options appear on a panel to the right for further specifying the contents of the field.
New Field indicates that this will be imported as a new field instead of mapping to an existing custom field. Clear when empty indicates that the field should be imported even if there is no value in the imported field.
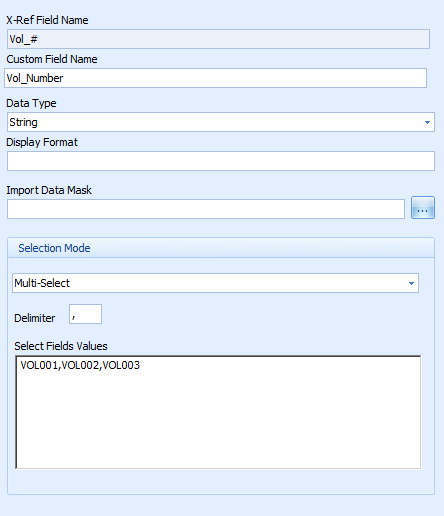
All the details regarding custom field mapping are outlined in the header of this document named Custom Field Management. Each field to be loaded as a custom field will undergo this process. The example screenshot below shows three custom fields have been selected for import. All 3 fields were renamed to match client specifications.
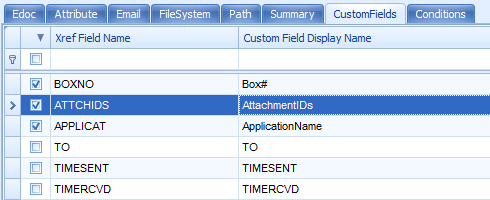
To see all fields that are present in the load file rather than just the unmapped fields, change the setting in the dropdown box at the bottom of the grid from Hide columns already mapped to stock fields to Display all columns in x-ref file as seen below.
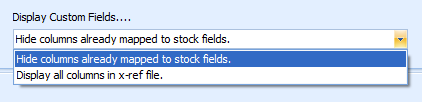
Conditions Mapping#
The Conditions tab is used primarily for tiff load files and should only be configured or modified by experienced Viewpoint users. This tab allows for users to indicate the start of a new document and parent/child relationships within a tiff load file such as an LFP or OPT.
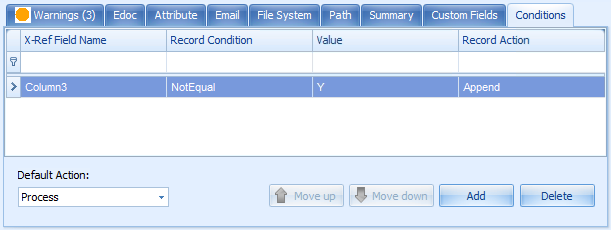
The above screenshot shows the pre-configured mapping for the loading of an OPT file. The Default Action dropdown indicates how each row of the load file should be handled after considering the parameters in the grid. The Process option means the row will be treated as a new document. The Skip option means that no action will be taken for the row. The Append options means that the contents of the row should be appended to the row directly above it. Append is most often used to indicate that this is an additional page of the document and should not be considered a unique record. The final option, ProcessAsChild, means that the row should be treated as a new record and a child of the last top-level document found. Except in rare circumstances, the Default Action should always be configured to Process.
Within the grid, users can provide rules on how to handle changes within the load file. The first column, X-Ref Field Name, indicates which field is being considered for this rule. The second column, Record Condition, is used to indicate what contents this field should be checked for. The options allowed are Equal, NotEqual, IsEmpty, and IsNotEmpty. If either the Equal or NotEqual option is selected, the Value column must be completed. The last column, Action, is used to determine what should happen if the criteria indicated is met. The options here match those for the Default Action dropdown described above.
Once the conditions have been set, they can be re-ordered if needed using the Move Up and Move Down buttons.
For the OPT file shown above, the default action for each row is to Process the data as a new record. However, the rule in place states that all documents without a value of ‘Y’ in Column3 should be appended to the previous record. In an OPT, rows that represent a new document are given a ‘Y’ value while each additional page of the document is given no value in that column. In this example the row is first checked to see if a ‘Y’ is present in Column3. If no ‘Y’ is present, it will append that row to the document preceding it. If a ‘Y’ is found, the next parameter in place would be considered. In this case, no additional parameters are present, so the Default Action of Process is completed, creating a new record for this row.
Mappings Tab#
The Mappings (or Warnings) tab is used to provide a summary of all fields that have been mapped from the load file. Mapped fields will be shown as linked to either a stock system field or a custom field. Fields will have an amber background if they are mapped multiple times or if a field that is part of the selected template is not present in the load file. The right pane will provide details on the warning provided in the Summary field.
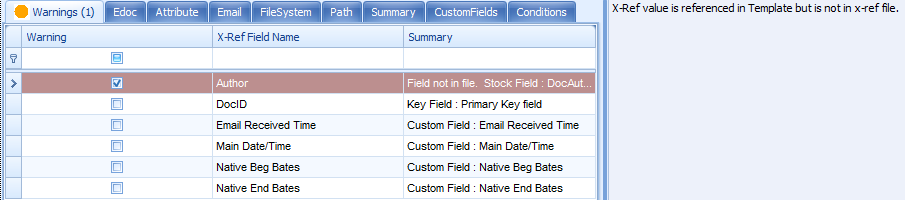
If one or more fields have a potential conflict, the Mappings tab will be named Warnings, change to an orange color, and display the number of current warnings. Warnings will not prevent data from loading into Viewpoint but should be validated to ensure accuracy of the database file. If no warnings are found, the Mappings tab will be green as seen below.
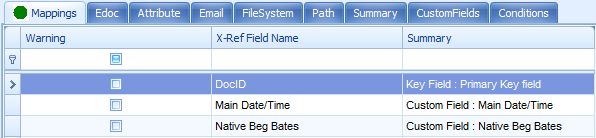
Template Management#
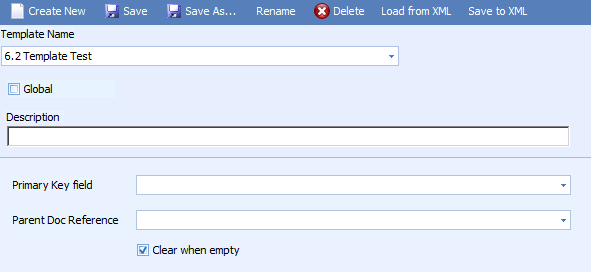
Templates allow users to load the same types of data repeatedly without having to start their efforts from scratch. Some templates come pre-configured with Viewpoint (see the Load File header of this section). Other templates can be created for mapping complex load files for a specific project or from a specific client. Templates are used specifically for declaring the reference keys, field mappings, and conditions of a load file. If a template is saved with Global checkbox unchecked, then the template will only visible within the Project it was created in. The options below describe the function of each option:
- Create New – Creates a new template from scratch. Users can choose the name of this new template.
- Save – Saves any changes made to the currently selected template.
- Save As… – Creates a new template using the current selected mappings. Users can choose the name of this new template.
- Rename – Brings up a dialog box where the current selected template can be renamed.
- Delete – Deletes the currently selected template from the template list.
- Load from XML – Used to import a template saved from another Viewpoint system.
- Save to XML – Exports out the settings for the selected template in an XML format.
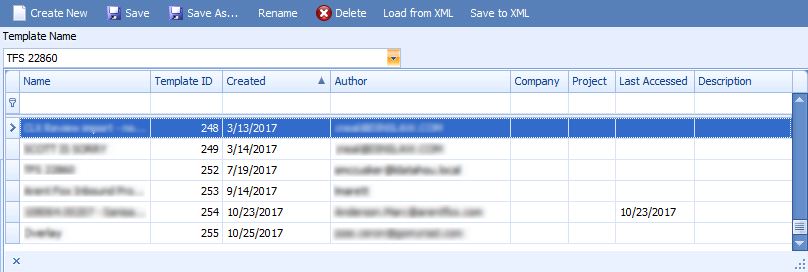
Clicking the template name opens a dropdown list of the import templates the user has access to. This list can be filtered and sorted like most other grids within Viewpoint. Templates without a Company or Project value are global templates and are available in every Viewpoint Project.
Supported Load Files#
Although Viewpoint can be modified to handle many types of load files, there are certain file types that are recommended for use whenever possible. For image files (TIFF, JPG) we recommend an OPT file as they can be loaded in with no load file alterations necessary. LFP files are also supported but require the editing of certain delimiters. For database load files we recommend CSV, Concordance, or pipe(|)/carrot(^) delimiters be used. Whenever possible, it is recommended that both the text and native (efile) relative paths be placed into the database load files.
Note: Extracted Text fields in load files are not supported and cannot be mapped as the Text path, these documents will need to be ran through the Create Text Task.
Viewpoint comes preconfigured with a number of load file templates. Each of these templates and a description of their use are below:
- LFP_IMG_TXT – Used to load the tiffs and text of a modified LFP file.
- Attach_Range – Used to update parent/child relationships by completing the Primary Key Field and Parent Doc Reference fields.
- LST – Used to update the searchable text renderings of files. [Format: BegDoc,Path to text rendering]
- Child_Docs – Used to load an LFP containing parent/child relationships (C/D).
- Inbound Production – Used to load a standard Concordance OPT file.
Maintenance Scripts#
Maintenance Scripts can be used within Viewpoint to run pre-configured or custom C# scripts over processed data. This open-ended approach allows users to have a large amount of flexibility in how Viewpoint operates within their environment. The following scripts come pre-configured with Viewpoint:
- Rebuild Indexes – If your database has high fragmentation or you are getting ‘time out’ errors, this script will force your processing and review project SQL databases to have their indexes rebuilt. Note: This process should happen nightly in pre-planned maintenance scripts and only be necessary in certain circumstances where a high volume of data processing has occurred in a single day.
- Create Placeholder Text Files – If a production requires a text file for every document, but certain documents don’t have text files (slipsheeted files, files with no OCR text found, etc.), this process will create a text file that says ‘No text extracted’ for every selected document.
- Search for Errors (last 10) – Allows a user to run a search to find the 10 most recent errors for this project with a given string of text.
- Exceptions for Documents from Log for last 7 days – Allows a user to see all exceptions for the selected documents for the last week.
- Create Native PDFs from Tiffs – This script is designed for projects where tiff images have been imported, but no native file is available. This script will create PDF files and place them in the EFile directory (used for the stage task) for all selected documents.
- Re-stage errored efiles – This script will attempt to re-stage all selected files. Should only be used in circumstances where a staging error exists.
- Clear Generated Tiffs – This script will delete all tiffs currently generated for the selected files. Once the tiffs are deleted, the Create Tiff status for these documents will be reset to New.
- Clear Created Text Files – This script will delete all text files currently generated for the selected files. Once the text files are deleted, the Create Text status for these documents will be reset to New.
- Update Tiff Page Count – This script will check the number of files found in the tiff directory for all selected documents. The TiffPageCount metadata field will then be updated to reflect this file count. This process should always be run prior to creating a delivery.
- Check and Fix Index Source Format – This script will validate the current Index Source Format of each document. If a document is currently pointed at a non-existent rendering (such as a document with no text, but with an Index Source Format of Text) this script will change the Index Source Format to a valid rendering.
- Change Index Source to SlipSheet – This script will change the Index Source Format for all documents to Slipsheet.
- Change Index Source to Text – This script will change the Index Source Format for all documents to Text.
- Change Index Source to Native – This script will change the Index Source Format for all documents to Native.
- Change Index Source to None – This script will change the Index Source Format for all documents to None.
To Run a Maintenance Script#
- Open up a processing task grid in the Process tab.
- Right-click, hover over Maintenance Scripts.
- Click on the Maintenance Script you would like to run.
- Follow any prompts as directed for the selected script.
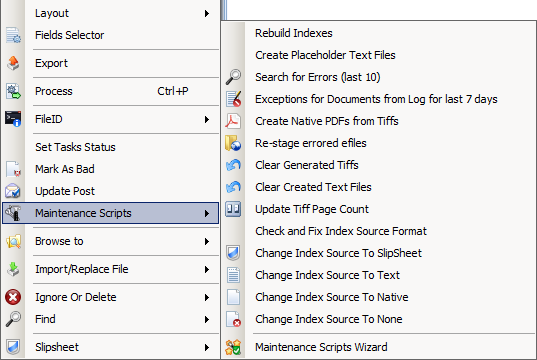
Note: Additional maintenance scripts can be found in the media panel of the Project tab.
To Customize a Maintenance Script#
- Open up a processing task grid in the Process tab.
- Right-click and hover over Maintenance Scripts.
- Click on Maintenance Scripts Wizard.
- In the Maintenance Wizard window, select the script that you wish to modify. The Description field can be used to rename the script. The Include in Menu option can be used to remove unwanted scripts from the Maintenance Scripts right-click menu. The Bitmap field will show the icon currently displayed for that item, but is not currently configurable. When finished, click Next.
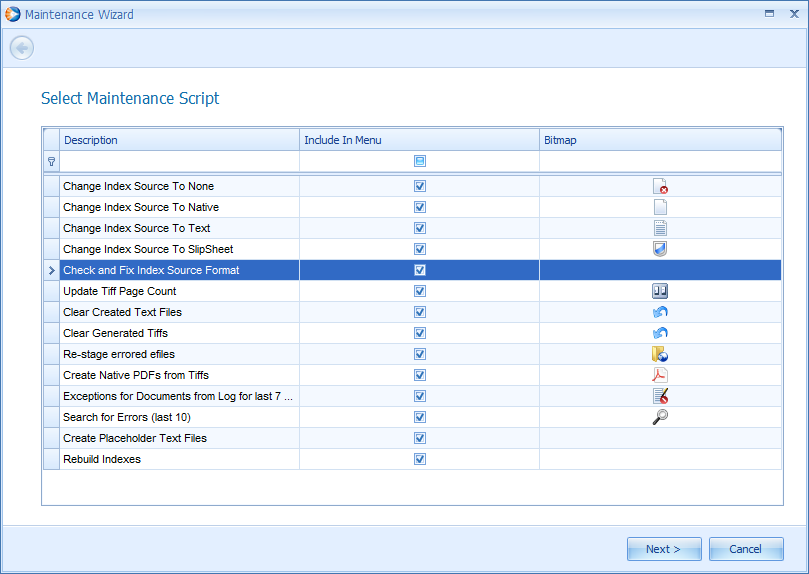
- The next window is grayed out and currently not configurable. Click Next.
- This window shows all of the default processing settings for your project. This screen allows you to modify any project settings for any script you are running on a one-time basis. Typically nothing on this screen requires configuration. When finished, click Next.
- The final window will show you the C# script that is being run within Viewpoint to currently complete the selected task. If any tweaks or changes to this script are required, simply make them in the provided area. Once your changes have been complete, click the Verify button to ensure that the code changes are still operating normally. Click the Execute button to attempt to run the verified code over your data set. To finalize and save the changes to your Maintenance Scripts, click Finish. To cancel the modifications, click Cancel.
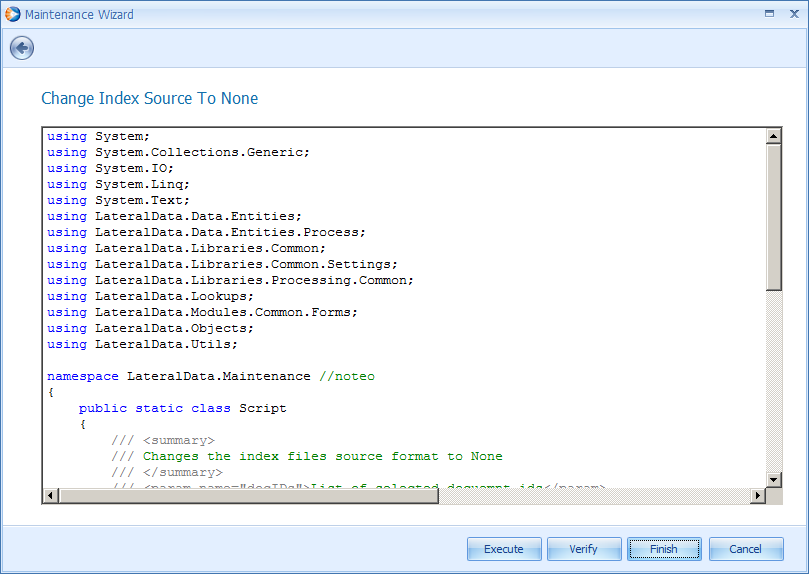
Connectors#
Viewpoint Connectors allow for the collection of data from specific web based data repositories. Using this functionality, data can be collected and processed directly from the web and into Viewpoint.
Choosing Collectors for Processing#
The workflow for processing data through connectors is nearly identical to the workflow for processing native files. The only difference is the steps needed to choose your data source. To load files using any Connector you will need to be on the Catalog tab. From there, click on the + button on the far right of the Path field as shown in the screenshot below.
Note: Connectors must be turned on by the CLCS team before they can be used for data processing. If the + sign is not present in your environment, please send a request to CLCS to have Connectors turned on.
On the Catalog Source Wizard window that appears, you will be able to select one of the Connectors for data processing. Click the appropriate collector and then click Next.
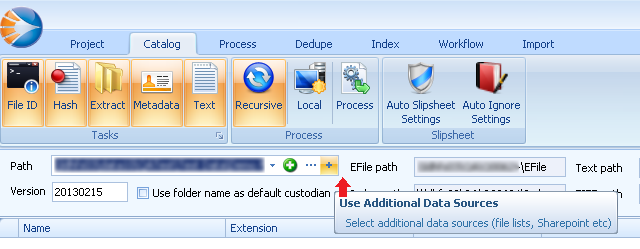
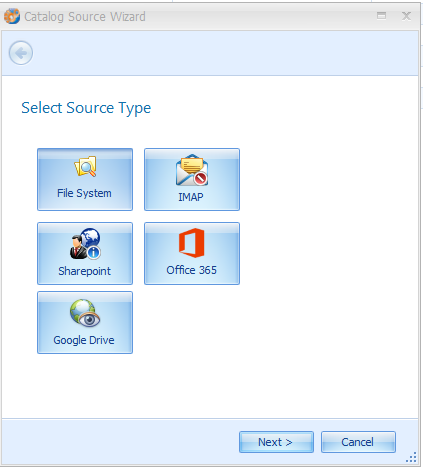
The next page will be used to input information for loading data for the specified connector. After inputting the appropriate information, click Finish. The data for the selected source will now be present in the catalog window. From this point on, documents are processed using the same procedures used for native file cataloging.
IMAP Connector#
The IMAP Connector can be used to collect web based e-mail accounts which support IMAP. The two e-mail account types most commonly collected with this method are Yahoo and Gmail. E-mails collected with this connector are fully compatible with the Relationship Analyzer and E-Mail Thread Analyzer advanced review tools.
To collect an IMAP account, choose the IMAP Connector on the Catalog Source Wizard. On the next screen that appears, type in the server, port, user name and password for the account to be collected.
- For Gmail accounts, the server is: imap.gmail.com
- For Yahoo accounts the server is: imap.mail.yahoo.com
- For both of these e-mail account types and the majority of IMAP accounts, the Port is 993
- After typing in all of the pertinent information, click Finish.
Note: Due to Gmail security requirements, the Google security option “Allow less secure apps” needs to be turned ON for the mailbox to be collected successfully. For more information on this setting, visit https://www.google.com/settings/security/lesssecureapps.
To collect multiple accounts, create a comma delimited text file containing the User Name and Password for all accounts to be collected. Type in the server and port containing the Use the Browse button to navigate to the relevant text file to open it. Then click Finish. An example of a comma delimited file for this functionality is as follows:
Username1,Password1
Username2,Password2
Etc.
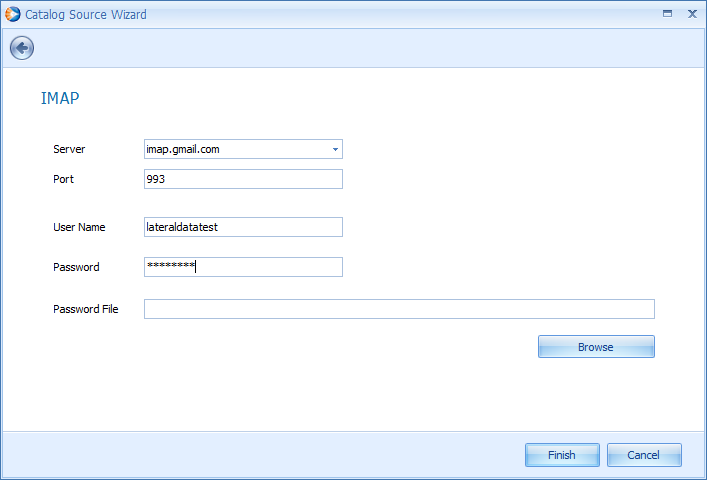
The account’s information is now loaded in the Catalog window. Place checkboxes next to the information you would like to collect. To collect the entire account checkbox the line named [IMAP Server] [Account Name]. Alternatively, you can collect one or more folders or specific e-mails (collected in EML format). Gmail documents can also be collected in formats such as ‘All Mail’ or ‘Starred’ to prevent collecting e-mails that appear in multiple folders. After selecting the appropriate data, assign Custodian, Data Location, and Media Source metadata to the selections prior to processing.
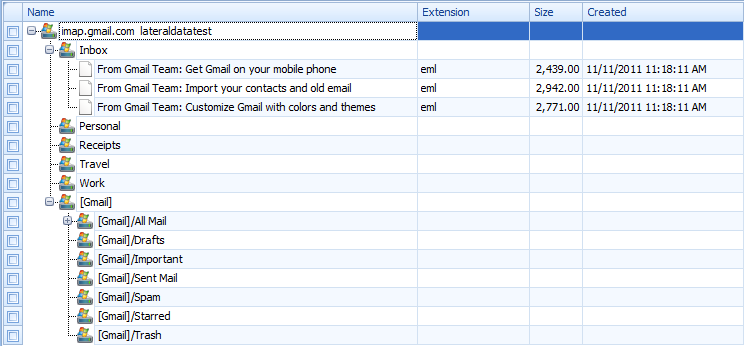
The screenshot below shows an example of Gmail metadata post collection.
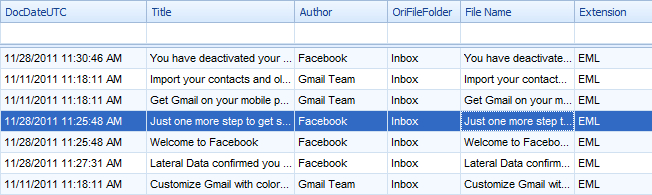
SharePoint Connector#
To collect a SharePoint account, choose the SharePoint Connector on the Catalog Source Wizard. On the next screen that appears, type in the URL of the site to be collected and the username and password of the user whose credentials will be utilized. The Test Connection button can be used to verify that the selected user has access to that site. If no error message occurs, the selected user can access this site. If an error message occurs, that means the current user does not have access to that SharePoint site. Click Finish after the connection has been confirmed.
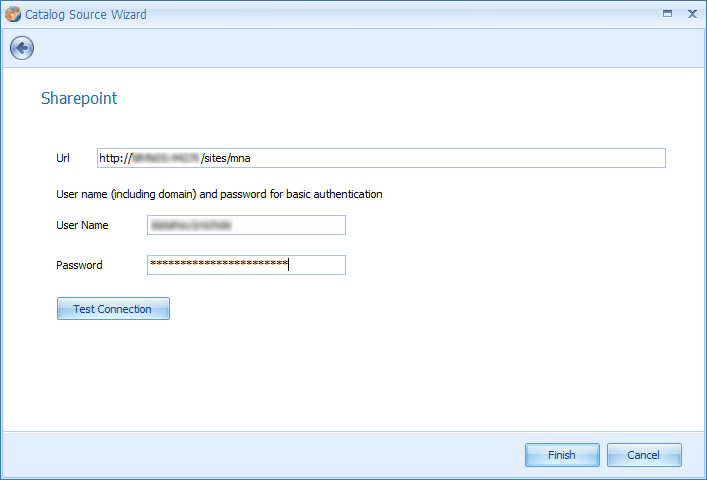
All information the current user has access to on the SharePoint site is now loaded in the Catalog window. Place checkboxes next to the information you would like to collect. To collect the entire account checkbox the line containing the SharePoint address. Alternatively, you can collect one or more folders or specific files. After selecting the appropriate data, assign Custodian, Data Location, and Media Source metadata to the selections prior to processing.
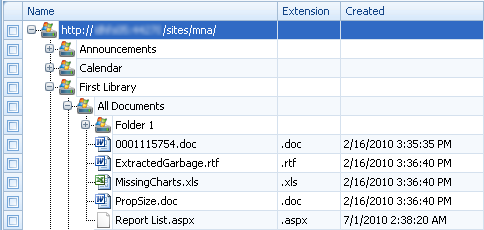
The following screenshot shows an example of SharePoint document metadata post collection.
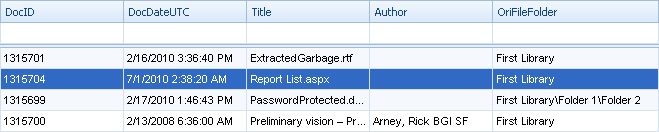
Office 365 Connector#
- To collect Office 365 account, choose the Office 365 icon on the Catalog Source Wizard. A login screen will appear in the window:
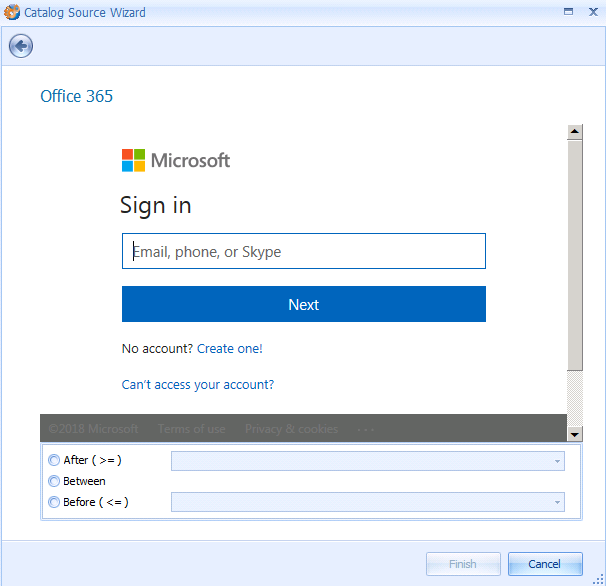
- Type in the O365 email address, click Next, and then enter in the account’s password. If the credentials are correct and Viewpoint can successfully connect to Office 365, the window will display that the login was successful.
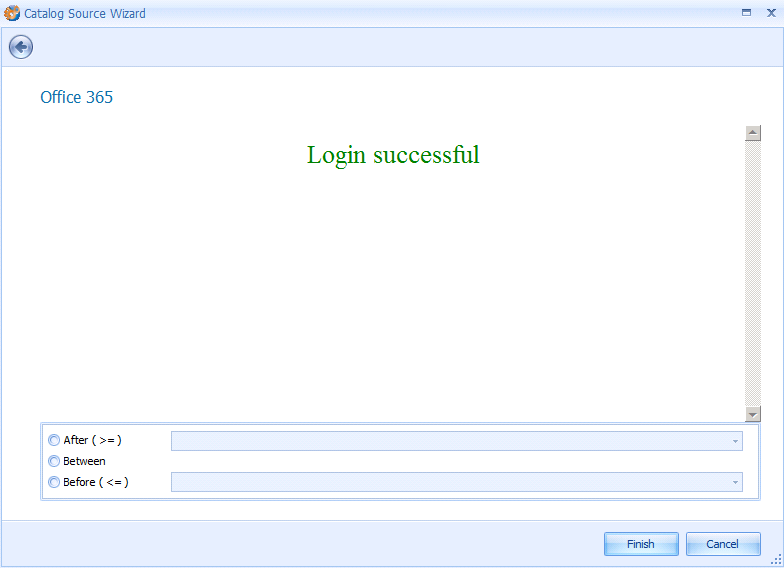
Note: For enterprise accounts, an administrator may need to grant permission to the ConduentOfficeExplorer app using Office 365 Cloud App Security. Please refer to the linked Microsoft article on the topic.
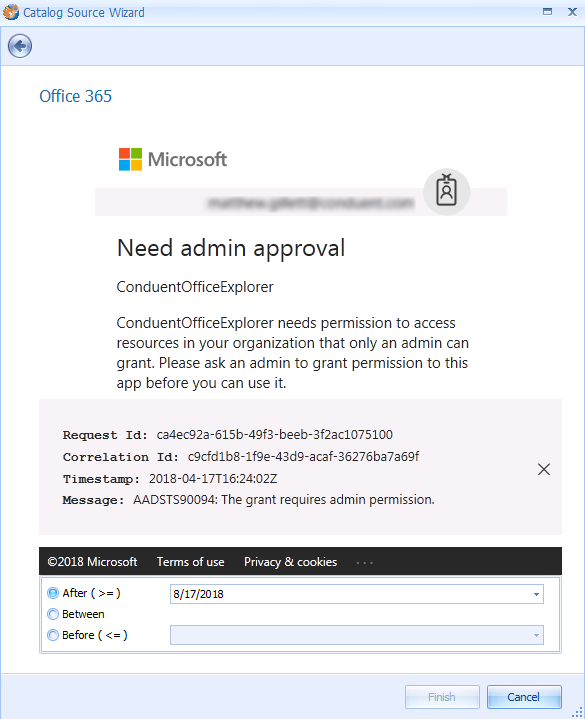
- Enter a date filter, if necessary. Click Finish.

- The wizard will close and the mailbox folder structure will be displayed. Collected emails will be in .eml format and downloaded in a .zip file.
Viewpoint Glossary#
Term | Definition |
|---|---|
Batch | Option used to send a job to a specific worker(s) during processing. |
Child | A document that has been extracted from another document. |
Connector | A processor that can be used to collect data hosted though online repositories. |
Custodian | Descriptor of who a processed set of data belongs to. |
Data Location | Descriptor of how a set of data was received (FTP, HDD, Thumb Drive, etc.). |
Database | The structure containing all data for a project. In Viewpoint, each project has both a review and processing database. |
Dedupe Set | A grouping of all files found to be duplicative based on the given parameters. Multiple dedupe sets can be present in a project. |
Deduplication | The act of identifying families of documents with exact hash matches to prevent duplicative data review. |
Delivery | The Viewpoint module which controls export and production. |
DocID | A unique number given to each document in the project. |
Document | Any file cataloged by Viewpoint. |
DTSearch | The application used to index files for keyword searching within Viewpoint. |
Event | Describes what actions have occurred to a particular workflow. |
Extension | The characters that describe the expected FileID based on the document's filename. |
Extract | Processing task which involves detecting and staging any document within a document. |
Family | A document and any directly associated extracted contents. |
Field | Document metadata or Viewpoint system information used for sorting and filtering purposes. |
File Category | A grouping of FileIDs based on relevant functionality. |
FileID | Describes the type of document and determines how it will be handled within the Viewpoint application. |
FileID (Task) | Processing task which involves detecting the associated application and function of a document |
Filters | Options that restrict displayed documents based on user defined criteria. |
Grid | Any display in Viewpoint that contains customizable fields. |
Hash | A unique string created via algorithm that represents a document for use in deduplication. |
Hash (Task) | Processing task which involves determining the hash of submitted documents. |
Ignore | Function that prevents a document from being posted to the Viewpoint review environment. |
Index | Function that allows documents posted to review to be keyword searched. |
Job | Encompasses all data simultaneously submitted for a series of processing tasks. |
Layout | The unique customization of panels, viewers and fields set by a user. |
Local | The act of completing a processing job on the computer running the processing application, rather than the worker machines. |
Maintenance Script | A configurable C# macro used for performing specific data processing tasks. |
Media | A subset of a scope. Each e-mail container (PST, NSF, etc.) within a scope will become its own media. All files not originating from an e-mail container will also become one media within the scope. |
Media Source | Descriptor of what kind of data was received (E-mail archive, Forensic Image, Sharepoint, etc.). |
Metadata | Descriptive information about a documents elements or attributes (name, size, data type, etc.). |
Metadata (Task) | Processing task which involves the detection of application specific metadata. |
Panel | Any window that can be added or removed from the Viewpoint layout. |
Parent | A document that has had another document extracted from it. |
Post | The act of copying document information from the processing database to the review database. |
Processing | The act of making a set of data available for culling, review and production within the Viewpoint application. |
Project | Organization unit that encompasses all data available within the review and processing applications. |
Quality Control | Viewpoint application that allows for the review and recreation of tiff images. |
Recursive | Enables the system to continually process the complete contents of an archived file. The system will continue to drill down until all archived files have been extracted and processed. |
Redaction | The act of process of covering restricted information for production purposes. |
Review | Viewpoint application that controls the culling, review and production of processed documents. |
Scope | A single piece of evidence that is attributed to a single custodian |
Slipsheet | A document file information sheet that is created for files that cannot be rendered. |
Stage | Processing task which involves finding a file, extracting system file metadata (created date, last modified date, file size, etc.), and creating a copy of the file saved in the standard Viewpoint structure with a unique DocID. |
Text | Processing task which involves the creation of a text rendering of a document by means of extraction or OCR. |
Tiff | Processing task which involves the creation of a tiff rendering of a submitted document. |
View | A subset of a scope or set of scopes. Derived from one or more filters and/or keyword hits. |
Viewer | Type of panel used to display various renderings of a selected document. |
Worker | A computer that completes submitted workflows. |
Workflow | Subset of a job. Each task for a submitted document in a job is one workflow. |
Appendix A – Custom Field Guidelines#
When custom field data is displayed in Review its format can be specified by populating the “Format String” property of the Custom Field. This is done in the Custom Field Dialog, accessible on the Project tab.
Format Strings for Numeric Values#
Standard format strings for numeric values are specified in the Axx format. Here A is a character which denotes whether values should be transformed to currency format, scientific notation, etc. xx is a sequence of digits which indicates the desired number of decimal places or minimum number of digits in the resulting output. The table below gives some used values.
Format String | Description | Sample Format String | Sample Output |
|---|---|---|---|
c | The number is converted to a string that represents a currency amount. | c2 | $1,234.00 |
n | Thousand separators are inserted between each group of three digits to the left of the decimal point. | n0 | 1,234 |
p | A percent symbol, %, will be added to end of the value. | p | 25.00% |
Format Strings for Date/Time Values#
Standard date and time format strings contain a single character. This character defines the pattern used to represent the value (whether and how to display year numbers, month numbers, etc.). The table below lists the most used format characters.
Format String | Description | Sample Output |
|---|---|---|
d | Short date pattern. | 3/12/2003 |
D | Long date pattern. | Wednesday, March 12, 2003 |
t | Short time pattern. | 12:00 AM |
T | Long time pattern. | 12:00:00 AM |
f | Full date/time pattern (short time). | Wednesday, March 12, 2003 12:00 AM |
F | Full date/time pattern (full time). | Wednesday, March 12, 2003 12:00:00 AM |
g | General date/time pattern (short time). | 3/12/2003 12:00 AM |
G | General date/time pattern (full time). | 3/12/2003 12:00:00 AM |
Specific Format Strings for Date/Time Values#
To create format patterns for date and time values, you need to combine the strings listed in the tables below. These strings represent the year, month, day number and so on in different formats. The following table lists the most used strings that can be used to format dates.
Format String | Description | Sample Output |
|---|---|---|
yy | The last two digits of the year. | 03 |
yyyy | Four digit year. | 2003 |
MM | The number of the month. | 09 |
MMM | The short text description of the month. | Sep |
MMMM | The full name of the month. | September |
dd | The number of the day. | 02 |
ddd | The short text for the day of the week. | Tue |
dddd | The full name of the day of the week. | Tuesday |
/ | Date Separator. | N/A |
Time Format Strings
Format String | Description |
|---|---|
hh | Hours. |
mm | Minutes. |
ss | Seconds. |
tt | If present, represents data in AM/PM format. |
: | Time separator. |
Format Strings for Fuzzy Dates#
Fuzzy date strings are needed for dates in which specific parts of the full date are missing or incomplete. For example, a collection of docs may contain month and year information but all are missing the day. In this instance, a ‘0’ should be inputted where the day would go. To create a fuzzy date format string set the Format Type to String and set the Format String as either MM/dd/yyyy or dd/MM/yyyy.