
Sections Review Manual
Manual informationReview Manual
1.1 | Nov 8, 2022 | Added Multi-Value dialog to View Manager Metadata Filter and Custom Fields filter | Technical Writer
Document conventions
Convention | Explanation |
|---|---|
Bold | For file names, commands, fields, menus, options, and window names. |
Courier New | Commands as you should type them. |
Lucida Console | Example output generated by the system. |
Italics | For configuration variables, including variable portions of file names and URLs. Also indicates a document name. |
Note / Blue Callout | The Blue Callout text indicates information that is of special interest or importance, an idea that could be useful or additional information about a product or a feature. |
| The Caution icon along with the text indicates actions that can lead to problems in system operation or configuration settings if the instructions are not followed properly. |

Revision history
This section tracks the initial creation of the document after each major version thereafter.
Ver: | Date | Description | Reviewed / Approved By |
|---|---|---|---|
1.0 | Apr 12, 2013 | Initial Version | Team |
1.1 | Sept 8, 2021 | Rebranded adhering to the latest Conduent brand central documentation standards/guidelines. | Technical Writer |
1.1 | Nov 8, 2022 | Added Multi-Value dialog to View Manager Metadata Filter and Custom Fields filter | Technical Writer |
Dashboard#
The Viewpoint Dashboard is the central point where all modules can be launched. The Dashboard is a graphical user interface useful for simplifying administration and providing statistics for predictive reporting, deadline compliance, resource quantification, end-user productivity, tagging statistics and other detailed reporting required to successfully manage a project. The Dashboard has the flexibility to be locked down so specific users can do little more than open the Review application.
The Dashboard contains six adjustable reporting features. The project list is static and cannot be removed from a user’s layout. Each user can customize his/her layout to view only certain panels or a template can be set to apply the same layout to all users.
Available Dashboard Panels#
- Project List – Listing of all Projects a user can access. Always visible.
- Automation Summary – Provides a high-level look at the current status of Automation. The List tab displays the number of documents in each Automation level and how many are available, checked out, or completed. The User Stats tab displays the number of documents each Automation user currently has checked out and how many they have already completed.
- Document Extensions – List of all document extensions and their corresponding counts. Available in list or chart form.
- Issue Statistics – Graphical representation of issue tag count.
- Production Statistics – Graphical representation of production tag count.
- Project Overview – Lists the number of custodians, scopes, Views, and documents per selected Project.
- Source Selector – Folder tree list of a Project’s Views and corresponding production tag counts. User can select a view here to display when opening any Viewpoint module.
- User Productivity – Displays tagging rates of all users within a specific Project. Filterable by hour, day, week or month.
Viewpoint Layout#
Resize a Panel#
You can resize docked or floating panels. Docked panels display a thick border, called a splitter, between the panel and the rest of the work area. Dragging the splitter allows you to increase or decrease the size of the panel. For floating panels, drag any border or corner to resize its length and/or width.
To resize a panel:
- To resize a docked panel, drag the splitter between the panel and the work area.
- To resize a floating panel, drag a border or corner until the panel is the desired size.
Move/Dock a Panel#
You can dock a panel vertically or horizontally on the right, left, top or bottom edge of the work area or float it anywhere on top of the Viewpoint window. You move a floating or docked panel by dragging it by its title bar.
When you drag a panel, two sets of icons appear to help you select a position for docking the panel or positioning multiple panels. One set displays icons around the perimeter of the work area and docks the panel at the corresponding edge. The other set, which initially appears in the center of the work area, helps you layer multiple panels in a single stack or position them adjacent to one other.
You dock a panel by dragging its title bar to an icon corresponding to the desired docking position. If you want to float the panel, drop it anywhere on the work area except on an icon.
The following table describes the function of each icon:
Icon | Function |
|---|---|
| Docks the panel/viewer at the top of the work area. If this icon appears within another panel/viewer then it will be positioned above the existent panel/viewer. |
| Docks the panel/viewer at the bottom of the work area. If this icon appears within another panel/viewer then it will be positioned below the existent panel/viewer. |
| Docks the panel/viewer on the left side of the work area. If this icon appears within another panel/viewer then it will be positioned to the left of the existent panel/viewer. |
| Docks the panel/viewer on the right side of the work area. If this icon appears within another panel/viewer then it will be positioned to the right of the existent panel/viewer. |
| Stacks panels/viewers on top of one another in layers. Tabs appear at the bottom of the panel/viewer area for displaying a panel/viewer in the stack. |


Move a Panel#
- To dock a panel, drag it by its title bar and drop it on an arrow icon corresponding to the desired docked position. Release the mouse button when the shaded image of the panel appears in the desired position
- To float a panel, drag it by its title bar and drop it anywhere in the work area, except on an arrow icon.
Display Multiple Panels#
When you open multiple panels, you can display them in any of the following positions
Individual Docked or Floating Panels #
If you dock one panel in a vertical dock (left or right side) and another panel in a horizontal dock (top or bottom), the first panel you dock sizes to the full docking space, while the other panel resizes to fit the remaining docking space.
Stacked in a Single Docked or Floating Panel with Multiple Layers #
Stacked panels layer one on top of another, with the most recently opened panel on top.
The name of each panel in the stack appears in a tab at the bottom of the panel area. Clicking a tab moves that panel to the top of the stack so that you can view it. Both floating and docked panels support stacking. When you move the stack, all of the panels move at the same time.
Adjacent Panels Sharing the Same Docked Area #
Panels can share the same docked or floating area. You can position panels adjacent (side-by-side) to one another in any direction, above, below, left, or right.
Display Adjacent Panels#
- Drag one panel on top of the other until a set of icons appear on top of the dragged panel. The icons that appear on top of the dragged panel correspond to adjacent positions rather than the perimeter of the work area. For example, the Up icon places the dragged panel above the panel under it.
- Drop the panel on the arrow icon corresponding to the desired adjacent position. Release the mouse button when the shaded image of the panel appears in the desired position.
Stack Panels#
- Drag one panel on top of the other until a set of icons appear on top of the dragged panel.
- Drop the panel on the stack icon
 in the center of the icons.
 - To display a panel in the stack, click the tab of the panel.
- To separate stacked panels, drag the tab of the panel you want to move to another location in the work area.
Open a Panel#
- On the Tools menu, position the cursor over Panels.
- In the selection menu, click on the panel to open.
Note: In the panel selection menu, each panel has a corresponding icon to the left of its name. An open panel will have an orange border around its corresponding icon. Any closed panel will not have an orange border around its corresponding icon.
Close a Panel#
- Click
 in the top right corner of the panel, if you wish to close.
Auto-hide a Docked Panel#
There are two behaviors for a docked panel; to always appear on top of the work area, or to hide automatically when not in use. This behavior is controlled by the  Pushpin icon, which appears in the right corner of the title bar for docked panels. The pushpin points down when enabled and points left when disabled. By default, the pushpin is enabled and the panel always appears on top of the work area, sticking the panel to the window. Clicking the Pushpin icon unpins the panel. Three things happen when you unpin a panel; the direction of the pushpin changes, a tab for the panel appears, and the panel disappears into the border of the work area as soon as you move the mouse pointer off the panel. You can auto-hide multiple docked panels.
To display a panel, either point to, or click the tab you want to view, or click the Pushpin icon to disable the auto-hide behavior. For stacked panels, the pushpin controls the pinning actions for all panels in the stack and creates a tab for each stacked panel.
To auto-hide a docked panel:
- On a docked panel, click
 to unpin the panel. The direction of the pushpin points to the left and a tab appears next to the panel with the name of the panel. The panel hides when you move the mouse pointer from the panel.
 - To display the hidden panel, point to the panel tab. Clicking the pushpin tab temporarily sticks the panel to the window.
- To disable auto-hide and display the panel always on top, click
 .
.
Review#
Panels#
Panels are used to perform many common tasks. Viewpoint Review provides the following panels.
- Viewer panel for physically viewing documents for review.
- Source Selector panel for organizing and selecting Views for review.
- Documents panel for viewing documents within a View and filtering documents by metadata.
- Custom Fields panel for viewing custom fields and adding values to those fields, per document.
- Family panel for viewing family members of selected document.
- Doc Notes panel for creating and attaching notes to specific documents.
- Tags panel for tagging documents with production tags and issue tags.
- Organization Codes panel used for administrative tagging purposes.
- View Keyword Hits panel for viewing existing keyword hits created when a View is built.
- Keyword Search panel for creating and viewing keyword lists on the fly.
- Message Board panel for posting announcements and messages viewable to all project users.
- ND Similarity panel for viewing and assigning codes to all documents in a near duplicate family.
- Vertical Field panel for viewing and searching metadata fields of the selected record in a vertical layout.
Layout#
Every Viewpoint window has a fully customizable layout. All panels can be resized, relocated or removed.
Refer the Viewpoint Layout section of this manual for detailed instructions on customizing your layout.
Save Layout#
At any time, you can customize your layout and save it for future use. This will include the location of all panels as well as your selected fields. To save your layout, go to the View menu and select Save Layout.
Reset Layout#
If your layout ever becomes unsatisfactory to your needs, you can always revert to your last saved layout by going to the View menu and selecting Reset Layout. This is the same layout you will see when logging into the application.
Default Layout#
Select Default Layout from the View menu to load the system wide layout set by a Viewpoint administrator.
Note: In the Review window, multiple layouts are supported. The current loaded layout is represented with a check in the View menu. User can save and reset checked layout as normal. There are three layout configurations to choose from, Layout 1, Layout 2 and Layout 3.
Load Shared Layout#
You can also load a layout that has been saved by another user. This is convenient for when users want to show and discuss something in Review, they can load a shared layout so that they are all seeing the same information displayed in the same way.
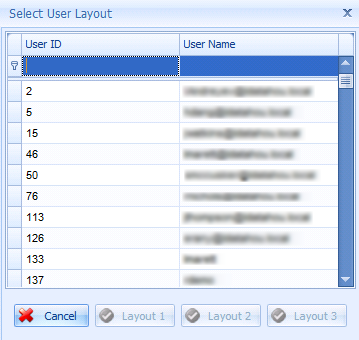
Click the option to open a window that will display a list of all the user records from which to choose. Depending on the level of permissions granted, the User Name field will only be populated for the records that you have permission to view. If you do not have the permission to view the User Name field, the user whose layout you want to load may need to provide you with their User ID number.
Note: You can find your User ID number by clicking the About button on the Review Dashboard.
To load a shared layout, select a user from the list and then using the buttons at the bottom, select which of the user’s saved layouts you would like to load. If one or more of the layout buttons is disabled, it means that user hasn’t saved that layout. A loaded layout is only temporary, unless you choose to save the layout as one of your own.
Reviewing Documents#
Viewer#
The Viewer contains eight distinct document renderings which can be chosen by selecting the appropriate button at the top of the Viewer panel.
- Doc Viewer is the default document viewer which displays the preferred version of each document for review.
- Native Viewer for displaying documents in their native format
- Text Viewer for displaying only the text of a document with all formatting removed.
- HTML Viewer for displaying the HTML version of documents. Keyword hits are highlighted in this viewer.
- TIFF Viewer for displaying tiffs created for production, which can be viewed side by side to the original native document.
- Production Image Viewer for viewing the final version of a produced image. Redactions and bates # stamping will be visible in this viewer.
- Production Text Viewer for viewing the final version of a produced text file. Post redaction OCR and bates #s will be visible in this viewer.
- Redaction Viewer for redacting sections of a document in black or white with relevant labels.
- Native Redaction Viewer for redacting sections of native Excel files with relevant labels.
Source Selector#
In Viewpoint, documents are organized into batches called Views. A View may consist of any number of documents and can be a completely random sampling, structured filter set or any other criteria.
Upon entering the Review window, the first step to reviewing documents it to load your desired View. Notice the Source Selector on the left side of your screen. Depending on your layout, the Source Selector may already be opened, or it may be pinned to the side. If pinned, simply hover over the word Source Selector to expand the panel.
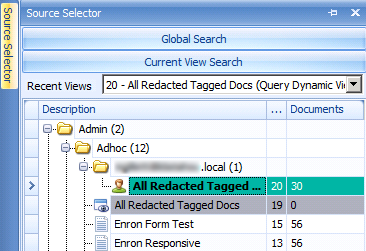
The Source Selector is organized into a tree like folder structure. Depending on one’s permissions, you may have access to all, some or only one folder. Within a folder, there may be a subfolder(s), View(s) or combination of. Navigate to your desired View and click it once to load the documents in the Documents panel. Use the Recent Views drop-down list to quickly find the Views that were most recently accessed.
If the user has been granted the ‘Edit View’ permission, the View can be renamed from the Source Selector by right-clicking on the View clicking the Rename View option.
Dynamic Views#
Views highlighted in gray denote that it is a Dynamic View and will display as having 0 documents. Click the Dynamic View to load it, will automatically launch the process to build the View using the build criteria as set in View Manager. The process will use either the user’s local machine or the Workers, depending on what the user has selected for the ‘Build View on Workers’ option under the File Options settings. The Dynamic View will be rebuilt each time the user selects it from the Source Selector.
When a Dynamic View is selected, a personal version of it is also created in the Adhoc folder under the user’s folder, and will be highlighted in turquoise. These turquoise colored Views will only be updated when the user re-runs the gray Dynamic View.
For more information on setting up Dynamic Views, refer to the View Manager section of this manual.
Documents Panel#
The Documents panel lists all documents contained in the selected View. From this panel, you can filter, sort and group the document list. By default, the documents will be grouped into families. Parent emails will be bolded in black. Select a specific record to render in the Viewer.
Use Ctrl + F to open a search box. Any alphanumeric string inputted in this box will highlight in the panel no matter the field. To search for a phrase input the alphanumeric string with double quotes on each side (Ex. “Samuel Chan”). To search for multiple strings at once apply a space between each (Ex. “Samuel Chan” MSG).
Note: This search functionality can be used in any Viewpoint interface grid.
Vertical Field Panel#
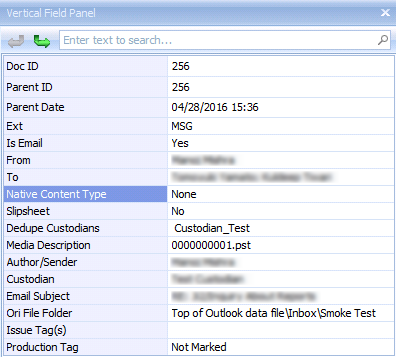
The Vertical Field panel is used to provide a more efficient look at the currently selected document’s metadata field values. Fields can be added by right-clicking in the panel, selecting the Field Selector and dragging the desired field onto the panel. To remove a field, right-click on the field and select the Remove Row option from the menu. All fields with empty values can be hidden/unhidden by selecting the Hide Empty Rows option from the right-click menu. The order of the fields on the panel can be rearranged by clicking on the field name and dragging it to the desired location. Alternatively, the fields can be sorted alphabetically by selecting the Sort button in the right-click menu. The visible list of metadata fields can also be exported to Excel or PDF by selecting the Export option from the right-click menu.
Family Panel#
The Family panel is a miniature Documents panel used to see family members of the selected record. When a record is selected in the Documents panel, the entire family of that record will populate in the Family panel. If a document in the Family panel is selected, the Viewer will render that doc but the original document will stay highlighted in the Documents panel to maintain orientation. Any document selected in the Family panel can be tagged in the manner described in the next section.
By default, only family members included in the same View will be displayed in the Family panel. However, changing the Review option, Load Family From DB to ON, all members of the family will be displayed in this panel, even if some are not part of the current View.
Add and Remove Production Tags#
Add a Production Tag #
- In the Documents Panel, select the document/s to be tagged.
- In the Tagging Panel, select the desired production tag.
- When a production tag is selected, any issue tags associated with the chosen production tag will be visible in an expanded tree view.
- To select an issue tag(s), check the box to the left of each desired issue tag. Note: Issue tags are grouped into categories. Issue tag categories may contain multi or single selectable tags.
- To remove an issue tag(s), unchecked the desired tag(s) for removal.
Each document’s assigned production tag is displayed in the Production Tag field of the Documents panel. When a document is selected, its production tag will be selected in the tagging panel. The color designation for each production tag is visible in the Production Tag Color field.
Note: If desired, user can click the plus sign to the left of a Production Tag in the Tags panel to expand and view the nested Issue Tags without selecting the Production Tag. Expanded tags will remain expanded when switching between documents.
Remove a Production Tag#
- In the Documents Panel, select the desired document/s.
- In the Tagging Panel, select the production tag assigned to that document.
If a document’s production tag is removed, any issue tags assigned to that document will be removed as well. If a document’s production tag is switched, any issue tags assigned to that document that are associated with the new production tag will stick. Any other issue tags will be removed.
Each document’s assigned Issue tag(s) will display in the Issue Tag field of the Documents panel.
Keyboard Shortcuts#
Users may customize keyboard shortcuts for Production Tags and Issue Tags. To create keyboard shortcuts, hit the Keyboard Shortcuts button in the Tags panel. On the left side, you will see the list of all Production Tags and on the right hand side, you will see the list of all Issue Tags for this project. Select a Command and Key for any desired tags. When ready, click the OK button to save your selections. You may now use those keyboard operations to easily assign/remove specific tags to/from documents.
Filter Bar#
Near the top of window, you will see all Production Tags listed with corresponding counts. By selecting a specific Production Tag, the Documents panel will be filtered to that tag. By default, the All filter will be selected when loading a View. It is recommended to select the Not Marked filter to filter down to all documents that have not been reviewed.

Add and Remove Doc Notes#
Doc Notes are for creating and attaching notes to specific documents. These notes are displayed in the Doc Notes field and are viewable to all project reviewers. There is no limit the number of doc notes that can be attached to each document.
Add Doc Notes#
- Select the desired document/s.
- In the Doc Notes panel, enter the note in the top window.
- Click the Enter key.
To delete a doc note from a specific document click the red X located to the right of the corresponding note in the bottom window of the Doc Notes panel.
Selecting Multiple Documents for Tagging and Notes#
Use the SHIFT and CTRL keys to select multiple documents in the Documents panel.
- Using the SHIFT key to select documents
- To select multiple documents that are adjacent, click on the first document. Then hold the SHIFT key while you click on the last document. This will select all of the documents between the first and the last.
- Using the CTRL key to select documents
- Hold the CTRL key while clicking documents to select them. Notice that unlike the SHIFT key, only the documents you click on are selected. If you make a mistake and want to un-select a document, click it again.
- Using a combination of CTRL and SHIFT
- You can select all but one or two documents in a row. First select them all using the SHIFT key as directed above. You can also use CTRL+A which is a shortcut to select all. Then hold the CTRL key and click on the documents you don’t want selected.
Viewing Document History#
To view the tagging history of a specific document, right-click on that document in the grid and select Doc History. The window which pops up will display what action occurred, the old value, the new value, the date that action occurred and by whom. The actions possible in this screen are Production Tag insertion or deletion and Issue Tag insertion or deletion.
Note: The document history of only a single document can be viewed at a time.
Filter and Sort Documents by Metadata#
Each field displayed in the Documents panel is filterable. There is no limit to the number of filters you can apply within the documents grid.
Filter Documents by a Specific Field#
- Type the desired filter text in the blank cell located between the column header and the document list.
- If desired, use the * symbol to apply a wildcard at the beginning of a filter.
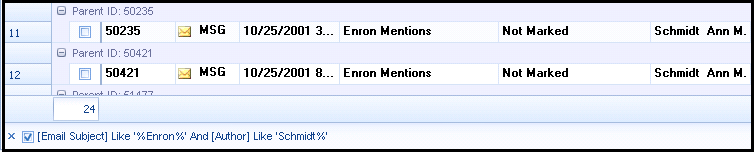
- At any time, you can see the applied filter at the bottom left hand corner of the Documents panel. Hit the X on the left to clear the entire filter.
Search Fields#
All the fields currently displayed on a panel can be searched simultaneously.
Use Ctrl + F to open a search box. Any alphanumeric string inputted in this box will highlight in the panel no matter the field. To search for a phrase input the alphanumeric string with double quotes on each side (Ex. “Samuel Chan”). To search for multiple strings at once apply a space between each (Ex. “Samuel Chan” MSG).
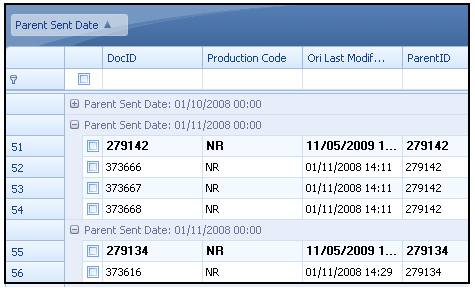
Group Documents by a Specific Field #
Documents in the grid can be sorted by any field on the panel.
- Use the left mouse button to drag the column header of the desired field to the dark blue area above. This area is noted with the text, “Drag a column header here to group by that column.”
- Release the mouse button.
- Documents will now be grouped in a tree like arrangement. Click the small minus sign located to the left of each group header to collapse that particular arrangement.
Add/Remove Metadata Fields in the Documents Panel#
Add a New Field to the Documents Panel #
- Right-click anywhere in the Documents panel.
- Select Field Selector.
- In the Field Selector window, use the left mouse button to click and drag the desired field name to the column header row. Or, to add more than one field at a time, check the box next to the desired fields and then drag to the desired location or double-click on one to add them all to the end of the grid.
- After adding a new field to the documents grid, you can drag each column header to change the arrangement or size each column to your preference.
- In the View menu, click Save Layout, to save your metadata field configuration.
Note: Under the Review section of the File Options settings, there is an option named, “Load Only Visible Columns.” When ON, field columns that are added after a View has already been loaded will display “Not Loaded” in the field values for that column, until the user refreshes the View. This is intended to speed up the process of opening large and complex Views. When the option is OFF, field values will automatically be loaded when the field is added.
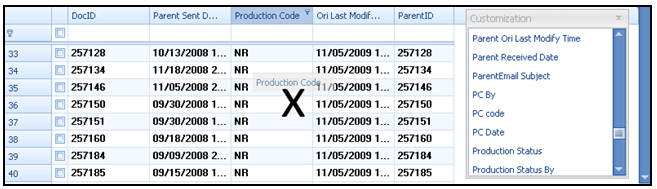
Remove a Field from the Documents Panel#
- Use the left mouse click to drag the desired field below the column header row.
- When the black X appears, release the mouse.
Wrapping Document Panel Fields#
Wrapping specific fields can only be done on the backend by your system administrator. Wrapping a field will cause the text within its cells to appear on multiple lines when the field is adjusted to a desired width.
To wrap a specific field enter a "1" in the WordWrap field of the FieldSelectorObjectField table.
Note: Ability to wrap does not extend to drop down and date/time custom field types.
Lookup Menu#
Lookup by Doc ID#
To quickly search for a specific Doc ID:
- Select Lookup by Doc ID from the Tools, Lookup menu.
- Alternatively, you can use the keyboard shortcut ctrl+`
- Enter in the Doc ID.
- Click Search. A list of all Views that Doc ID is contained in will populate.
- Double-click on the left hand border to load the desired View.
- The View will load with the desired record selected.
Note: When searching for a Doc ID, there is also the Single Document View button, which contains the single doc id for you to open. This is available in instances where the desired document is only in large Views as a way to view the doc quickly without having to wait until an entire View loads. This will create a View in the Adhoc folder called Single Doc View.
Lookup by Production Begin Bates#
To quickly search for a specific Begin Bates (Production) value:
- Select Lookup by Produced Begin Bates from the Tools, Lookup menu.
- Enter in the Bates #.
- Click Search. A list of all Views that Bates # is contained in will populate.
- Double-click on the left hand border to load the desired View.
- The View will load with the desired record selected.
Note: Use this feature to look up any value that would appear in the Begin Bates (Production) field. End Bates (Production) values cannot be searched for. This search box support ‘fuzzy’ searching meaning you do not have to enter in the exact Begin Bates (Production) in order to return any results. To apply a fuzzy search, simply input a ‘%’ at any part of your value which you believe may not be exact. For instance, if you don’t know the prefix use a ‘%’ at the beginning. If you do not know the suffix use a ‘%’ at the end. If you are worried about too many or not enough 0’s enter a ‘%’ in that location.
The Lookup by Production Bates Range feature can be used when the Begin Bates (Production) is unknown but the End Bates (Production) or individual bates # for a page in the middle of the range is known. This search box does not support fuzzy searching. The exact bates number must be inputted to return accurate results.
Lookup by Imported Begin Bates#
To quickly search for a specific Begin Bates (Imported) value:
- Select Lookup by Ingested Begin Bates from the Tools, Lookup menu.
- Enter in the Bates #.
- Click Search.
- A list of all Views that Bates # is contained in will populate.
- Double-click on the left hand border to load the desired View.
- The View will load with the desired record selected.
Note: Use this feature to look up any value that would appear in the Begin Bates (Imported) field. End Bates (Imported) values cannot be searched for. This search box support ‘fuzzy’ searching meaning you do not have to enter in the exact Begin Bates (Imported) in order to return any results. To apply a fuzzy search, simply input a ‘%’ at any part of your value which you believe may not be exact. For instance, if you don’t know the prefix use a ‘%’ at the beginning. If you don’t know the suffix use a ‘%’ at the end. If you are worried about too many or not enough 0’s enter a ‘%’ in that location.
The Lookup by Imported Bates Range feature can be used when the Begin Bates (Imported) is unknown but the End Bates (Imported) or individual bates # for a page in the middle of the range is known. This search box does not support fuzzy searching. The exact bates number must be inputted to return accurate results.
Lookup By View ID / Description#
To quickly search for a specific View ID or Description:
- Select Lookup by View ID / Description from the Tools, Lookup menu.
- Enter in the View ID or Description name.
- Click Search.
- Search results will populate.
- Double-click on a search result to load the View.
Keyword Search within a Populated View#
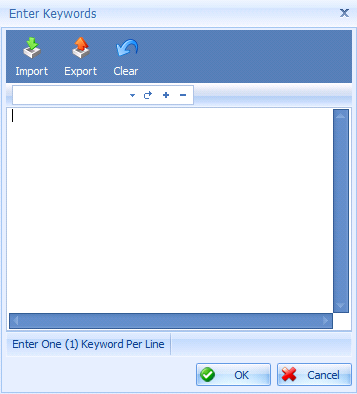
Enter Keywords for a Search#
- Click the Enter Keywords in the top right corner of the Keyword Search panel.
- In the pop up window input your list of key terms (one per line) or you can use the import option to import a list of keywords from a text file.
- Click OK.
Keyword Lists#
Public and private keyword lists can also be quickly imported into the current list by using the dropdown box located under the Clear button. To load a keyword list, select a list from the options in the dropdown box and click the Load button to the left of the ‘+’ button.
Public Keyword Lists#
Public keyword lists are lists that are created through the Keyword Manager in the View Manager. They are available to all users using the Keyword Search panel. These lists cannot be removed as options in the dropdown using the ‘-’ button, but are managed through the View Manager.
Private Keyword Lists#
Private keyword lists are lists that are individual to each user. They cannot be seen or used by other users. To create a private list, add the terms in the space provided and then click the Plus button. Give the list a name and click OK. The new list will then be available as an option in the dropdown box. To remove a private list, select the list from the dropdown options and click the Minus button.
Filter Keyword Search Results by Specific Hits#
- Select whether you want to apply an ‘or’ or an ‘and’ filter.
- Check the box located to the left of each desired keyword hit you wish to filter by.
- Click Filter.
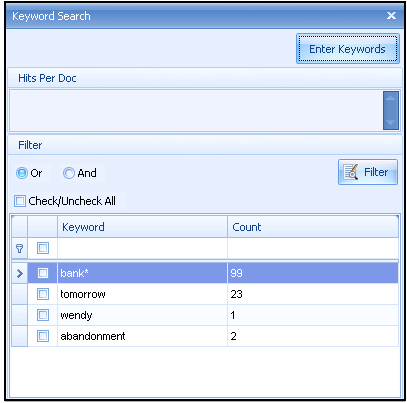
Note: To include family members in your keyword filter turn the Include Family in Filter option ON in the File Options menu.
Keyword Search and Metadata Filter Combination#
Across the Entire Project#
- At the top of the Source Selector panel hit the Global Search button.
- In the window that display, input your list of key terms (one per line) in the Search Terms tab. You can also use the import option to import a list of keywords from a text file.
- Input any metadata filters in the other tabs presents.
- Click the Review button in the top right corner. Your results will populate in the Documents panel.
Across the Selected View#
- At the top of the Source Selector panel hit the Current View Search button.
- In the window that display, input your list of key terms (one per line) in the Search Terms tab. You can also use the import option to import a list of keywords from a text file.
- Input any metadata filters in the other tabs presents.
- Click the Review button in the top right corner. Your results will populate in the Documents panel.
Saving a Search#
- After your search results have populated, hover over the File menu and select Save View.
- Enter in a description.
- Browse to the desired folder by clicking the ellipses.
- Click OK.
Keyword Highlighting#
After a keyword search has been run across one or more Views, Viewpoint highlights each keyword to ease the review of these hits. Keyword highlights are only visible in the HTML viewer. See the How to display and position panels section for instructions on how to open the HTML viewer.
Enable Keyword Highlighting#
- Click the Highlight button in the top left hand corner of the HTML viewer.
- Click Next or hit the ENTER key to jump from hit to hit.
- Click CTRL + ENTER to move backwards from hit to hit.
Note: Keywords run thru the Keyword Search panel will always be highlighted in yellow. Prepopulated keywords will be highlighted in a color designated by the project manager.
Save, Print and Export Documents#
Save Documents#
- Select document(s) to be saved.
- In the File menu, click Save Documents. Alternatively, right-click on the selected documents and click Save Documents.
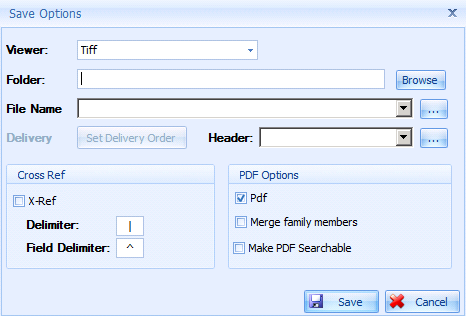
- Click Browse to navigate to the desired save location.
- In the Viewer dropdown option, select the desired Viewer.
- Tiff, Production Image and Redaction options enable the PDF Options section. Checking the PDF box will export the image-based Viewer in PDF format instead of individual images. The Make PDF Searchable option will allow the PDF to be saved in a text-searchable format instead of image-based. The Merge Family Members option will allow the family members of production tiffs to be merged into a single PDF.
Note: The Make PDF Searchable option requires an Impersonation Staging Area location to be used. This location can be set in the Configuration Settings found on the Project tab of the Processing application.
- Selecting the Redaction Viewer will make the Generation option visible next to the Viewer selection. This allows the user to either save the Final version of the redacted document as displayed in the Doc Viewer, or the Draft version of the redacted document as displayed in the Redaction Viewer.
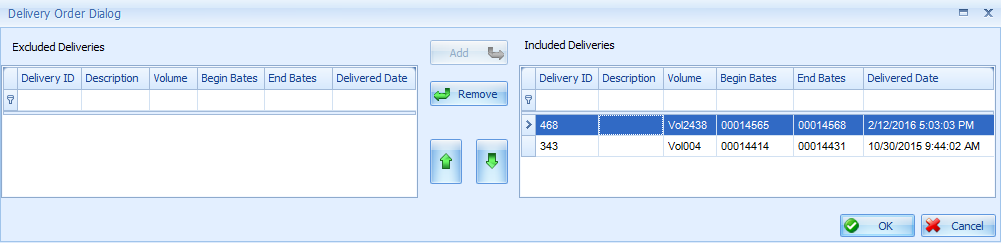
- Production Image or Production Text will enable the Set Delivery Order button. This allows the user to set the order of precedence if the documents were included in multiple deliveries. It will save the first production image/text that exists in the list, starting at the top. If a document doesn't have a production image/text in the first delivery in the list, it will check the next one, and on down the list until it finds a delivery where that document does have a production image/text.
- If Tiff is selected, the Header field is enabled, allowing the user to click the ellipsis to the right of the Header field to select which field(s) to use as a header.
- To name the files that will be saved, click the ellipsis to the right of the File Name field to open the Structure Builder. The top section is where the file name structure is displayed. It can be typed in directly, or double-clicking on fields below will add them to the naming structure at the top. Click OK to continue.
- Check the X-Ref box if a cross reference file is also needed. Adjust the Delimiter and Field Delimiter values as needed.
- Click Save.
Print Documents#
- Check document(s) to be printed.
- In the File menu, click Print Documents. Alternatively, right-click on the selected documents and click Print Documents.
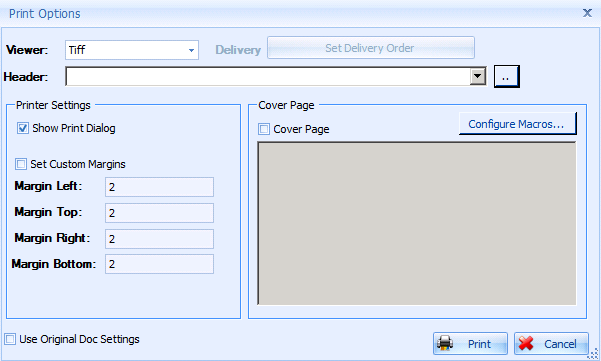
- Select the desired Viewer.
- Selecting Tiff, Production Image, or Redaction will enable the Cover Page section. Check the Cover Page box to create a cover page for the document(s) being printed. Clicking the Configure Macros button on the right side of the Cover Page section, will open the Structure Builder. The top section can be typed in directly, or double-clicking on fields below will add them to the structure at the top. Press Enter in the top section to add a new line to the Cover Page. Click OK to continue.
- Selecting Production Image or Production Text will enable the Set Delivery Order button. This allows the user to set the order of precedence if the documents were included in multiple deliveries. It will print the first production image/text that exists in the list, starting at the top. If a document doesn't have a production image/text in the first delivery in the list, it will check the next one, and on down the list until it finds a delivery where that document does have a production image/text.
- Selecting the Redaction Viewer will make the Notes option visible next to the Header selection. When the Notes box is checked, a page will be appended to the printed document that will contain all of the stored notes per document.
- If desired, add a header to the printed document(s) by clicking the ellipsis to the right of the Header box. In the structure builder, select which field(s) to include in the header by double-clicking the field(s). Click OK to continue.
- To adjust the margins, check the Set Custom Margins box, and enter in the desired margin values in the fields provided.
- Click Print.
Note: By default, the documents will print to your local default printer. Check the Show Print Dialog box to choose from available printers.
Export Metadata#
- Export metadata of the currently listed documents
- Right-click in the Documents panel and click Export. Browse to the desired location, name the file, and click Save.
- Be aware that this will not export the entire View if the number of documents in the View spans multiple pages in the Documents panel. The number of documents per page is set by the Page Size (Families) value in the Options settings.
- Export metadata of the entire View
- Select the Export Metadata option from the File menu at the top of the screen.
- This will open a window to select which Layout to use for exporting. A list of the included metadata fields will be listed, but cannot be changed here. If changes are necessary, go back to the document grid, make the changes and then save the layout. If the list looks correct, click Export. The metadata fields are exported in .XLSX format.
Note: This feature is also available in the Actions menu in View Manager.
Create/Edit/Delete View folders#
Note: All of the below actions take place in the Source Selector panel.
Create a Folder#
To create a new folder, right-click on an existing folder and select New Folder. By default, Drag and Drop is selected. If a folder is not Drag and Drop then new folders cannot be created within it nor can it be deleted.
Edit a Folder#
To edit an existing folder, right-click on an existing folder and select Edit Folder.
Delete a Folder#
To delete an existing folder, right-click on an existing folder and select Delete Folder.
Create Personal Views#
To create a personal View, right-click on an existing folder in the Source Selector panel and select Create View. Type in a description.
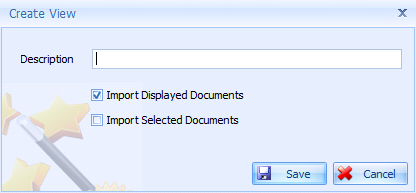
To automatically add all the documents currently displayed in the Documents panel, check the ‘Import Displayed Documents’ option and click Save. To automatically add the documents that are currently selected in the Documents panel, check the ‘Import Selected Documents’ option and click Save. Leave both boxes unchecked if you want to start with an empty View and drag-and-drop documents into the new View later on, as needed.
Note: The option that is checked by default can be changed in the File Options menu. In the Review section of the menu, change the ‘Include Docs in New View’ option to either, ‘Displayed’, or ‘Selected.’
To add documents to the new View, select the desired documents in the Documents panel. Hold down the left mouse click on the left-side number column, and drag the documents to the new view listed in the Source Selector.
Image Redaction#
Note: In order to redact a document, a Tiff rendering of the document must exist and the user must have the Redaction permission.

Redact a Document#
- To redact a document, select the desired document in the Documents panel.
- In the Viewer panel, switch to the Redaction Viewer.
- Within the Redaction Viewer, there are options at the top to help configure the document before redacting. You can zoom in/out, fit page, or fit to panel width. You can also choose to rotate the loaded page or the entire document clockwise or counter-clockwise.
- By clicking the Show Pages button, thumbnails of each page of the document will populate on the left. Click a thumbnail to jump to that page.
- Select a color from the Draft Color selector at the top-left. The color selector is useful for differentiating redaction draft sets. One reviewer, for instance, can be assigned green, while another could be assigned red.
- Select an option from the Final Color drop down. This will be the color of your final redacted segments.
- Using the Label box, type in or select from among the existing redaction labels and select a font size.
Note: If using a global Form, users can type in a custom label or select from any existing redaction labels. If using a non-global Form, users can only select from the labels in the drop down list. Available labels are controlled from the Redactions tab in the Forms Manager.
- Holding down the left-click button on your mouse, drag a box around the portion(s) of the document to be redacted. You can draw multiple boxes on each page of the document.
- To make adjustments to the size or placement of a redaction, deselect the Draw button and click on the redaction. Click and drag the redaction to move it, or adjust the size as needed. To change the label, draft color, or final color, refer to the Modify Redaction section below.
- A preview of your redactions can be seen in the Doc Viewer.
- Actual redactions will only occur upon the time of delivery.
Note: Viewpoint does support multiple redaction sets per document. Redaction sets will be tied to Forms in this case. Upon delivery, redactions will be based on the Form selected. To turn this feature on, the KeyName, ‘StoreFormIDsWithRedactions’ must be added with a KeyValue of ‘True’ to the Configuration table of the project database.
Reset Redaction#
To reset the loaded page, hit the Reset button at the top. To reset the entire document, hit the Reset All button.
Note: Resetting redactions will also affect any assisted redactions that may exist.
Modify Redaction#
- The Draw button must be deselected before the Modify button will become active.
- Enter in the desired changes to the Draft Color, Final Color, and/or Redaction Label.
- Click on the redaction or Ctrl+click to select multiple redactions.
- Click the arrow next to the Modify button and select the desired modification option.
- A confirmation dialog box will appear to make sure you intend to make the change.
Reverse Image Redaction#
- Holding down the left mouse button, drag a box around the portion(s) of the document which should not be redacted for that page. Using the Invert all pages button will do the same but for the entire document.
- Toggle the Invert button on. Except for the section(s) that wasn’t redacted, the document will now be displayed with the selected draft color in the Redaction Viewer.
- Upon delivery when redactions are applied, all sections of the document not covered by the redaction draft will be redacted out.
Assisted redaction#
Documents with assisted redactions can be identified by adding the Assisted redaction field to the Documents panel. ‘Not Approved’ means there is at least one assisted redaction in the document that has not been approved. ‘Approved’ means all assisted redactions in the document has been approved.
Assisted redactions will be displayed with the draft color that was selected when the Automated Redaction job was run. To jump to pages with redactions, select an option from the last drop-down list on the toolbar. ‘Any Redactions’ will jump to the next page with any type of redaction. ‘Approved Assisted Redactions’ will jump to the next page with approved assisted redactions. ‘Unapproved Assisted Redactions’ will jump to the next page with assisted redactions that have not yet been approved.
Assisted redactions should be checked for accuracy of placement and coverage and then approved or unapproved. Redactions can be adjusted before approval by deselecting the Draw option, selecting the redaction and then making the needed adjustments. Assisted redactions must be approved or unapproved by a user before the documents can be produced in the Delivery module; otherwise, an error will be generated in the Delivery module when the delivery is renumbered. Checking the Image Status Message field in the Data Panel will display “Document contains unapproved auto redact sections” for all the documents with assisted redactions that were not approved/unapproved before delivery.
Approving/unapproving assisted redactions can be done on a document, per-page or per-redaction basis. To approve/unapprove all assisted redactions in a document, or group of selected documents, right-click on the selected document(s) and click Assisted Redaction, and then either Approve or Unapprove. To approve/unapprove per page or per redaction, click the arrow to the right of the Approve Auto Redact button in the Redaction Viewer toolbar to see the drop-down options.
- Approve Section(s): This will approve individually selected redaction(s). To select redactions, deselect the Draw option and the click on the redaction. Use Ctrl+click to select multiple redactions. The number in front of this option is the number of assisted redactions in the document that need approval. Approving assisted redactions will change the draft color to orange.
- Approve Page: This will approve the currently displayed page. The number in front of this option is the number of pages in the document with assisted redactions that need approval. Approving assisted redactions will change the draft color to orange.
- Unapprove Section(s): This will unapprove individually selected redaction(s). To select redactions, deselect the Draw option and the click on the redaction. Use Ctrl+click to select multiple redactions. When a redaction is unapproved, the redaction will be removed from the document.
- Unapprove Page: This will unapprove the currently displayed page. All of the assisted redactions on the page will be removed.
Note: For information on setting up and running Automated Redaction, please refer to the Automated Redaction section of this manual.
Copy/Paste Redaction#
Redaction coordinates of a page (not individual redactions) can be copied and pasted to other pages of the same document, or to other documents. Be aware that only the redaction coordinates are copied. The draft color, final color and redaction label will use the user’s current settings when redactions are pasted.
To copy a redaction, go to the page with the desired redactions and click the Copy button on the redaction toolbar.
To paste a redaction, go to the document you wish to paste redaction coordinates into and click the Paste button on the redaction toolbar. A small window will open asking which page of the document to start and end on. Clicking OK will paste the copied redaction coordinates into the page range you selected.
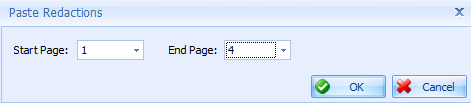
Pasted redactions are viewed as Assisted redactions in Viewpoint. This means that they must be checked for accuracy and marked as either approved or unapproved. Please refer to the Assisted redaction section above for more detailed information on approving/unapproving Assisted redactions.
Copy Redaction from Duplicate Document#
When a user opens the Redaction Viewer on a document that is a duplicate of another document that has already been redacted, the user will be prompted whether they would like to copy over the redactions from the redacted duplicate document to the current document. If more than one duplicate of the document has been redacted, but the redactions are not the same, the user will be notified that there are duplicates with different redactions and specify which DocIDs have the conflicting redactions.
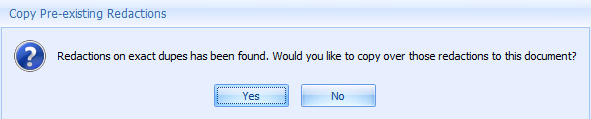
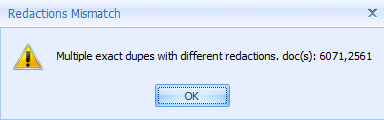
Like the Copy/Paste function, copying redactions from duplicates are also viewed as Assisted redactions in Viewpoint. These copied redactions will need to be approved/unapproved before the redactions will be deliverable. Please refer to the Assisted redaction section above for more detailed information on approving/unapproving Assisted redactions.
Note: Prompts to copy redactions from duplicate documents can be disabled by turning off the ‘Copy Duplicate Document Redactions’ option under File 🡪 Options menu.
Mass Update Redaction Color and Label#
Redaction color, labels and label size can be updated for entire Views by using the Redaction Manager in the View Manager module.
TIFF on the Fly#
Under recommended circumstances, when documents are ready for redaction or production, they are sent to the Viewpoint Processing application for batch TIFFing. It is, however, possible to TIFF single documents on the fly from within the Review application.
Note: In order to enable TIFF on the Fly, at least one worker must be set to ‘Any’ or ‘Review’ in the Use Worker For field in the Worker Selector window of the Workflow tab.
To TIFF a selected document in Review, right-click on that record in the Documents panel and select TIFF.
If the TIFF option is greyed out, the document has already been TIFFed.
When using this option, the user will not be able to modify any TIFF settings. Existing project settings in the Processing application will be used when TIFFing on the fly.
Note: This option should be used sparingly only on normal size documents. Large files, particularly MS Excel documents, will take time to TIFF and are therefore recommended to be TIFFed within the Processing application.
Native Redaction#
Historically, generating image files from Microsoft Excel files can result in large volumes of pages, which can result in increased costs and lengthened schedules. Viewpoint allows users to redact Microsoft Excel files in their native format and, therefore, does not require a Tiff rendering. Excel files are the only file types that can be redacted in native format (.xlsm files are not supported). All other files require Tiff rendering. This feature requires the Native Redaction permission.

Redact a Native Excel File#
- To redact a document, select the desired Excel document in the Documents panel.
- Switch to the Native Redaction Viewer in the Viewer panel.
Note: If you have the Excel application already open, Viewpoint will warn you that Excel will need to be closed.
- Select the cell(s) you wish to redact. Cell navigation and selection works the same as it does in the native Excel application. You can select multiple cells by holding the Ctrl or Shift keys.
- Enter a redaction label in the box along the tool bar.
Note: A label can be applied to every redacted cell or only a single label for redacted cells that are joined. This can be toggled using the Single Native Redact Label setting under the File🡪Options menu.
- Click the
 Redact button on the far left of the tool bar.
- All redactions are initially black with white text and the redaction label will not wrap. To change the redaction color, right-click on the redaction record from the Redaction History menu and select Change Redaction. Click the ellipsis to choose a new color.
Inverse Native Redaction#
This feature provides basic inverse redaction capabilities for native Excel spreadsheets. To perform an inverse native redaction, you must first a place redaction on the cell(s) that are intended to remain readable after the Invert option is used. Clicking the Invert button on the Native Redaction viewer toolbar will then cause all the cells on the sheet that were redacted to be un-redacted, and all the un-redacted cells to be redacted. The Invert button ONLY inverts the currently selected worksheet. This option will not invert the document in its entirety.
Note: The Invert option ignores dependent, precedents, and the formulas connecting them. Be aware that an un-redacted cell that contains a formula which references a redacted cell, may have an altered value. For example, cell A1 depends on cell B1 to calculate its value. Applying an inverse redaction to B1 would cause it to no longer contain a value, potentially impacting the value displayed in the un-redacted cell A1.
Regex#
This feature provides the ability to search for values within the current Excel file and redact the cells those values exist in. The searches can use simple keywords or standard regex syntax. For this feature to function, the document must already have its text extracted in Viewpoint Processing.
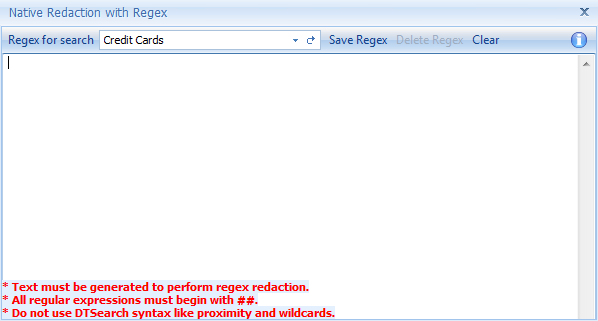
- Regex for Search: List of previously saved custom regex searches and a few pre-saved searches. Select an option from the list and click the semi-circle right arrow icon to load the regex in the text area below. The pre-saved searches cannot be deleted.
- Credit Cards: Common regex used to identify credit card numbers.
- Social Security (With Explicit Dash Separator): Common regex used to identify social security numbers in the common ###-##-#### format.
- US Phone Numbers (no extensions): Common regex used to identify US formatted phone numbers.
- Words or Phrases Template: Regex template for a user to match specific words or phrases. REPLACETHISTEXT and REPLACE THIS TEXT should be changed to keywords or phrases the user wishes to redact. Use the pipe character (|) to separate additional words or phrases.
Note: Regex searches are not case-sensitive, and do not use the same syntax as dtSearch. For more detailed information on regex syntax, as well as tutorials on writing regular expressions, click the blue Information icon on the right side of the toolbar. This will open a browser link to www.regular-expressions.info.
- Save Regex: Saves the contents of the text area. User will be prompted to name the regex. Saved ones will be available in the Regex for Search drop-down list.
- Delete Regex: Deletes the regex currently selected in the Regex for Search box. The user will be prompted to confirm the deletion. The pre-saved regexes cannot be deleted.
- Clear: Clears the text area below. The user will be prompted to confirm the clear.
Regex Text Area#
Regex loaded from the Regex for Search list will be displayed here. A custom regex can be typed directly in this text area but must begin with ‘##’. Simple keywords and phrases can also be entered in the text area without the ‘##’ notation, but each term must be on its own line. DtSearch wildcards and search operators do not function the same way as they do with searching within View Manager. Please refer to the blue Information icon on the right side of the toolbar that opens a link with more detailed information on regular expression syntax and use.
Precedents and Dependents#
There are times when cells are related to each other in Excel through formulas and, it might be necessary to redact related cells, so the contents of the cells can’t be deduced or inferred. Viewpoint can automatically display and redact related cells known as precedents and dependents.
If a selected cell contains a formula, the formula will be displayed in the bottom row of the Native Redaction toolbar.
Example#
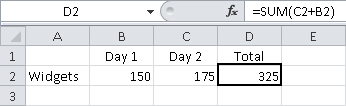
In the following example, cell D2 is the sum of cells B2 and C2. In Viewpoint terms, cell D2 is a dependent of cells B2 and C2. Conversely, cells B2 and C2 are precedents to D2.
Trace Options#
- To view any precedent or dependent cells, select the desired cell
- Select the appropriate Trace Options from the menu. How Viewpoint displays the relationship is based on the cells relationship and location.
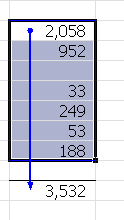
- Same Column/Row – Precedent cells that are sequential to the desired cell and in the same column/row are selected and have a single arrow drawn to the dependent cell.
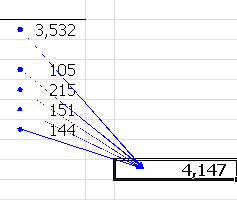
- Different Column/Row – Precedent cells that exist in different columns/rows than the desired cell have individual arrows linking them to the dependent cell.
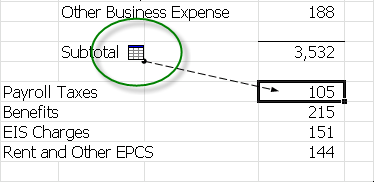
- Different Worksheet – If precedent cells exist on different worksheets, the trace option will display a worksheet icon and a dotted line to the dependent cell.
Remove Trace Arrows#
- To remove any precedent or dependent trace arrows, select the desired cell.
- Select the appropriate Remove Trace Arrows from the menu.
Redact Options#
- To redact precedent or dependent cells, select the desired cell.
- Select the appropriate Redact Options menu.
Note: All precedent and dependent cells will have the same redaction label as the desired cell.
Redaction History#
The Redaction History menu option will open a grid listing all the redactions on a document. The grid will list the primary redacted cell and any precedents/dependents including the worksheet number. The redactions are listed in the order in which they were placed. The right-click menu in the Redaction History menu is where users can find the options to change a redaction color and remove redactions (either individually or the selected redaction along with all redactions that were placed afterward).
Delete a Redaction#
- To delete a redaction, open the Redaction History.
- Select the redaction you wish to delete.
- Right-click and select Undo Single Redaction or Undo Redaction.
- Undo Single Redaction will remove just the selected redaction record. However, removing a single redaction without also removing all subsequent redactions may cause potential redacted formulas and relationships of related cells to not be appropriately reverted. A confirmation window will be displayed before this action can be completed.
- Undo Redaction will remove the selected redaction along with any subsequent redactions.
Unprotected Mode#
It might be necessary to redact information that isn’t strictly limited to a cell (e.g. a graphic or chart). In addition, you might need to leave notes as to why a document was redacted beyond what is available through the redaction label. These tasks can be accommodated through the Unprotected Mode function. Viewpoint will open the document in an editable state, whereas users can make additional changes to the document. Once changes are made, the user will select the Save icon from the menu bar.
Note: The changes are made to the native redaction copy only and NOT the original native. To undo changes, open the Redaction History and “Undo” the line item that is listed with a Sheet value of 0.

Expand Hidden Rows/Columns#
Selecting Expand Hidden Rows/Columns will expand all hidden rows/columns throughout the spreadsheet.
Options#
The following Review options are accessed from the File, Options menu.
Note: Options denoted with a * are only available when the ‘Show Advanced Settings’ box is checked.
- Copy Duplicate Document Redactions: When ON, Viewpoint will search for any duplicate docs with redactions. If found, and redactions on all duplicated documents are the same, the user will be prompted if they wish to copy over the existing redactions to the current doc. If redactions are not the same on duplicate documents, the user will be given a message indicating which documents have different redactions.
- *Display PDFs with Internet Explorer: When ON, PDF files will display in Internet Explorer to resolve some specific viewing issue.
- *Ignore Keyword Colors: All keyword hits will be highlighted in green.
- Include Docs in New View: This controls what option is checked by default when creating a new View from within the Source Selector in Linear Review. Displayed will automatically add the documents currently displayed in the Documents panel to the new View. Selected will automatically add the documents currently selected in the Documents panel to the new View.
- Include Family in Filter: When ON, any filtering performed in the Document or Keyword panels will include any family members as well.
- Load family from DB: When ON, the family panel will be loaded from the database if all the family members are not in the View.
- Load only visible columns: When On, only fields that are visible or required (DocID) will be loaded when a View is opened. Fields that are added will display as “Not Loaded” until the user refreshes or reloads the View. This helps Views open faster and reduces memory consumption.
- *Maximum File Size (MB): Files over the designated size will not render in the applicable viewer. Instead, the user should right-click on the selected document and Open Native.
- Native Office Content Viewer: When ON, the Doc Viewer will automatically render Track Changes, Notes and Comments in the selected document.
- Native Redaction Warning: When ON, a warning message will display when switching to Native Redaction. This warning notifies the user that all currently open Excel documents on the machine running Viewpoint will be closed when beginning a native redaction or opening a native redacted Excel document.
- Open Folder After Saving: When ON, a Windows file browser will automatically open to the folder location after files are saved by the user.
- Page Order By: When paging, documents will be sorted by ‘Parent ID’ by default. This option can be toggled to sort by ‘Begin Bate (Production)’ or ‘Begin Bates (Imported)’ instead.
- Page Size (Families): Designates the number of families to be loaded on each page of the Documents panel.
- *Print Image Intermediate Format:
- Single Native Redact Label: When ON (default), Viewpoint will place a single redaction label for redactions containing multiple joined cells.
- Suppress Native Content Messages: When ON (default), Viewpoint will suppress/hide all Office prompt messages while opening native content through the application.
The following Common options are accessed from the File, Options menu.
- *Advanced dtSearch Logging Mode: When ON, the next time View Manager is opened, advanced dtSearch Logging will be recorded to the user’s machine at %temp%\Viewpoint\dtSearchLog. Warning – this option will create a large amount of data in a only a few minutes; only turn this option on when instructed to do so by Viewpoint Support. Logging will continue until the option is turned off and View Manager is closed.
- Confirm Multi Document Change: When ON, a warning prompt will display before any tags are added/removed from multi documents.
- Confirm Single Document Change: When ON, a warning prompt will display before any tags are added/removed from a single document.
- Family Tagging Mode: When set to Production Tag and Issue Tag, any Production Tags or Issue Tags added/removed to one family member will be populated to all other family members. When set to Production Tag, only Production Tag additions and removals will be copied to the entire family.
- Fast Mode: When ON, after selecting a Production Tag with no nested Issus Tags, the next document in sequence will automatically be selected. This option is compatible with single select Forms only.
- Highlight By Default: When ON, keywords will be highlighted by default within all viewers.
- Highlight HTML Exclusively: When ON, users will only be able to have highlighting turned on for the HTML viewer. Users will be unable to switch to another viewer unless they turn highlighting OFF.
- Include Family Members: When On, family members will be included when building a View or hitting the Review button, or when using the Global Search or Current View Search options from the Source Selector panel. Additionally, this will also cause the Include Family Members checkbox to be checked automatically in the Build Options section of View Manager.
Media player#
Using the Doc and Native Viewers, many multimedia files can be played directly in the application without the need to open the file outside of Viewpoint. If the file is compatible with the player and the Doc or Native Viewer is visible, it will automatically begin playing when the file is selected from the document panel. Viewpoint’s media player makes use of Windows Media Player in the background.
Note: Not all media files types will be compatible with the media player. If the file is unable to play directly in Windows Media Player outside of Viewpoint, it also won’t be able to be played inside of Viewpoint. Users can, however, find and install 3rd party codec packs for Windows Media Player, which will increase the number of supported file types that the Viewpoint Media Player will be able to play.
CaseMap#
With LexisNexis CaseMap integration, documents existing in a Viewpoint Review database can be linked to a CaseMap case.
Note: Viewpoint and CaseMap must be hosted on the same computer for linking to occur. The linkage between Viewpoint and CaseMap is one directional. Documents from CaseMap cannot be linked to Viewpoint.
Link a Document to an Open CaseMap Case#
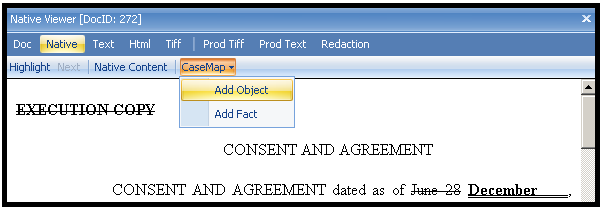
- Select Add Object in the CaseMap menu located in the Doc, Native or Text Viewer.
- Select the desired object type from the drop down.
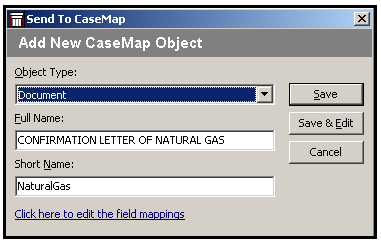
- Select ‘Click here to edit the field mappings’ to add or remove and field mappings upon linkage.
The following Viewpoint fields are available for mapping: Author/From, Beg Bates (Production), FS - Created Date, Date, BCC, CC, To, IsEmail, Subject, End Bates (Production), Ext, Name, MessageID, FS - Modified Date, Notes, ReceivedDate, SentDate, Title.
- Click Save. The chosen document will now be linked to CaseMap.
Note: When linking, documents are mapped to whichever project the user has open in CaseMap. If the user does not have a CaseMap project open or has multiple projects open, link will not occur.
If a document is re-linked, duplicate records will not be created.
If a document is re-linked and any Viewpoint field values have changed since previous linkage, CaseMap fields will be updated.
If a user has made changes to a field in CaseMap, these changes will not be overridden when re-linking a document.
Link a Portion of Text From a Document to a CaseMap Fact#
- Highlight the portion of text for the fact in the Doc, Native or Text Viewer.
- Select Add Object in the CaseMap menu located viewer.
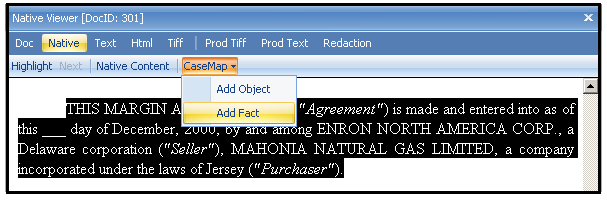
- If the selected document has already been linked to CaseMap, skip to step 5. If the selected document has not already been linked to CaseMap, you will prompted to do so.
- In the ‘Send to CaseMap – New Fact’ window, input any desired attributes and hit OK.
- Once the fact has been sent to CaseMap, you will need to link that specific fact to the desired document within the CaseMap interface.
View Manager#
The View Manager is Viewpoint’s administrative tool. Although other functionality is built into the View Manager, its main function is to create Views or subsets of documents based on different sets of criteria to facilitate the organization of documents or batch out documents in review assignments. Views can be created based on other Views, or from Scopes, which are groupings of media based on custodian information.
Opening View Manager#
The View Manager can be launched from the Tools menu of either the Dashboard or Review.
Creating a New View Folder#
Views are arranged in folders located in the Source Selection tab. Folders may contain subfolders to help organize different review sets.
To create a new folder:
- Right-click on the folder within which you want to create the new folder.
- Select New Folder
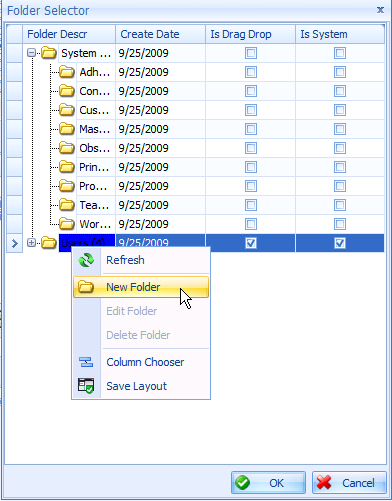
- Input the new folder name in the Description field.
- Uncheck the Drag And Drop box if you do not want to enable this option.
Note: New folders can only be created within existing folders if Drag And Drop is enabled. To enable Drag And Drop for a folder, right-click the desired folder, select Edit Folder and check the Drag And Drop box.
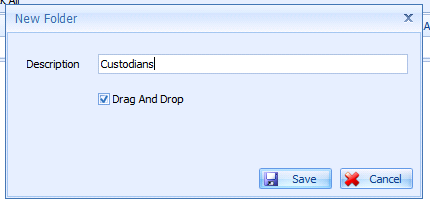
- Click Save and the new folder will be created.
Building a New View#
Views can be built by selecting either a Scope(s) or an existing View(s) as the source. At the beginning of a project, no Views will be created. The initial View(s) must use a Scope(s) for their source.
Note: A View cannot be built by selecting a combination of View(s) and Scope(s). The source must either be one or more Scopes or one or more Views.
Build a New View#
- Click the New View button.
- Select your source from the Source Selector tab.
- Click on each tab and fill in any desired search criteria. The only required tabs are the Source Selection and Main Setup. All others only help to further refine your view creation. Each tab is described in more detail below. Tabs that are used to add additional filters will be highlighted in yellow.
Note: Each tab will be covered in more depth below.
- Click Build when all criteria have been selected.
Edit a View#
- To edit a View, first check the desired View to be edited. Only one View can be edited at a time.
- Click the Edit button. Once in edit mode, you will see the original sources used to build the View in the Source Selection tab.
- Modify the sources or any other needed criteria.
- Click Rebuild to rebuild the View or click Build to build a completely new View without altering the original View.
Deleting a View#
- To delete a View, check the View(s) you wish to delete.
- Click the Delete button.
Note: A View cannot be deleted if you are in Edit mode or it is the source View of a delivery. You will be prompted to confirm your choice before the View is deleted.
Source Selection Tab#
Select a source from the Source Selection tab. When selecting a View(s) as your source you will first need to check the folder on the left. The View(s) contained in that folder will populate on the right. When selecting a Scope(s) as your source you will first need to check one or more custodians from the window on the left and then check one or more of the scopes which populate in the window on the right as seen below.
Main Setup Tab#
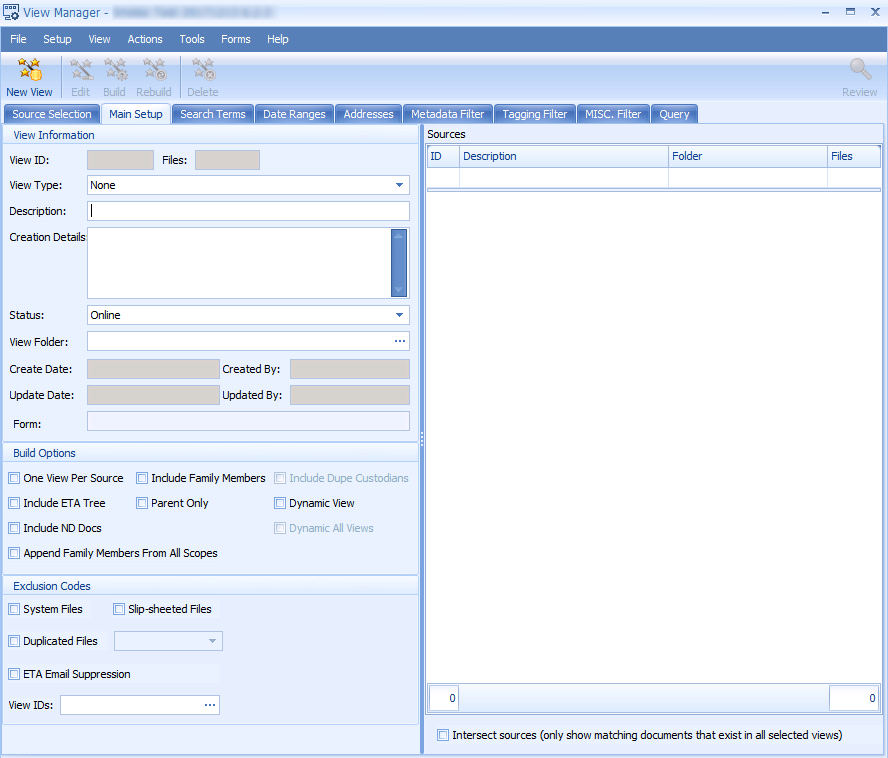
View Information#
- View ID – Denotes the unique ID number of a View.
- Files – Denotes the number of files included in the View
- View Type – Select the type of View you are creating.
- Description – User-created name for the View.
- Creation Details – Optional notes pertaining to the View.
- Status – Set to Online for a reviewer to have access. Offline or Archived views will be accessible in the View Manager but not in the Review. Set to Online by default.
- View Folder – Click the three dots to navigate to the desired View Folder.
- Form – The Form that was used when the View was built.
Build Options#
- One View Per Source – If multiple sources are selected, this option will build one View per source selected based on the inputted build criteria.
- Include ETA Tree - Check this option to include all emails which are part of the same email tree as any which will reside in the View.
- Include ND Docs – Check this option to include other documents that are in the same ND Group as the documents that will reside in the new View.
- Append Family Members From All Scopes – Check this option to include all parent emails and attachments of all documents that will reside in the new View. This option is only enabled for users with access to Scopes.
- Include Family Members – Check this option to include parent emails and attachments of all documents that will reside in the new View. This option is checked by default.
Note: Family members must be included in the source in order to be added to the newly built View.
- Parent Only – Check this option to only apply search across parent emails.
- Include Dupe Custodians – Enabled only when Duplicated Files is checked in the Exclusion Codes section. When checked, the Dedupe Custodians field will be populated in the new View. If the field is not needed, the time needed to build the View can be reduced by unchecking this option.
- Dynamic View – Check this option to designate the View as a Dynamic View. A Dynamic View will automatically rebuild itself each time it is opened in Review. This option will only search the selected source View(s). Dynamic Views are useful for providing users with always up-to-date results for the build criteria, without needing an administrator or advanced user to rebuild the View each time using View Manager.
- Dynamic All Views – Check this option to automatically add all Views to the source. Instead of being limited to the selected source View(s), this will also continue to add any new Views as they are built in the future. This saves time on Projects where data continues to be added to Review by making it unnecessary to continually edit the Dynamic View to include new Views.
Note: Dynamic Views will be highlighted gray in the Source Selection list. These Views contain 0 files because the View isn’t populated until it is selected from Review. For information on loading Dynamic Views in Review, please refer to the Source Selector section of this manual.
Exclusion Codes#
- System Files – Check this option to exclude system files from the View.
Note: In typically situations, system files are not posted to the Review application.
- Slip-Sheeted Files – Check this option to exclude slip-sheeted files from the View.
- Duplicated Files – Check this option to exclude duplicate files from the new view. The drop down menu lists the Dedupe Sets created during processing, one of which must be selected if excluding duplicates. Selecting [Global] will use whichever Dedupe Set has been designated as the global Dedupe Set in the Processing application.
- ETA Email Suppression – Check this option to exclude any emails that are fully contained in another email which will reside in the View.
- View IDs – Enter in comma separated View IDs here to exclude any docs which reside in those Views from being placed in the View you are building. Alternatively, click the ellipsis button to open a source selector and choose the View IDs to be excluded.
Intersect Sources#
Located at the very bottom of the Sources section of the Main Setup tab is the Intersect Sources option. When checked, the new View will only include those documents that all of the selected source Views have in common. This option can be used on up to 50 selected source Views at a time.
Search Terms Tab#
The Search Terms tab is used to input and identify keyword hits that appear in the indexed data.
To use the Search Terms tab, follow the workflow outlined below:
Note: The only required step is #1. All others steps only assist in a more in-depth analysis of your keywords.
- Type in your list of keywords (one per line) in the Search Term field. You can also import a long list of keywords from a .txt file.
- Right-click and select Spelling Suggestions to open the Spelling Suggestions window. Type in the desired search term to populate suggested spellings. Check Hits Only to filter the suggested list of words by only those that appear in the selected source(s). Select any suggestions to be added to your keyword list and select OK to add them.
- Right-click and select Spelling Suggestions to open the Spelling Suggestions window. Toggle to the Index Search tab. Type in the desired term to see a list of other available terms based on your term with a wild card at the end. These are results from the indexed data of your selected source(s). Select any suggestions to be added to your keyword list and select OK to add them.
- Click the Analyze button to display an in-depth result of your keyword list. The resulting grid is broken down into several useful columns.
- Keyword Hit field will display the actual hit produced using dtSearch characters.
- Number of Documents is the number of documents in the selected source(s) that contain the keyword hit.
- Hit Instances is the number of times the keyword hit exists in the selected source(s).
- Check the Exclude check box to omit the This Term Only documents from appearing in the newly built View.
- The Extensions field provides a breakdown of the extension count per Keyword Hit.
- This Term Only is the number of documents in the selected source(s) that contain this keyword hit and none of the other keyword hits.
- Other Docs in Hit Family Count provides the total number of documents that are not hits themselves but are family members of documents with hits AND are in the same View source. This field will not populate unless the Options setting “Analyze Search Terms with Family Counts” is set to ON.
- Total Docs in Hit Family Count provides the sum of the Number of Documents column and the Other Docs in Hit Family Count column.
- Right-click on a search term and select Build View / Review for options on building a View of that term.
- Build View: Builds a View with all the documents in the source that contain the selected search term. When selected, a window will open to input information about the View to be built. Check the Include Family Members box if family members of the documents with hits should be included. Click OK – Go to Review to immediately open the new View once the build is complete. Click OK to build the View but remain in View Manager.
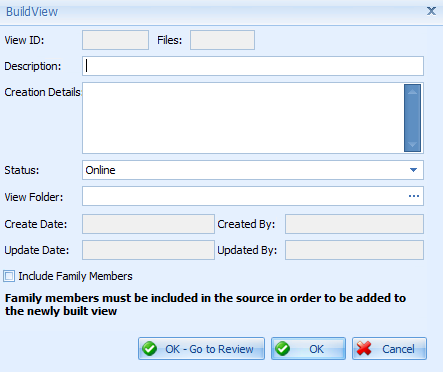
- Build View – This Term Only: Builds a View with all the documents in the source that contain only the selected search term and no other terms in the list. When selected, a window will open to input information about the View to be built. Check the Include Family Members box if family members of the documents with hits should be included. Click OK – Go to Review to immediately open the new View once the build is complete. Click OK to build the View but remain in View Manager.
- Review: Immediately builds and opens an ad-hoc View with all the documents in the source that contain the selected search term.
- Review – This Term Only: Immediately builds and opens an ad-hoc View with all the documents in the source that contain only the selected search term and no other terms in the list.
- Sampler Splitter – Percent of Families: Builds a View using a random sample containing a percentage of the total number of families that contain the selected search term. When selected, a window will open to input a View name and destination folder, as well as the percentage of families that should be included in the new View. Click OK to build the View.
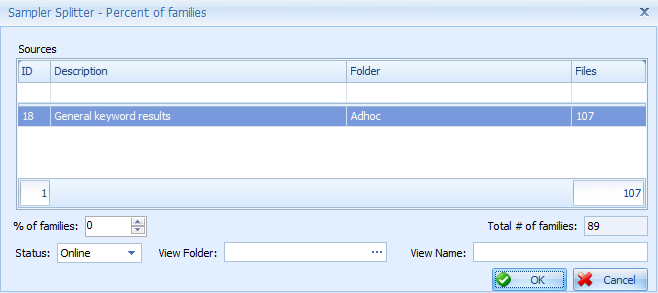
- Sampler Splitter – Number of Documents: Builds a View using a random sample of a specified number of documents that contain the selected search term. When selected, a window will open to input a View name and destination folder, as well as the number of documents that should be included in the new View. Click OK to build the View.
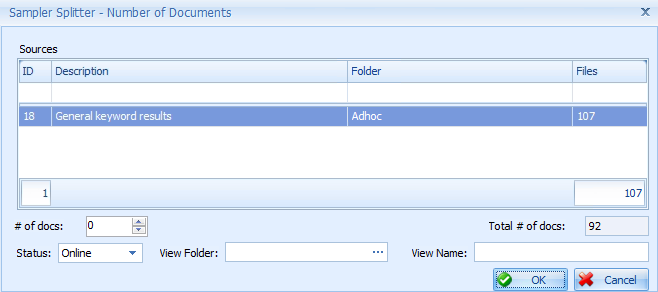
Note: Information regarding search syntax and advanced search options can be found in the Keyword Searching Manual.
Date Ranges Tab#
Use the Date Ranges tab to filter the documents in the new View by date. Documents can be filtered before or after a selected date or between two dates. Check the Use Parent Dates checkbox in the upper-left corner of the tab to force the date filter to use parent dates instead.
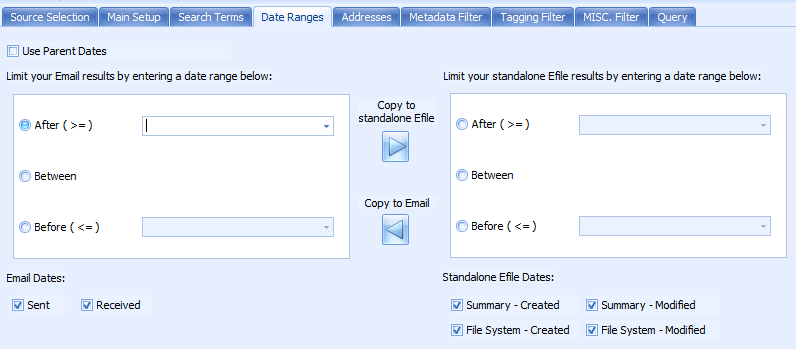
- Select the dropdown on the first date field and a calendar will appear.
- Do the same thing for the second date field if you are running a between query. If you want the docs in the View to be after or before a certain date, input the date in the single appropriate field.
The left date section is strictly for Emails. If needed, you can filter by just Sent or Received dates. By default, both options are checked. The right date section is strictly for loose Efiles. If needed, you can filter by specific date types. By default, all are checked. If the same date range should be applied to both emails and loose Efiles, use the blue copy arrows to populate your inputs from one section to the other.
Addresses Tab#
The Addresses tab is used to filter down to emails down to specific senders, recipients or combination of.
The left side of the tab filters exclusively on the Sender. The right side of the table filters exclusively on the Recipient. The recipients filter can be isolated to the To, CC, BCC or combination of. By default, all three are checked. The top portion of each side is for email address while the bottom portion is for domains.
The Pick List Address Type is used to toggle between an address listing and a domain listing. If searching for full email addresses, it is recommended to use a wildcard within the address list to find all variations. Hit the Pick List button to generate the list of emails/domains for the selected View(s). To populate the search windows, you can select from among the available options in the pick lists, type in your desired search or import from a text file.
If you are looking for specific correspondence between two or more parties, check the ‘Match Sender and Recipient’ box. This will treat the search as an “AND” search and only return documents where the sender(s) and recipient(s) match. Leaving the box unchecked will act as an “OR” search and return any document that has the sender(s) or recipient(s).
Near the top-left corner of this window, you will notice an Exclude check box. Select this option to exclude the inputted emails from the resulting View.
Note: When "Exclude" option is selected, all the emails in the resulting View and their family members are excluded, no matter if "Include Family Members" is selected or not.
Metadata Filter Tab#
The Metadata Filter tab is used to filter by metadata criteria. You have the option to input single value or multi-value metadata criteria on this tab. Most stock fields available in the Documents panel can be chosen in the Metadata Filter.
Clicking the Metadata Filter tab displays the pane below.

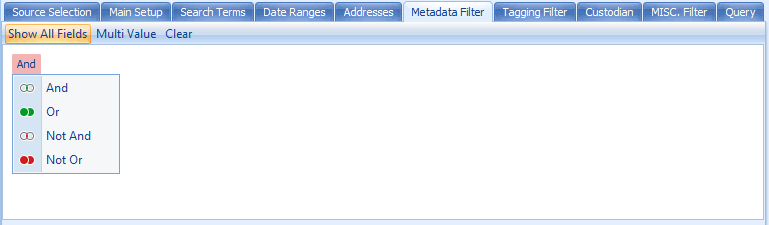
- Click the button to display a context menu. From here you can designate the type of filter to run. You can choose between And, OR, Not And and Not Or conditions for your filter. To add additional conditions to your filter, click Add Condition.
- Click on the metadata field name to display a menu of additional fields to choose from as shown below.
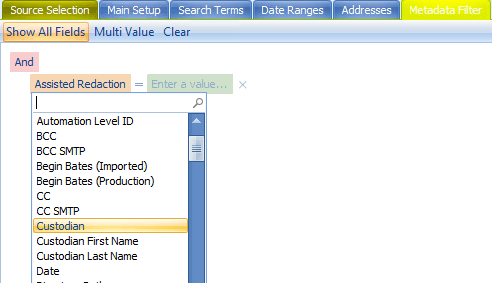
- Click on the existing condition to access additional condition modifiers as show below.
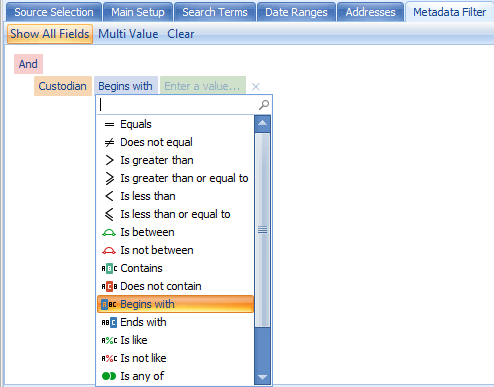

- Click on and enter the value you are looking for in that condition.
- To add new groups select Add Group from the original menu.
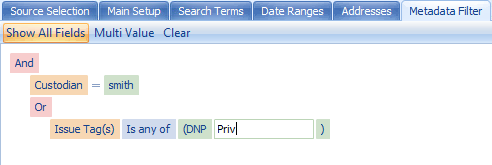
- Modify the connectors as needed – you may choose from And, Or, Not And and Not Or.
Multi Value - The Multi Value functionality of the Metadata Filter allows users to enter a list of values all at once. The screen below is displayed when you click the Multi Value button.
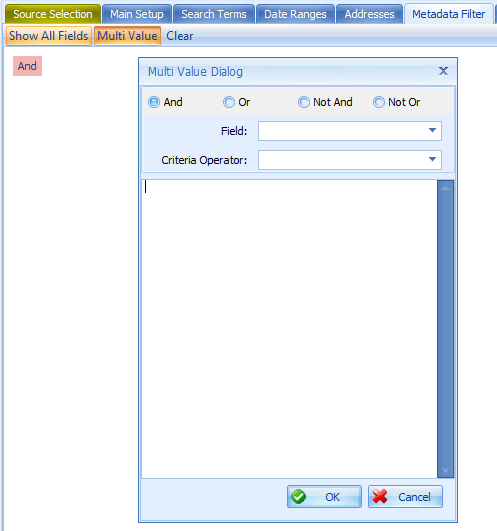
- Click on the drop down to choose the appropriate field.
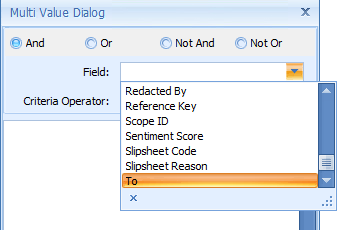
- Select operator criteria by clicking the drop down.
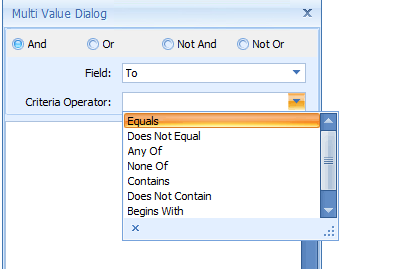
- Paste the list of values you have and click OK.
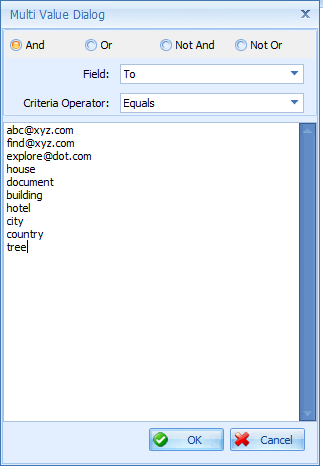
- List of values will be populated as below.
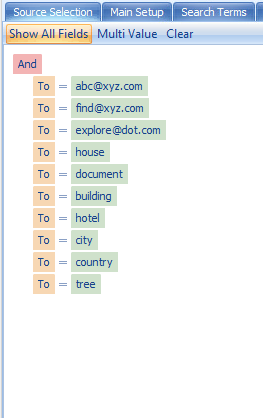
Tagging Filter Tab#
The Tagging Filter is used to filter documents by Production Tag, Issue Tags, and/or Organization Codes.
In the Production Tag panel on the left, select the Production Tag(s) either in the Contains or Does Not Contain sections you wish to filter by. Be sure to select the correct Or or And option at the top of the Production Tag window.
In the Issue Tag panel on the right, select the Issue Tag(s) you wish to filter by. On the left side choose if you wish to include (Contains) and on the right side choose if you wish to exclude (Does Not Contain) specific Issue Tag(s).
In the Organizational Codes window at the bottom, select the Organization Code(s) you wish to filter by. On the left side choose if you wish to include (Contains) and on the right side choose if you wish to exclude (Does Not Contain) specific Organization Code(s).
Note: By default, you will see the ‘Exclusion’ Organization Code checked under the Does Not Contain section. Any document tagged with this code will not appear in the resulting View if this remains checked.
Custodian Tab#
The Custodian tab is used to filter source data based on custodian information. There are three filter options in the dropdown box:
Custodian – Filters results based on a document’s associated custodian. Multiple selections are linked using OR (ex. Custodian1 OR Custodian2 OR Custodian3). This option is essentially the same thing as using Custodian equals ‘xyz’ in the Metadata Filter tab.
Dedupe Custodian (OR) – Filters results based on the possible Dedupe Custodian field values of the Dedupe Set selected on the Main tab of the View Manager. Multiple selections are linked using OR (ex. Custodian1 OR Custodian2 OR Custodian3).
Dedupe Custodian (AND) – Filters results based on the possible Dedupe Custodian field values of the Dedupe Set selected on the Main tab of the View Manager. Multiple selections are linked using AND (ex. Custodian1 AND Custodian2 AND Custodian3).
Note: The Dedupe Custodian options will be empty if [custodian] is the selected dedupe set in the Main Setup tab. This is because [custodian] denotes the use of custodian-level dedupe sets, as such, there wouldn’t be any other values in the Dedupe Custodian to select.
Miscellaneous Filter Tab#
In the Miscellaneous Filter tab you can filter by Doc IDs, Begin Bates (Production), Begin Bates (Imported) and Custom Fields. For the Doc IDs/Bates number panes, type in or paste a list of Doc IDs / Bates numbers you wish to filter by. The Custom Fields filter pane on the right works the same as the Metadata Filters tab discussed above but for Custom Fields, including the Multi Value dialog.
Note: When filtering for Custom Field percentage values, use the decimal notation of the needed value. For example, if searching for ‘25%’, you must enter ‘.25’ in the filter. When filtering for a fuzzy date, all slashes should be removed from filter. When filtering for a date/time value, use the ‘contains’ operator with a % sign on either side.
File Menu#
Options#
All following View Manager options are accessed from the File, Options menu.
Note: Options denoted with a * are only available when the ‘Show Advanced Settings’ box is checked.
- *Address Picker Manual Threshold: Related to the Addresses tab, when the total number of addresses is above the threshold, the system will require you to specify a value before the address picklist is populated. This improves performance for extremely large data sets.
- Analyze Search Terms with Family Counts: When ON, the Other Docs in Hit Family Count and Total Docs in Hit Family Count columns will be populated when search terms are analyzed in the Search Terms tab of View Manager.
- Build Advanced Tools on Workers: When ON, any advanced tool builds will be distributed to available workers. OFF by default.
- Build View on Workers: When ON, any Views being built/rebuilt will be distributed to available workers. OFF by default.
- *Close View Manager on Review: When ON, the View Manager will close after hitting the Review button. OFF by default.
- *Exclude duplicates as default: When ON, the duplicate exclusion option in the Main Setup tab is automatically checked. ON by default.
- *Multithread Analyze: When ON, analyzing search terms will be run as a multithreaded process. On by default.
The following Common option is accessed from the File, Options menu.
- *Advanced dtSearch Logging Mode: When ON, the next time View Manager is opened, advanced dtSearch Logging will be recorded to the user’s machine at %temp%\Viewpoint\dtSearchLog. Warning – this option will create a large amount of data in a only a few minutes; only turn this option on when instructed to do so by Viewpoint Support. Logging will continue until the option is turned off and View Manager is closed.
- Confirm Multi Document Change: When ON a warning prompt will display before any tags are added/removed from multi documents.
- Confirm Single Document Change: When ON a warning prompt will display before any tags are added/removed from a single document.
- Family Tagging Mode: When set to Production Tag and Issue Tag, any Production Tags or Issue Tags added/removed to one family member will be populated to all other family members. When set to Production Tag, only Production Tag additions and removals will be copied to the entire family.
- Fast Mode: When ON, after selecting a Production Tag with no nested Issus Tags, the next document in sequence will automatically be selected. This option is compatible with single select Forms only.
- Highlight By Default: When ON, keywords will be highlighted by default within all viewers.
- Highlight HTML Exclusively: When ON, the Doc, Native, Text, and HTML Viewers will all display the html render of the file so that only the most accurate keyword highlighting is displayed to the user.
- Include Family Members: When On, family members will be included when building a View or hitting the Review button.
Setup Menu #
Tags#
Review teams can setup production tags and issue tags to facilitate their document review. Common production tags include Not Responsive, Responsive or Privileged, while common issue tags might be a confidentiality designation, privilege claim or issue codes specific to the case. Tags are created in the Setup menu in View Manager.
Production tag is the highest level tag and will always be listed at the root of the tagging panel. Usually, a document is assigned one production tag; however, forms can be setup to allow users to select multiple production tags. Issue tags are nested under production tags and grouped into categories. A production tag can have multiple issue tag categories. Also, issue tags can be setup as single (circle) or multiple (square) values.
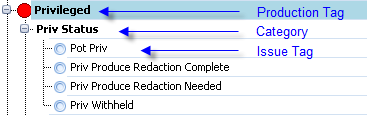
Create a New Production Tag#
- To create a new production tag, select Tags from the Setup menu. This will open the Tag Manager.
- Right-click in the Tags section and select Add new Production Tag or simply click on the Add new Production Tag button in the header.
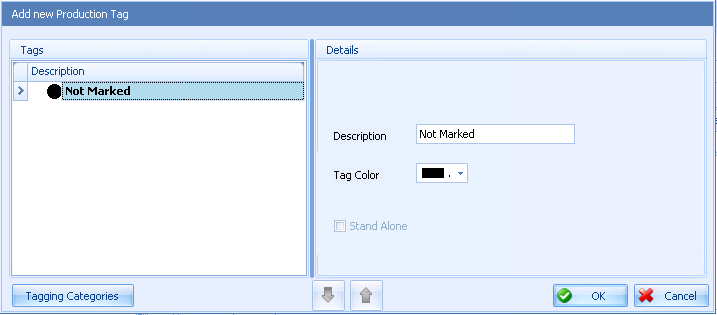
- Give the production tag a Description and select OK. The description can include spaces and special characters except the following: single quote (‘), double quote (“), comma (,), semicolon (;) or colon (:).
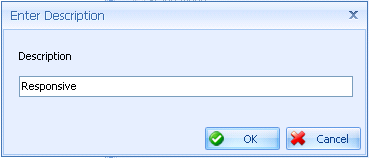
Once the tag is created, select the tag and choose a tag color from the Details section. This will be the color associated with that tag during review and within the analytics. You can also choose to have the tag as a Stand Alone tag. Stand Alone tags are placeholders for issue tags that are not linked to (nested under) a production tag.
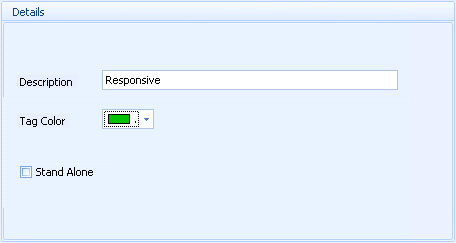
Delete a Production Tag#
To delete a production tag, right-click on the desired tag and select Delete Production Tag. You can also click on the Delete Production Tag button in the header.
Note: You cannot delete a tag that has been applied to a document. To delete a production tag, you must first remove that tag from any associated documents.
Create a New Category#
- To create a new category, right-click on a production tag and select Add new Category or click the Add new Category button in the header. You can also click the Tagging Categories button near the bottom-left of the window.
- Give the category a description.
- To make a category single value, meaning only one issue can be selected within the category, check the Single Value box. By default, categories can have multiple issues selected.
Create a New Issue Tag#
- Once the category has been created, select the category within Tagging Categories.
- On the new line in the Issue Tags section of the window, enter the issue tag description. The same naming conventions apply. This will be the name of the tag as seen by the reviewers.
Note: Viewpoint allows you to export issue tags as part of production. The tags can be exported as data in a load file or as branded text on an image. If you want the export these tags, enter the exported/branded text in the appropriate columns.
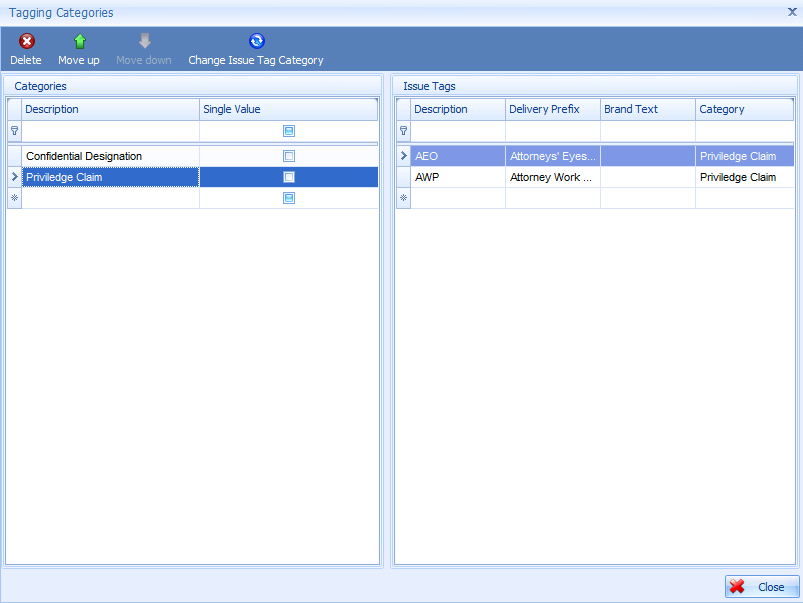
- Repeat this process for every new issue tag within the category.
Delete an Issue Tag#
To delete an Issue Tag, right-click on the desired tag and select Delete Issue Tag. You can also click on the Delete Issue Tag button in the header.
Note: You cannot delete a tag that has been applied to a document. To delete an issue tag, you must first remove that tag from any associated documents.
Delete an Issue Tag Category#
To delete an Issue Tag Category, click on the category to select it and click the Delete button at the top-left corner of the window.
Note: This action will also delete any Issue Tags that are currently listed under the category.
Link Production Tag and a Category#
- If you want to place a set of issues under a production tag, you’ll need to link the category to the production tag. To link a category, simply right-click on the desired production tag and select Link to Category. You can also click on the Link to Category button in the header.
- Select the Category from the categories list.
- By default, all the issue tags associated with that category will be linked to the production tag. However, if there are specific issue tags you want to omit or not link to the production tag, uncheck the box for that issue tag.
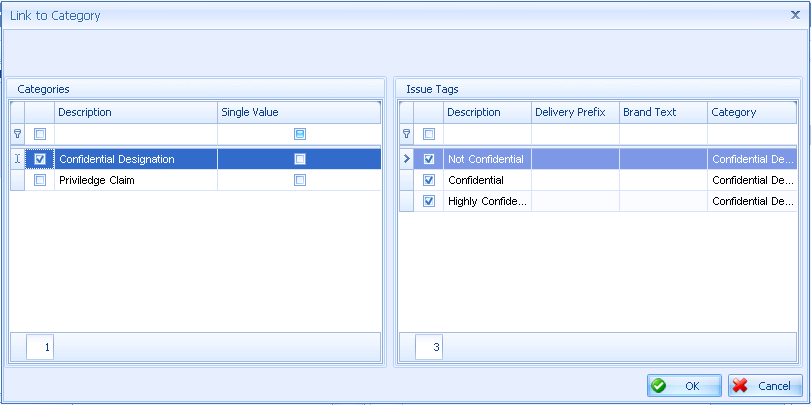
- Click OK.
Other Options#
- Production Tag
- Add Existing Issue Tag – Links an issue tag (and associated category) to a production tag. This would be used if you didn’t want to add an entire category.
- Category
- Add Existing Issue Tag – Allows you to link existing issue tags within a category that were not previously linked to a production tag.
- Remove Category from Production Tag – Will remove the category and all associated issue tags from the production tag. It will not delete the category; it simply unlinks it from the production tag.
- Security Access – Allows you to grant access to certain users or roles. Users without access will not see the category.
- Issue Tag
- Change Issue Tag Category – Users can move an issue tag from one category to another.
- Remove Issue Tag from Production Tag – Will unlink the issue tag from the production tag.
Reorder#
To reorder production tags and issue tags, select the desired tag and click the up/down arrows.

Organizational Codes#
Organizational Codes are used to mass tags documents for administrative purposes.
- Click the Organizational Codes item in the Setup dropdown menu to display the menu below.
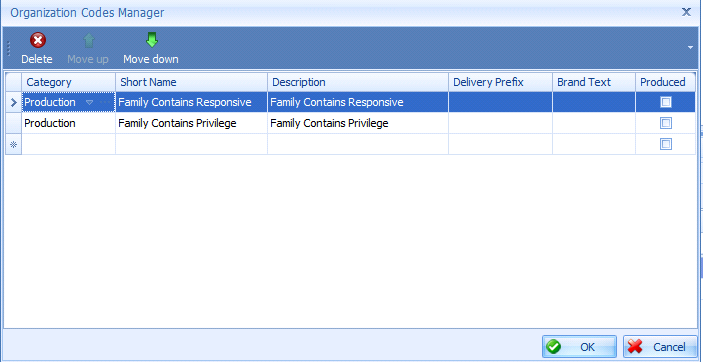
- If needed, select the ellipses in the Category field to create a new category.
- Select a Category.
- Input a Short Name and Description if needed.
- Click OK.
Note: By default, an ‘Exclusion’ Organization Code will be created for all projects. This code should be used to mark documents that should not be included in built Views. By default, this code will be checked in the Does Not Contain section of the Tagging Filter in the View Manager.
Custom Fields#
Click the Custom Fields item in the Setup dropdown menu to display the Custom Fields Manager seen below. Custom fields are used for reviewer coding to input values for fields not contained in the imported load file. All custom fields created will be available in the Field Selector of the Documents panel as well as in the Custom Fields panel as a linear list. Values can be inputted in the Documents or Custom Fields panel.
Note: Custom fields that were created in the Processing application and posted to Review will also be listed here. By default, custom fields from the Processing application are not editable in Review. To make one of these fields editable, it needs to be made editable in the Processing application and then an Update Post performed to make it editable in the Review application.
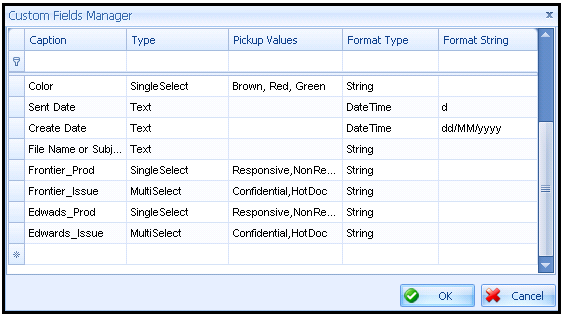
- Type a caption for the desired custom field.
- Select the type of field. You can choose between Text, Single Select or Multi Select.
- If Single or Multi Select is chosen, enter in the list of available selections. Each entry should be comma separated without a space between.
Note: The first entry should be a blank space followed by a comma so users have the option to remove a selection.
- Choose from among the available format types. If pick list was chosen for type, string must be selected.
- The format string is used to specify the formatting of the values inputted. This will most commonly be used for dates. In the screen shot above you can see the most common example, dd/MM/yyyy.
Note: Refer Appendix A - Custom Field Guideline for additional format syntax.
Keyword Lists#
The Keyword Manager is used to build pre-configured keyword lists. To create a new keyword list follow the below steps.
- On the left-hand side, in the Name field, type in a new keyword list name.
- If you do not wish for these keywords to be highlighted in the Review, uncheck the box in the Highlight Always field.
- By default, each keyword in your list will be highlighted in green, however you can choose from among the available color selection.
- On the right-hand side, input your list of terms (one per line) or you can use the import option to import a list of keywords from a text file.
- Hit OK when complete.
Note: After a keyword list has been saved it will be available in the drop down menu located above each keyword entry box. Select the down arrow to display the available keyword lists. After selecting a specific list, select the small horse shoe arrow to populate the keyword entry box with the selected list.
Redaction Labels#
The Redaction Label Manager is used to create and manage redaction labels that are available to users. To access this feature, the ‘Access Redaction Labels Manager’ user/role permission is required.
To create a new list of redaction labels, give the list a name by clicking on the blank line designated with an asterisk and typing a name.
On the right panel, type in one redaction label per line. Alternatively, a text file containing a list of redaction labels can be loaded by clicking the Import button and browsing to the location of the text file.
Global Forms will have access to use all of the labels in all of the redaction label lists. Non-global Forms will only have access to use the redaction labels added to the Form from the Redactions tab in the Forms Manager.
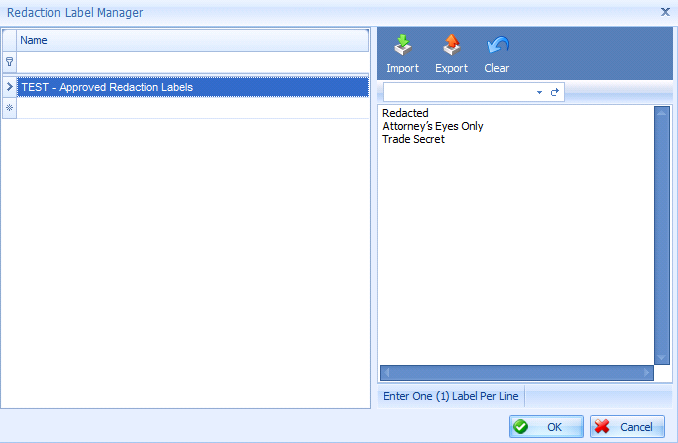
Domain List Manager#
The Domain List Manager is used to manage and categorize email domains within Viewpoint. To access this feature, the ‘Domain List Manager’ user/role permission is required.
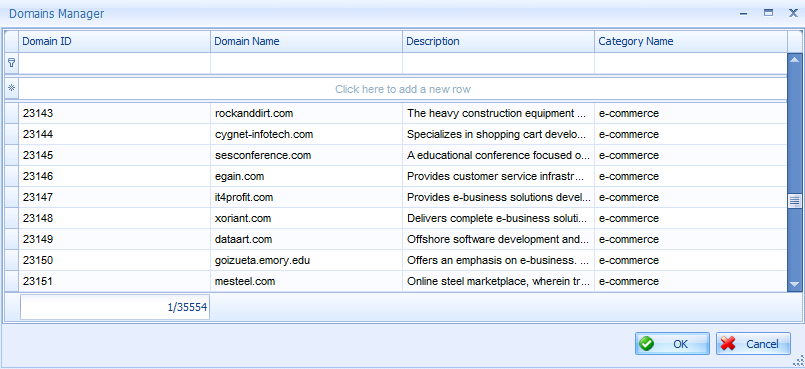
To add a new domain to the list, click the first row of the list where it says, “Click here to add a new row.” Enter a domain name and a description (not required).

Select a Category Name from the list, or click the ellipsis to add a new category.
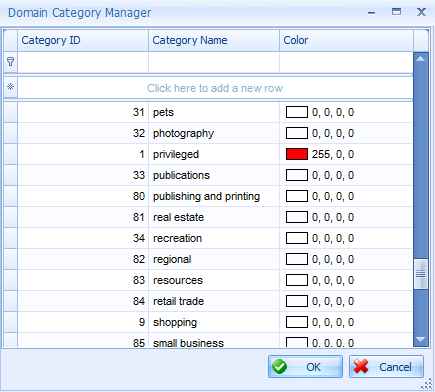
To add a new domain category, click the first row of the list where it says, “Click here to add a new row.” Enter a category name and, if desired, a color. The color selected is the text color of the domain category wherever it is used in Viewpoint. The color is intended to help draw attention to specific domains that, for example, might be privileged. Click Update to save any new entries or changes.
To edit any existing domain or category, double-click the record to open the edit options.
Mass Folders#
Please refer to the Automation and Pipes Manual
Automation Levels#
Please refer to the Automation and Pipes Manual
View Templates#
Please refer to the Automation and Pipes Manual
Forms#
Please refer to the Forms and Tagging Rules Manual
View Type#
The View Type is a simple pick list that allows users to categorize views based on their purpose. For example, all views created to identify documents ready for review might be associated with a “For Review” view type. Or, those views that represent all the data hosted for a matter might get associated with a “Hosting” view type. Associating a view to a type allows users to easily query the database to find all documents related to a certain category. Users can associate views to view types on the Main Setup tab. To create a new view type value follow the below steps.
- Select View Type from the Setup menu
- Enter the new view type on the next available line and hit Enter.
Pipes#
Please refer to the Automation and Pipes Manual
View Menu#
Save Layout#
At any time, you can customize your layout and save it for future use. To save your layout, go to the View menu and select Save Layout.
Reset Layout#
If your layout ever becomes unsatisfactory to your needs, you can always revert to your last saved layout by going to the View menu and selecting Reset Layout. This is the same layout you will see when opening the View Manager.
Default Layout#
Lastly, select Default Layout from the View menu to load the system wide layout set by a Viewpoint administrator.
Actions Menu#
Refresh#
Refreshes your screen.
Copy Dupes Info#
This option is used to copy all tags, custom field entries, notes and redactions of the parent dupe for each document in the selected View(s) to all respective duplicates.
Set Folder#
This option is used to move any checked View(s) to a new folder.
Set Status#
This option is used to change the status of any checked View(s). Views set as Offline or Archived will not be visible in the Review.
Set/Reset Auto Level#
Sets and resets the automation level for any checked View(s). Please see the Viewpoint Automation and View Templates Manual for detailed information about this feature.
Redaction Manager#
To update the redaction color, label or label size, check the desired View(s) and select Redaction Manager from the Actions menu. Make the desired adjustments and click OK. A confirmation box will appear which summarizes the changes that will be made to the selected View(s). Click OK to update the redactions. Click Cancel to go back.
Lock/Unlock#
To lock a View(s), check the desired View(s) and select lock. To unlock a View(s), check the desired View(s) and select Unlock. By default, Views are unlocked. Any documents residing within a locked View are set as read-only. They cannot be tagged or redacted. After a View is produced it will automatically be locked; however an administrator can unlock at any time. Locked View(s) and Documents are designated with a black highlight.
Export Metadata#
This feature gives the ability to export the metadata fields of a View in the order the fields appear in the selected Layout. This feature differs from the right-click Export option available on the document grid in Review by being able to export the metadata fields of the entire View rather than being limited to the number of documents displayed at one time, as set by the Page Size (Families) setting. The metadata fields are exported in .XLSX format.
To use this feature, check the box for the View to be exported and select Actions and then Export Metadata. This will open a window to select which Layout to use for exporting. A list of the included metadata fields will be listed, but cannot be changed here. If changes are necessary, go back to the document grid, make the changes and then save the layout. If the list looks correct, click Export.
Note: This option is also available in Linear Review by clicking File and then Export Metadata.
Tools Menu#
Coding Actions#
- Reset Organization Codes: Select from among the available Organization Codes to reset all documents residing in the checked View(s).
- Reset Custom Fields: Select from among the available Custom Fields that are not set to read-only. Multiple fields can be selected. Completing the action will clear the selected Custom Field values for any unlocked documents within the checked View(s). This option requires the user to have the ‘Allow Bulk Clear Custom Fields’ permission.
- Mass Tagging: Select from among the available tags to mass tag all documents residing in the checked View(s).
- Reset Tags: This option will remove all tagging from documents residing in the checked View(s).
- Reset Issue Tags: Select from among the available Issue Tags to reset all documents residing in the checked View(s).
Splitter Wizard#
The purpose of the Splitter Wizard is to separate one or more Views into logical sub-groups based on user specified criteria. The Splitter Wizard can be accessed from the Tools menu in View Manager. Upon opening you will be presented with the screen below, allowing you to select the View(s) or Scope(s) that you would like to split. Please note that while you can select multiple Views or multiple Scopes, you cannot select both Views and Scopes.
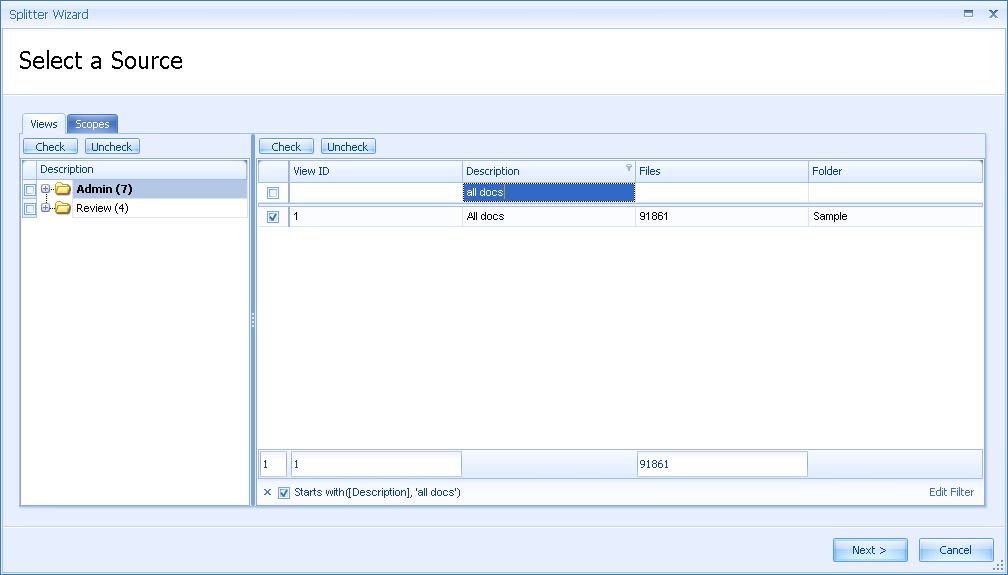
On the next screen, you can select the specific splitter you would like to use, specify splitter specific options, and so on.
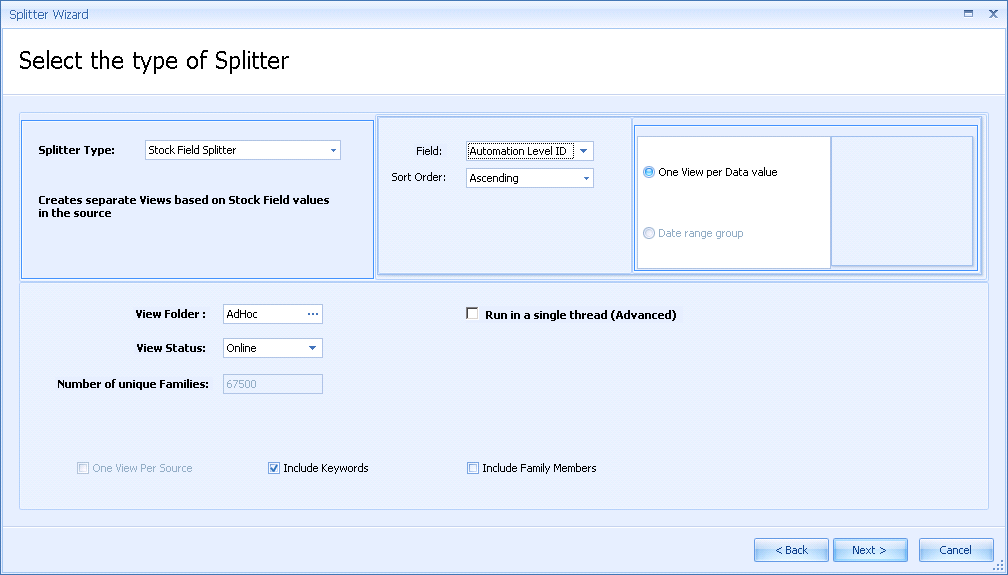
There are seven types of splitters available:
- Number of Views Splitter
- Creates a specific number of Views from a source
- Available options are number of Views, sort order, and sort by
- Email EFile Splitter
- Creates two distinct Views for the Email and EFiles in the source
- Documents are designated as Email or EFile based on the parent document in the family
- Custodian Splitter
- Creates distinct Views for each custodian in the source
- Custom Field Splitter
- Creates separate Views based on custom field values in the source
- With a custom field selected from the dropdown, there are three options available on how split the field values.
- One View per data value
- Date range group (only for fields that are date-based)
- Data value range, which allows the user to set the number of Views that are created
- Keyword Splitter
- Creates separate Views for each keyword in the source
- Stock Field Splitter
- Creates separate Views based on stock field values in the source
- With a stock field selected from the dropdown, there are three options available on how split the field values.
- One View per data value
- Date range group (only for fields that are date-based)
- Data value range, which allows the user to set the number of Views that are created
- Tagging Splitter
- Creates separate Views based on Production Tag, Tagging Category, or Issue Tag.
- This splitter will also create a Not Marked View, which contains the records that have not been marked by any tags in the currently selected Form.
Note: The selected Form matters. Users will only see the Tags which the current Form has access to.
- Production Bates Splitter
- Creates separate Views for each Delivery or Delivery Volume Prefix in the source
- This splitter will only take into account Deliveries that have a status of Done.
- The Deliveries and Folder Volume Prefixes that are visible in the splitter are based on the user’s currently selected Form.
- Documents that were included in more than one Delivery will also be included in each of applicable split Views.
- Documents in the source that have not been delivered will be split into a View named, “No Bates.”
The fields shown in the lower half of the screen are common to all splitters:
- View Folder
- Click the three dots to navigate to the desired View Folder.
- View Status
- Set to Online for a reviewer to have access. Offline or Archived views will be accessible in the View Manager but not in the Review. Set to Online by default.
- Number of unique families
- Displays the count of unique families across all sources.
- One View per source
- If multiple sources are selected, this option will build one View per source selected based on the specified build criteria.
- Include Keywords
- If the sources contain keywords, this option will populate the keywords to the Hits column of the split Views.
- Include Family Members
- Check this option to include parent emails and attachments of all documents that will reside in the new view.
- Run in a single thread (Advanced)
- This option should be left unchecked unless instructed to do otherwise by Viewpoint Support.
The final screen of the Splitter Wizard is used to specify the naming convention for the split Views. The View Description Macro allows entry of both, free text and Splitter, document, or View related fields. Pressing the ellipsis button will show you the View Description Macro fields available for the splitter selected.
After entering a View Description Macro, pressing the Refresh button will display a preview of the Views that the splitter will create. Pressing the Next button will build the Views to the location previously specified.
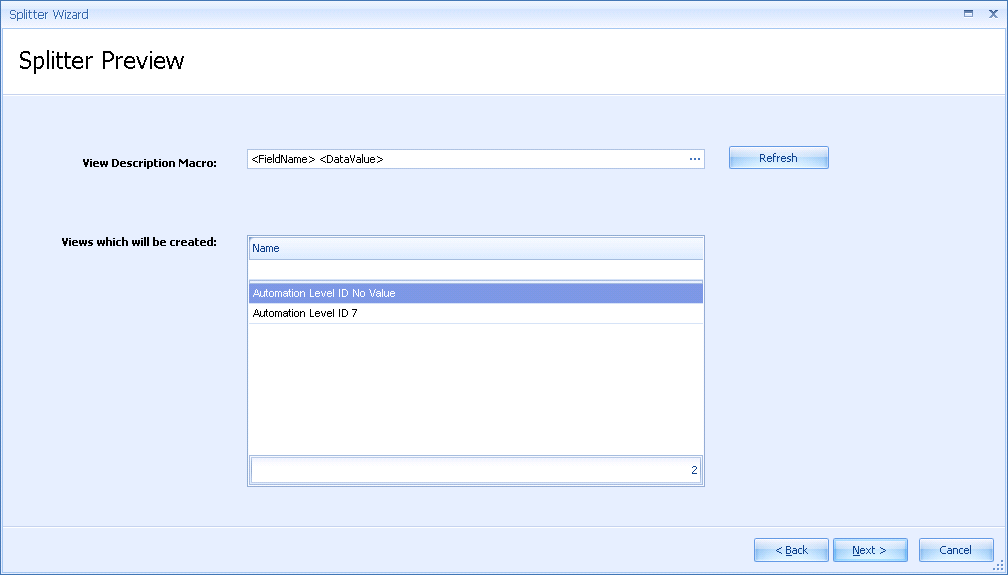
Sampling#
Sampler Splitter - Percent of Families#
- Selecting the Sampler Splitter – Percent of Families from the Tools>Sampling down menu displays the screen below. This feature allows you to create a sample View from a larger view to evaluate the contents of the larger set.
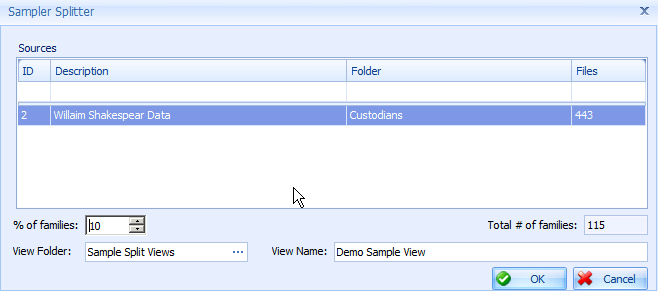
- Select the % of families (or # of docs) that should be included from the overall set displayed in the Total # of families (Documents) field to the right.
- Select the View Folder where the views should reside. Input the desired name for the View.
- Click OK to run the split.
Sampler Splitter – Number of Documents#
- Selecting the Sampler Splitter – Number of Documents from the Tools>Sampling down menu displays the screen below. This feature allows you to create a sample View from a larger view to evaluate the contents of the larger set.
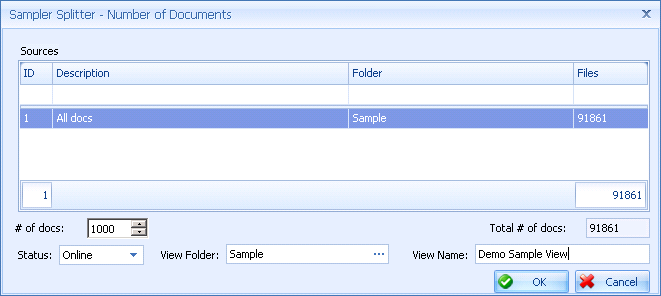
- Select the number of docs that should be included from the overall set displayed in the Total # of docs (Documents) field to the right.
- Select the View Folder where the views should reside. Input the desired name for the View.
- Click OK to run the split.
ND Similarity Viewer#
Please see the ND Similarity Viewer section of this manual for a detailed guideline of the tool.
Email Thread Analyzer#
Please see the Email Thread Analyzer section of this manual for a detailed guideline of the tool.
Concept Analyzer#
Please see the Concept Analyzer section of this manual for a detailed guideline of the tool.
Relationship Analyzer#
Please see the Relationship Analyzer section of this manual for a detailed guideline of the tool.
Bulk Populate Custom Fields#
This tool is used to quickly populate one or more custom fields with user-specified values for all documents within the selected Scope(s) or View(s).
All editable custom fields will be listed in the wizard. Type the new value into the Value field of the custom field. Check the Override box if documents that already contain a value in that field should be overwritten. Check the Clear box to clear any existing values.
Note: Documents that are in a locked state cannot be changed.
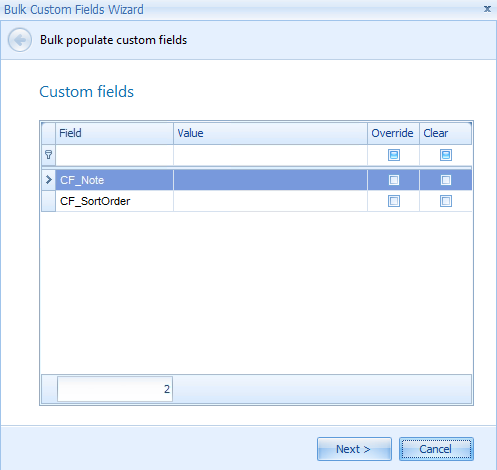
After selections have been made, click Next. The documents in the source will be checked for problems and reported back to the user. Click the Export button to generate a CSV file that contains a listing of DocIDs for the documents that will not be updated. Click Finish to kick off the task.
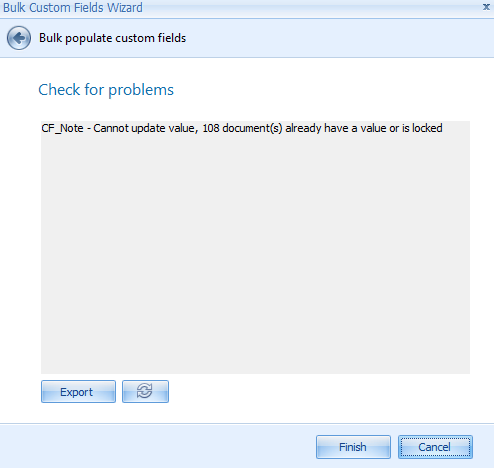
Assisted Redaction#
This tool is used to help automate the process of finding and redacting key terms or patterns, such as credit card numbers and social security numbers. Assisted Redaction utilizes regular expressions (regex) to perform the searches. A user must have the Redaction permission in order to open Assisted Redaction.
To use Assisted Redaction, click the checkbox next to the View in View Manager to select the View that Assisted Redaction will run on. Click Tools and then select Assisted Redaction.
Note: The list of Views in View Manager includes a field called Assisted Redaction Status, which will display New, Error, or Done depending on the current status of the View.
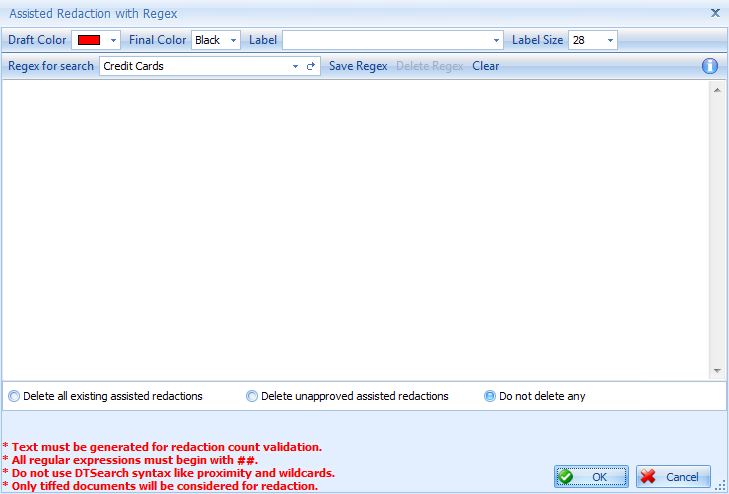
Note: Only documents in the View with generated text and tiffs will provide results.
- Draft Color: Sets the color that the assisted redactions will use in the Redaction Viewer. Select from one of the available colors or use a custom color by clicking the Custom tab and then right-clicking on one of the boxes in the bottom two rows. Select a color or enter in a specific color value before clicking OK.
- Final Color: Sets the color the final redaction will use in the Doc Viewer and production images. The options are black, white, and white with black border.
- Label: Sets the redaction label that will be applied to each redaction. Type directly in the box for a custom label. Click the + to add the label to the list of any previously used redaction labels, which are available by clicking the down arrow next to the + button. To remove a redaction label from the list, select it from the drop-down list, and click the – button.
- Label Size: Sets the maximum font size of the redaction label. Labels will be scaled down in size to fit within the boundaries of each redaction.
- Regex for Search: List of previously saved custom regex searches and a few pre-saved searches. Select an option from the list and click the semi-circle right arrow icon to load the regex in the text area below. The pre-saved searches cannot be deleted.
- Credit Cards: Common regex used to identify credit card numbers.
- Social Security (With Explicit Dash Separator): Common regex used to identify social security numbers in the common ###-##-#### format.
- US Phone Numbers (no extensions): Common regex used to identify US formatted phone numbers.
- Words or Phrases Template: Regex template for a user to match specific words or phrases. REPLACETHISTEXT and REPLACE THIS TEXT should be changed to keywords or phrases the user wishes to redact. Use the pipe character (|) to separate additional words or phrases.
Note: Regex searches are not case-sensitive, and do not use the same syntax as dtSearch. For more detailed information on regex syntax, as well as tutorials on writing regular expressions, click the blue Information icon on the right side of the toolbar. This will open a browser link to www.regular-expressions.info.
- Save Regex: Saves the contents of the text area. User will be prompted to name the regex. Saved ones will be available in the Regex for Search drop-down list.
- Delete Regex: Deletes the regex currently selected in the Regex for Search box. The user will be prompted to confirm the deletion. The pre-saved regexes cannot be deleted.
- Clear: Clears the text area below. The user will be prompted to confirm the clear.
Regex Text Area#
Regex loaded from the Regex for Search list will be displayed here. A custom regex can be typed directly in this text area but must begin with ‘##’. Simple keywords and phrases can also be entered in the text area without the ‘##’ notation, but each term must be on its own line. DtSearch wildcards and search operators do not function the same way as they do with searching within View Manager. Please refer to the blue Information icon on the right side of the toolbar that opens a link with more detailed information on regular expression syntax and use.
Starting an Automated Redaction Job#
After the regular expression text is complete there are three options along the bottom that will determine how the results will be applied to documents that already have assisted redactions.
- Delete all existing assisted redactions: This option will remove any assisted redactions that already exist in a document, regardless of their approved/unapproved status. New assisted redactions will be placed based on the current automated redaction job.
- Delete unapproved assisted redactions: This option will keep any existing assisted redactions that are currently approved but will delete any unapproved redactions. New assisted redactions will be placed based on the current automated redaction job.
- Do not delete any: This option will leave any existing assisted redactions alone and only add new assisted redactions based on the current automated redaction job.
Click OK to start the automated redaction job. The job will be run on Workers that are set to accept Automation Redaction jobs. If the user has the Advanced Worker Selection permission, the job can be batched to a specific Worker. A progress bar will be displayed while the job is running.
Refer to the Image Redaction section of this manual for more information about assisted redactions in the Redaction Viewer.
Review Job Browser#
The Review Job Browser allows a user to view the various jobs which have been launched from the Review application. The Job Browser lets a user see and manage Review jobs without having to access the Processing application.
To access the Job Browser, go to the Tools menu and select Review Job Browser. The list of jobs will be filtered to those for the project you are in. From the Job Browser a user can monitor the progress of each job, cancel a job or view any errors.
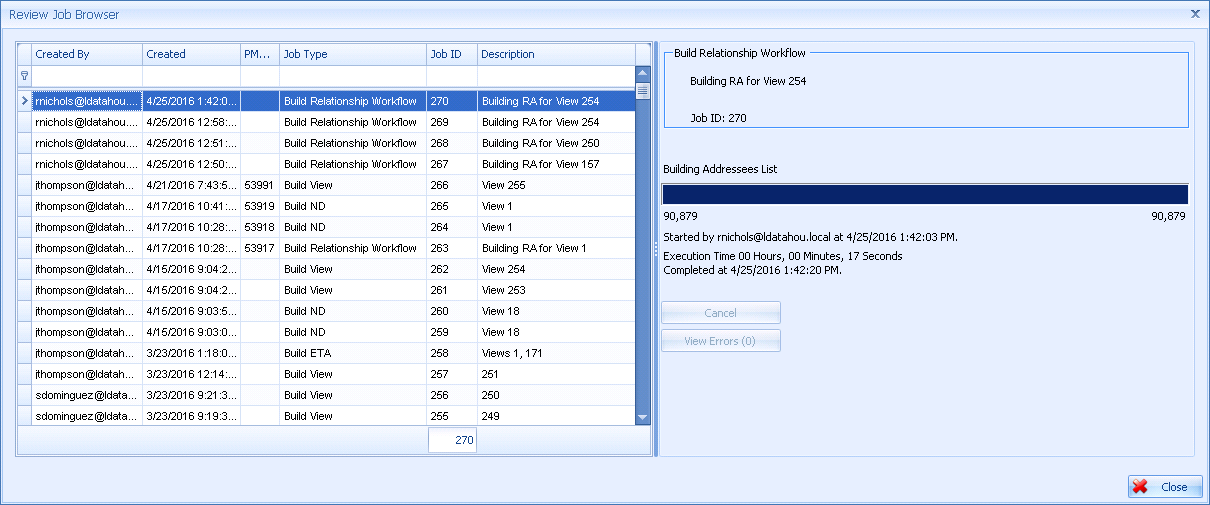
ND Similarity Viewer#
The ND Similarity Viewer (ND) is used for identification and side by side comparison of near duplicate (ND) documents. Viewpoint classifies documents as near duplicates when they are very similar but not identical. Identical documents, classified as duplicates are suppressed by default when building Views.
Build Near Duplicates#
Before using the ND Similarity Viewer, near duplicates must be identified and grouped. Use the View Manager to build ND Groups.
Note: It is recommended to build Near Duplicates for an entire project at once. This will prevent variations in existing ND Groups when groups are built for a new source(s).
To Build ND Groups, perform the following steps:
- In View Manager, check the View(s) or Scopes(s) to build ND over.
- Hover over ND Similarity Viewer in the Tools menu and select Build ND.
- The window seen below will display.
- Set the desired ND Grouping Threshold. By default the threshold will be set to 95.
- If you wish to clear all previously built ND data for the documents in your source, check the ‘Clear All ND data first’ box.
- Click Next.
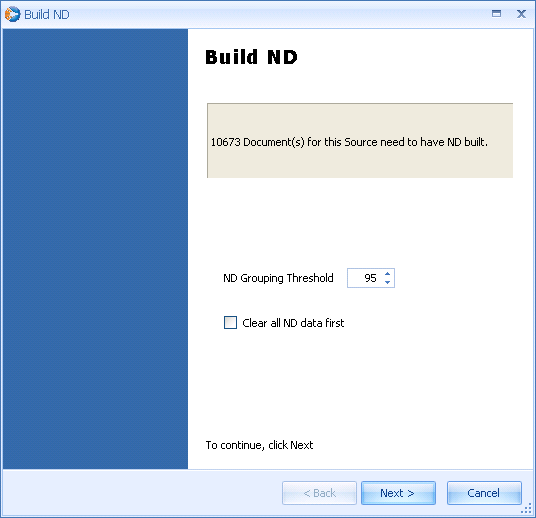
- To have the system check for documents missing hash codes or text files, select ‘Check for documents missing key fields’. If documents are missing key fields, the system will notify the user and give you the option of ignoring those documents or canceling the build.
- To ignore certain blocks of text, check ‘Apply/Define text to be ignored when building ND’. This feature is further described in the Excluded Text section below.
- The Advanced options should be used for troubleshooting purposes only. Changing advanced settings can have serious impacts on the functionality and usefulness of the ND results. Please consult Viewpoint Support before changing these settings.
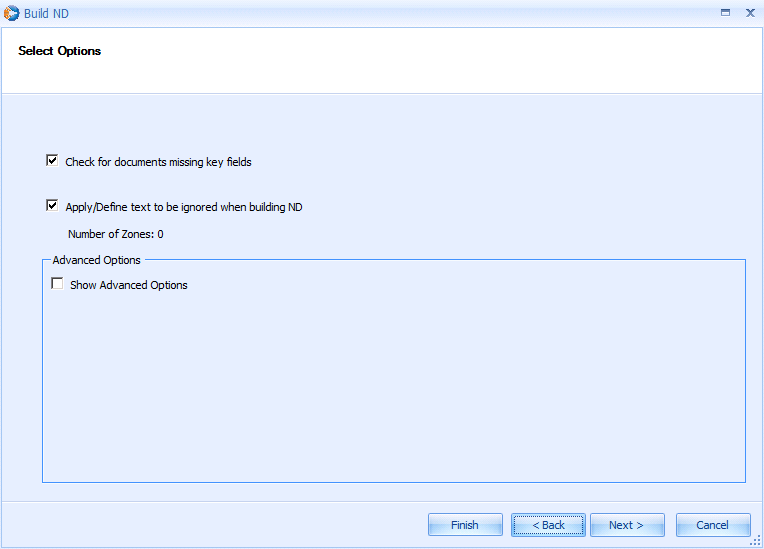
- Select how the job should be built. Users can choose from: Local, On Workers, or a specific Worker from the Worker Selector.
Note: The ability to change how the job is run requires the user to have the ‘Advanced Worker Selection’ permission. If this permission is not given, this window does not appear and the job will automatically start running, defaulting to the option set in the File->Options menu.
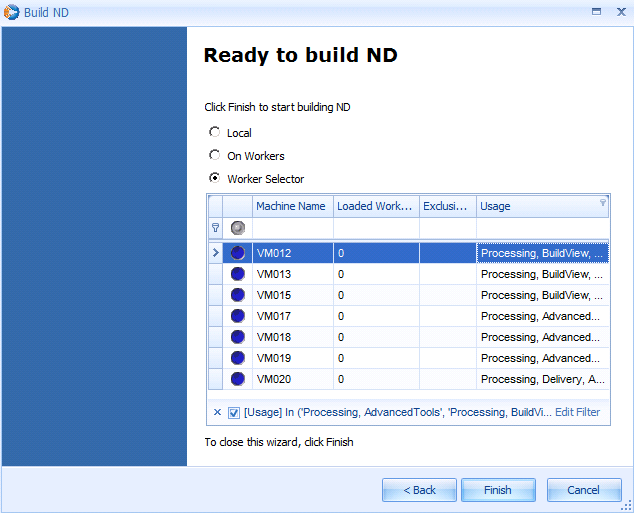
- Click Finish
Excluded Text#
When building ND, user has the option to input text which should be ignored during any near-duplicate analysis. The purpose of this feature is to allow users to specify large email disclaimer text block in order to yield more accurate and sometimes faster results.
To exclude certain text from near-duplicate analysis:
- Check the ‘Apply/Define text to be ignored when building ND’ button in the Build ND Groups window.
- In the top window of the ‘Excluded Text’ window, right-click and select Add.
- In the bottom window of the ‘Excluded Text’ window, paste or type the desired text.
- Click Apply to add this text to the above list of exclusion texts.
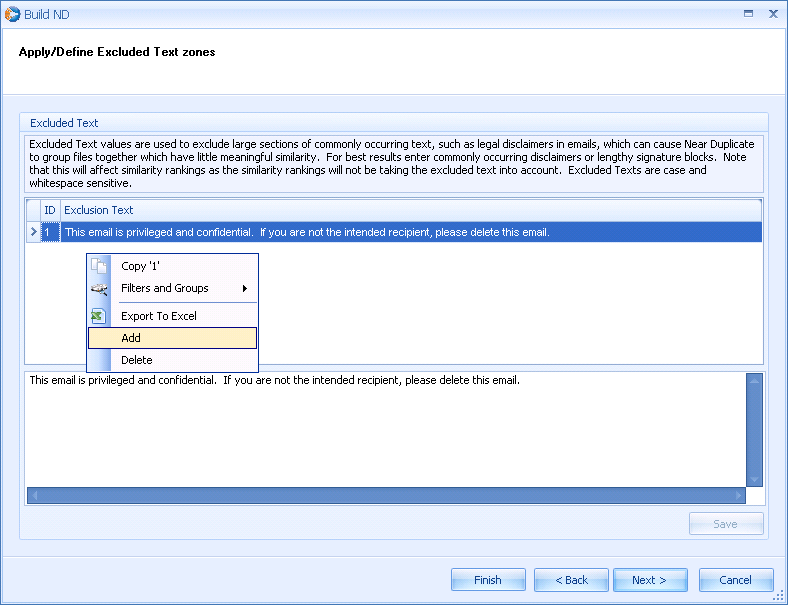
Identifying Near Duplicates #
After ND has been built, you can identify documents belonging to certain ND Groups in the Review. Use the Field Selector to add the following fields to your documents grid; ND Group ID and ND Doc Count.
To add a new field to the documents grid:
- Right-click anywhere in the Documents Panel.
- Click Field Selector.
- In the Field Selector window, use the left mouse button to drag the desired field name to the column header row.
- Release the mouse button at the desire location.
- After adding a new field to the documents grid, you can drag each column header to change the arrangement or size each column to your preference.
- In the Tools menu, click Save Layout, to save your document grid configuration
The ND Group ID field displays the Group ID assigned to each document. The ND Doc Count field displays the number of documents that belong to a specific ND Group. There is no limit to how many documents can belong to each group but documents cannot belong to more than one group. Documents belonging to ND Group ID 0 are not similar to any other documents.
Group Near Duplicates#
- Use the left mouse button to drag the column header for ND Group ID to the dark blue area above. This area is noted with the text, “Drag a column header here to group by that column.”
- Release the mouse button.
- ND Groups and their corresponding documents are now in a tree like arrangement. Click the small minus sign located to the left of each ND Group ID to collapse each group.
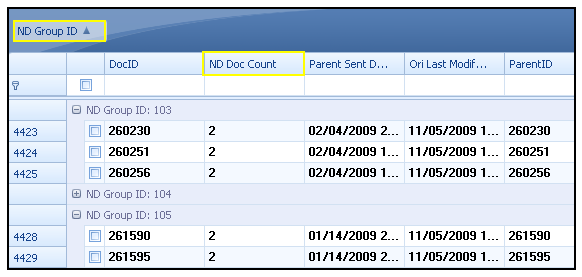
ND Similarity Viewer#
The ND Similarity Viewer allows users to view near duplicate documents side by side. Differences are highlighted in red so a user only has to review a small portion of the text rather than the entire document. Within the ND Similarity Viewer each ND Group is assigned a base document. The base document is a single document that all other documents in that group will be compared to. When opening the ND Similarity Viewer from Review, the base document will be the one that the tool is launched from. Once inside the ND Similarity Viewer, the base document for a group can be reassigned.
To open the ND Similarity Viewer from Review:
- Select any document desired as a base document for a particular ND Group.
- Right-click and select ND Similarity Viewer.
Or…
- Select any document desired as a base document for a particular ND Group.
- From the Tools menu, select ND Similarity Viewer.
To open the ND Similarity Viewer from View Manager:
- Check the View or Scopes to open ND for.
- Hover over ND Similarity Viewer in the Tools menu and select Open ND.
Layout#
Like all other Viewpoint windows, the ND Similarity Viewer layout can be customized and saved per user. To save your layout, go to the View menu and select Save Layout. To load your last saved layout, go to the View menu and select Reset Layout.
Note: Please see the Viewpoint Layout section for instructions on modifying the ND Similarity Viewer’s layout.
Panels#
The following panels are available in the ND Similarity Viewer:
- Difference Viewer for reviewing near duplicate documents side by side.
- Doc Notes for adding attorney notes to selected document(s).
- Documents for displaying documents and associated metadata per selected ND Group.
- ND Groups for displaying list of ND Groups and corresponding doc counts.
- Tags for tagging selected document(s).
- Family for reviewing family members of selected document.
- Doc Viewer for reviewing document selected in Family panel.
Difference Viewer Panel#
The Difference Viewer consists of two windows laid side by side. The left side window always displays the base document for the selected ND Group. The right side window displays the document currently selected in the Documents panel. Text differences are highlighted in red. The scroll bars for each window are synchronized and will move together horizontally and vertically.
On the far left hand side, there is a navigation bar. To correspond with the Difference Viewer, the navigation bar is divided into right and left halves. The red segments corresponded to areas of the document where differences occur. Click on a segment of the navigation bar to jump to that portion of the document.
Difference Viewer Features#
- Center: Selecting Center will make the left and right preview windows equal in their horizontal size (i.e. move the separator between them to the middle of the window).
- Compact Whitespace: By default, Compact Whitespace is selected. When identifying near duplicates, the tools ignores all formatting and only considers text. Therefore, when viewing near duplicated in the Difference Viewer, all empty white space should be compacted for a more accurate side by side comparison of text.
- Show Differences: Select Show Differences to view only the red highlighted differences of the selected document in the right side window.
- Show All: Select Show All to view all text of the selected documents.
- Options: Select Options to configure the number of lines to be shown before and after differences when using Show Differences.
Documents Panel#
By default, the Documents panel will list all documents belonging to the selected ND Group, whether or not those documents are contained in the View that the tool was launched from. To limit the documents to only that View, check the Show documents in selected View only checkbox.
By default, the base document will be the first document listed in this panel. To reassign the base document, select another document in the group, right-click and hit Select Base. The base document will always appear in the left side of the Difference Viewer panel. All other documents will appear in the right side when selected.
To build a view of a certain documents, select those desired documents, right-click and hit Build View. Enter in the necessary details and hit OK. You can also right-click and hit Review to quickly populate those selected documents in the Review window.
ND Groups Panel#
The ND Groups panel lists all ND Groups and corresponding doc count. By default, the list will be filtered to the View the tool was launched from. Check the Show All Groups button expose groups for the entire project. By default, the ND Groups are sorted by descending doc count. The purpose of this is to make it easier for a review team to launch the tool and review larger groups first in order to make as big of a dent in the review population as possible. Documents belonging to the selected ND Group will be loaded in the Documents panel. To view all documents in a specific ND group in Linear Review, right-click the group and select Build View or Review from the context menu.
Family Panel#
The Family panel displays all family members of the document selected in the Document panel. When selecting a record in the Family panel, that document will display in the Doc Viewer. If a document(s) in the Family panel is selected with a Production or Issue Tag is selected, that document(s) will be tagged. If no document in the Family panel is selected then the document(s) select in the Documents panel will be tagged.
Options#
All following options are accessed from the File, Options menu:
Note: Options denoted with a * are only available when the ‘Show Advanced Settings’ box is checked.
- *Check for documents missing key fields: When set to ON, the ‘Check for documents missing key fields’ option will be selected by default when building ND.
- *Close ND on Review: When ON, the ND Similarity Viewer window will close automatically when selecting the Review button to populate the selected documents in the Review window. OFF by default.
- Force Viewer Switch: When ON, if the Difference Viewer and Doc Viewer are tabbed together, the windows will toggle automatically depending on whether or not a document is selected in the Family panel. The Doc Viewer will be exposed if a family member is selected. The Difference Viewer will be exposed if not.
The following Common options are accessed from the File, Options menu:
- Confirm Multi Document Change: When ON a warning prompt will display before any tags are added/removed from multi documents.
- Confirm Single Document Change: When ON a warning prompt will display before any tags are added/removed from a single document.
- Family Tagging Mode: When set to Production Tag and Issue Tag, any Production Tags or Issue Tags added/removed to one family member will be populated to all other family members. When set to Production Tag, only Production Tag additions and removals will be copied to the entire family.
- Fast Mode: When ON, after selecting a Production Tag with no nested Issus Tags, the next document in sequence will automatically be selected. This option is compatible with single select Forms only.
- Highlight By Default: When ON, keywords will be highlighted by default within all viewers.
- Highlight HTML Exclusively: When ON, users will only be able to have highlighting turned on for the HTML viewer. Users will be unable to switch to another viewer unless they turn highlighting OFF.
- Include Family in View: When On, family members will be including when building a View or hitting the Review button.
Email Thread Analyzer#
The Email Thread Analyzer (ETA) is a visual tool for analyzing and reviewing email trees. An email tree is a group of one or more email threads linked by a common parent.
Build Email Trees#
Before using the Email Thread Analyzer, email threads must be identified and organized accordingly. Use the View Manager to build Email Threads.
Note: It is recommended to build Email Threads for an entire project at once. This will prevent variations in existing Threads when ETA is built for a new source(s).
To Build Email Threads:
- In View Manager, check the View(s) or Scopes(s) to build ETA over.
- Hover over Email Thread Analyzer in the Tools menu and select Build ETA.
- The window seen below will display.
- Notice the predetermine Build Rule. The difference between each Build Rule is described below.
- You can also clear any previously built ETA by selecting the ‘Clear all ETA tables before building’ option.
- Click Next.
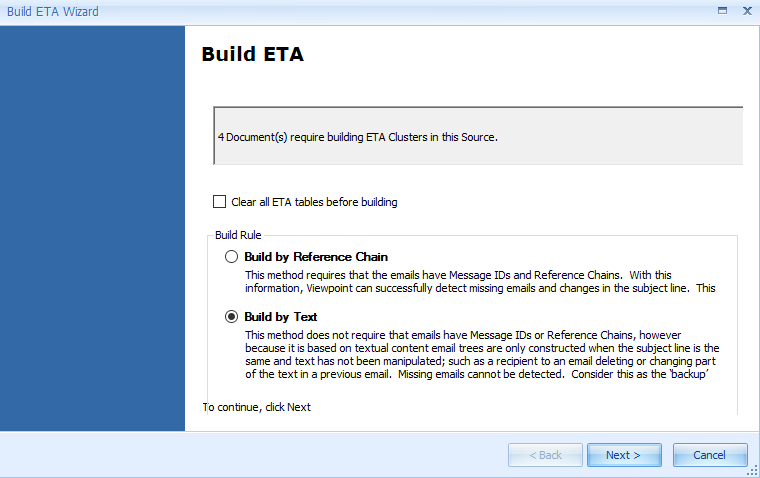
- To have the system check for documents missing key fields or text files, select ‘Check for documents missing key fields’. If documents are missing key fields, the system will notify the user and give you the option of ignoring those documents or canceling the build.
Note: Emails without sent dates will be not be considered when building ETA.
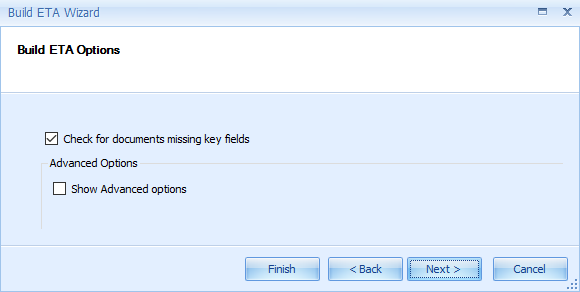
- Advanced Options:
- If you’ve received text that includes branded information at the top of the file, you can have the system skip over the branded lines by entering a number in the ‘Skip First N Lines’ section.
- To better handle large numbers automated status emails, spam, or mass emails, use the ‘Skip building trees by text for clusters whose subject is represented many times’ setting. The default setting is 500, which means that any email with a subject that occurs more than 500 times within the body of ETA documents will be skipped, and an ETA tree will not be created for those emails.
- The option, ‘Skip building trees by text for clusters with blank subjects’ is used to prevent emails with blank subjects from being grouped together in an ETA tree.
Note: The remaining Advanced options should be used for troubleshooting purposes only. Changing advanced settings can have serious impacts on the functionality and usefulness of the ETA results. Please consult Viewpoint Support before changing these settings.
- Click Next
- Select how the job should be built. Users can choose from: Local, On Workers, or a specific Worker from the Worker Selector.
Note: The ability to change how the job is run requires the user to have the ‘Advanced Worker Selection’ permission. If this permission is not given, this window does not appear and the job will automatically start running, defaulting to the option set in the File->Options menu.
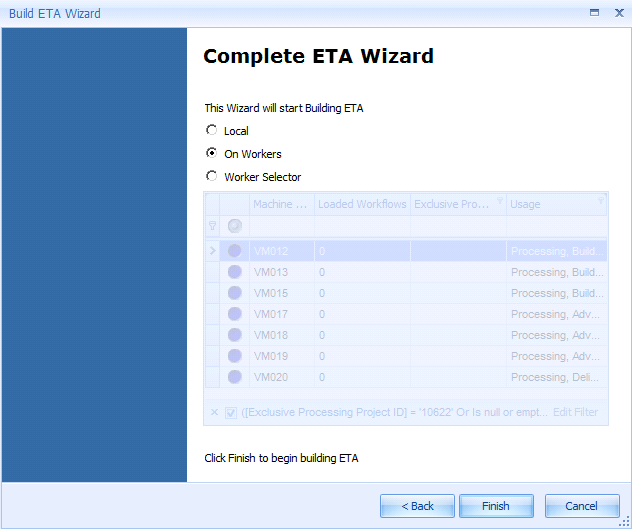
- Click Finish.
Build Rule#
- Build by Reference Chain: This method requires that the emails have Message IDs and Reference Chains. With this information, Viewpoint can successfully detect missing emails and changes in the subject line. Upon opening the Build ETA window, Viewpoint will quickly crawl the data and select this option if the needed information exists.
- Build by Text: This method does not require that emails have Message IDs or Reference Chains, however because it is based on textual content, email trees are only constructed when the subject line is the same and text has not been manipulated, such as a recipient to an email deleting or changing part of the text in a previous email. Missing emails and subject line changes cannot be detected. Upon opening the Build ETA window, Viewpoint will quickly crawl the data and select this option if needed.
Identifying Email Trees#
After ETA has been built, you can identify documents belonging to certain Trees in the Review. Use the Field Selector to add the following fields to your documents grid; ETA Tree ID and ETA Doc Count.
To add a new field to the documents grid:
- Right-click anywhere in the Documents Panel.
- Click Field Selector.
- In the Field Selector window, use the left mouse button to drag the desired field name to the column header row.
- Release the mouse button at the desire location.
- After adding a new field to the documents grid, you can drag each column header to change the arrangement or size each column to your preference.
- In the Tools menu, click Save Layout, to save your document grid configuration
The ETA Tree ID field displays the Tree ID assigned to each document. The ETA Doc Count field displays the number of emails that belong to a specific ETA Tree ID. There is no limit to how many emails can belong to each tree but emails cannot belong to more than one tree.
Group Email Trees#
- Use the left mouse button to drag the column header for ETA Tree ID to the dark blue area above. This area is noted with the text, “Drag a column header here to group by that column.”
- Release the mouse button.
- ETA Trees and their corresponding emails are now in a tree like arrangement. Click the small minus sign located to the left of each ETA Tree ID to collapse.
- By sorting your documents by ascending date order, you will be able to review the progression of each email tree.
Email Thread Analyzer#
To open the Email Thread Analyzer from Review :
- Select any email in the Documents panel.
- Right-click and select Email Thread Analyzer.
Or…
- Select any email in the Documents panel.
- From the Tools menu, select Email Thread Analyzer.
To open the Email Thread Analyzer from View Manager
- Check the View or Scopes to open ETA for.
- Hover over Email Thread Analyzer in the Tools menu and select Open ETA.
Layout#
Like all other Viewpoint windows, the Email Thread Analyzer layout can be customized and saved per user. To save your layout, go to the View menu and select Save Layout. To load your last saved layout, go to the View menu and select Reset Layout.
Note: Please see the Viewpoint Layout section for instructions on modifying the Email Thread Analyzer’s layout.
Panels#
The following panels are available in the Email Thread Analyzer:
- Tree List for displaying list of ETA Tree IDs and corresponding doc counts.
- Email Tree for a graphic display of selected email tree. Color coded based on certain criteria.
- Cluster Information for displaying email header information and identifying any removed or added correspondents.
- Documents for reviewing email and all copies of email selected in Email Tree panel.
- Doc Viewer for reviewing email selected in Email Tree panel.
- Doc Notes for adding attorney notes to selected document(s).
- Attachments for reviewing attachments of selected email.
- Difference Viewer for reviewing emails side by side to confirm 100% containment.
- Tags for tagging selected document(s).
- Missing Emails for displaying a list of missing emails identified among the available trees.
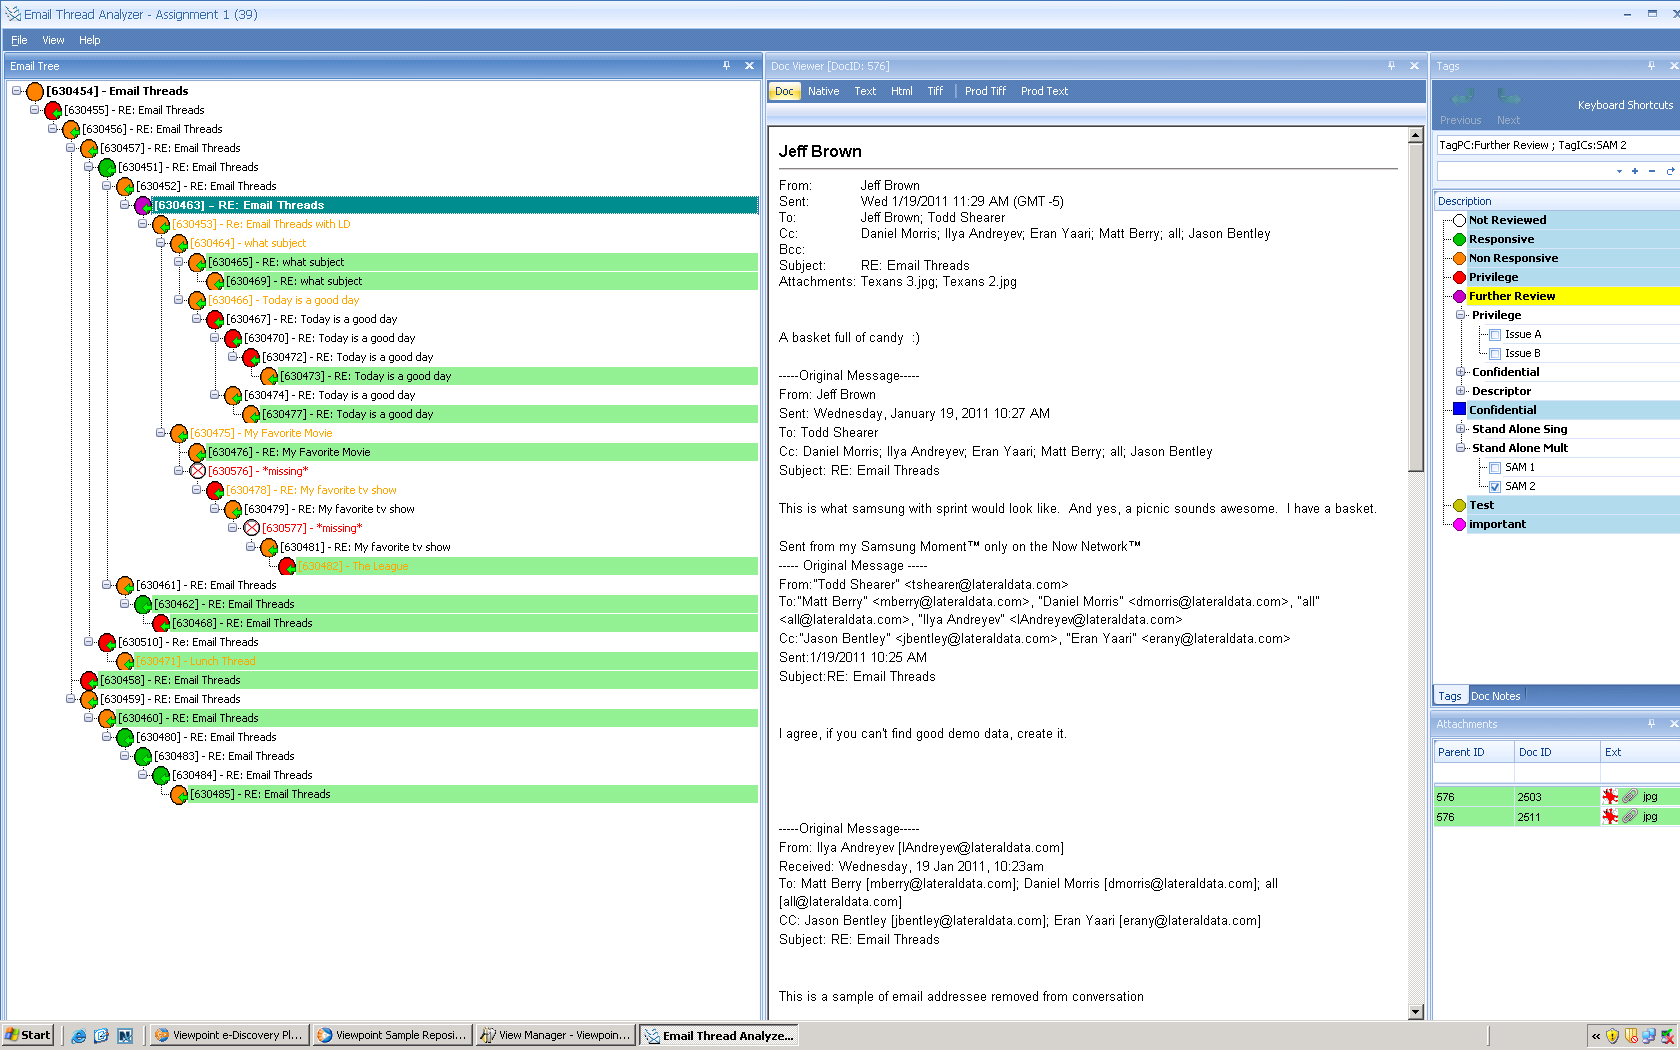
Tree List#
The Tree List panel lists all of the available email trees from the selected source. A ‘leaf only’ tree can contain as few as one email. There is no upper limit to the number of emails in a tree. Select a record in the Tree List panel to populate the Email Tree panel with those emails.
Email Tree #
The Email Tree panel is a graphic display of the selected email tree. For each email you will see a unique number known as a Cluster ID. An email cluster is essentially an email message instance. Multiple emails can make up a single cluster. The best example of this is duplicate emails.
The subject of each email is listed to the right of the Cluster ID. To the left of the Cluster ID, there is a colored circle which represents the current color of the email’s current Production Tag. The circle will be multi colored if the email contains multiple Production Tags. A red circle with a white X indicates that the emails in the cluster have different Production Tags. For example, a cluster may have two documents, one is Responsive and the other is Non-Responsive.
Email colored in orange represent those subjects that changed from the previous email. Emails colored in red represent ‘missing’ emails. These emails were not part of the data set but the tool has identified that a physical email was sent between two others that are part of the data set.
Emails highlighted in green are those containing unique body text or unique attachment(s) compared to other emails in the same tree. When using the ETA Suppression feature, these emails will be included in the resulting View. Theoretically, only these emails need to be reviewed by the review team to prevent the review of redundant content.
Upon selecting an email, you can tag the selected by utilizing the Tags panel. Use the CTRL key to select multiple emails at once. Right-click on any email tree and hit Select All to select all emails for tagging.
Cluster Information#
The Cluster Information panel displays header information specific to the selected email. Any email recipients who existed in the previous email but were removed from the selected email are colored in red. Any email recipients who did not exist in the missing email but in the selected email’s header are colored in green.
Documents#
Each email listed in the Email Tree panel is not necessarily a unique document. If two separate documents are in fact the same email (Ex. One custodian being the sender and another being the recipient) both documents will be listed in the Documents panel. Upon selecting an email in the Email Tree panel, all applicable documents will be listed in the Documents panel. Each selected document will display the same content in the Doc Viewer as well as the same attachments in the Attachments panel.
To build a view of a certain documents, select those desired documents, right-click and hit Build View. Enter in the necessary details and hit OK. You can also right-click and hit Review to quickly populate those selected documents in the Review window.
Doc Viewer#
The Doc Viewer displays the selected row from either the Documents or the Attachments panel. When applying a tag(s), the specific document rendering in the Doc Viewer will be tagged.
Doc Notes#
The Doc Notes panel can be used to add an attorney note to a specific email, attachment or multiple items of each category.
Attachments #
The Attachments panel lists the attachment(s) for the selected email in the Documents panel. When selecting an attachment, that document will render in the Doc Viewer. When applying a tag(s), the specific document rendering in the Doc Viewer will be tagged.
Difference Viewer#
The Difference Viewer is used to compare emails in a side by side fashion. Although used rarely, a reviewer may be interested in confirming that an older email of a particular thread is 100% contained in a later email. Right-click on the last document of a specific thread and select Set as Base Document. You will see a text rendering of this email appear on the left hand side of the Difference Viewer. Select another doc to render it’s text on the right hand side. All text in yellow is the same between the two documents. Text in red represents differences between.
Tags#
The Tags panel can be used to tag a specific email, attachment or multiple items of each category.
Missing Emails#
The Missing Emails panel is used to identify spots where there is a potentially missing email. Double-click on a record to jump to that location in a specific Email Tree. In the viewer you will see the assumed content of what the missing email should be.
Options#
All following options are accessed from the File, Options menu:
Note: Options denoted with a * are only available when the ‘Show Advanced Settings’ box is checked.
- *Close ETA on Review: When ON, the Email Thread Analyzer window will close automatically when selecting the Review button to populate the selected documents in the Review window. OFF by default.
- Cluster Tagging Mode: When ON, selecting a specific email in the Email Tree panel will automatically select all records in the Documents panel. This is useful for tagging purposes. All documents listed in the Documents panel will be the same email with the same attachments. They should most likely be tagged the same so by default they will all be selected together. ON by default.
- Highlight Unique Content: When ON, email clusters containing unique content or attachments in relation to that email thread will be highlighted in green.
The following Common options are accessed from the File, Options menu:
- Confirm Multi Document Change: When ON a warning prompt will display before any tags are added/removed from multi documents.
- Confirm Single Document Change: When ON a warning prompt will display before any tags are added/removed from a single document.
- Family Tagging Mode: When set to Production Tag and Issue Tag, any Production Tags or Issue Tags added/removed to one family member will be populated to all other family members. When set to Production Tag, only Production Tag additions and removals will be copied to the entire family.
- Fast Mode: When ON, after selecting a Production Tag with no nested Issus Tags, the next document in sequence will automatically be selected. This option is compatible with single select Forms only.
- Highlight By Default: When ON, keywords will be highlighted by default within all viewers.
- Highlight HTML Exclusively: When ON, users will only be able to have highlighting turned on for the HTML viewer. Users will be unable to switch to another viewer unless they turn highlighting OFF.
- Include Family in View: When On, family members will be including when building a View or hitting the Review button.
Concept Analyzer#
The Concept Analyzer (CA) is used to identify and group concepts per a selected set of documents. The concepts can be viewed in a linear fashion or in a graphical representation.
Build Concepts#
Before using the Concept Analyzer, concept must be identified and grouped. Use the View Manager to build concepts.
To Build Concepts:
- In View Manager, check the View(s) to build CA over.
- Hover over Concept Analyzer in the Tools menu and select Build CA.
- Select how the job should be built. Users can choose from: Local, On Workers, or a specific Worker from the Worker Selector.
Note: The ability to change how the job is run requires the user to have the ‘Advanced Worker Selection’ permission. If this permission is not given, this window does not appear and the job will automatically start running, defaulting to the option set in the File->Options menu.
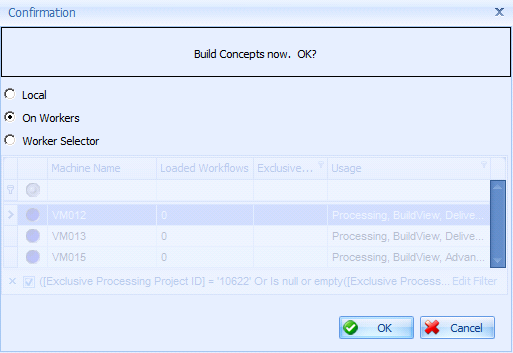
- Click OK.
- When the progress bar finishes, right-click and Refresh in the View Manager.
- You will see the CA Status column for that specific source switch to Done.
Concept Analyzer#
To open the Concept Analyzer from Review:
- Open any View by selecting it in the Source Selector.
- From the Tools menu, select Concept Analyzer.
To open the Concept Analyzer from View Manager:
- Check the View to open CA for.
- Hover over Concept Analyzer in the Tools menu and select Open CA.
Layout#
Like all other Viewpoint windows, the Concept Analyzer layout can be customized and saved per user. To save your layout, go to the View menu and select Save Layout. To load your last saved layout, go to the View menu and select Reset Layout.
Note: Please see the Viewpoint Layout section for instructions on modifying the Concept Analyzer’s layout.
Panels#
The following panels are available in the Concept Analyzer:
- Concepts Tree Panel – Displays a list of concepts organized into groups with corresponding doc counts.
- Tag Panel – Used for tagging documents belonging to selected concept(s).
- Issue Statistics Panel – List of Issue Tags and corresponding counts per selected concept(s).
- Production Statistics Panel – List of Production Tags and corresponding counts per selected concept(s).
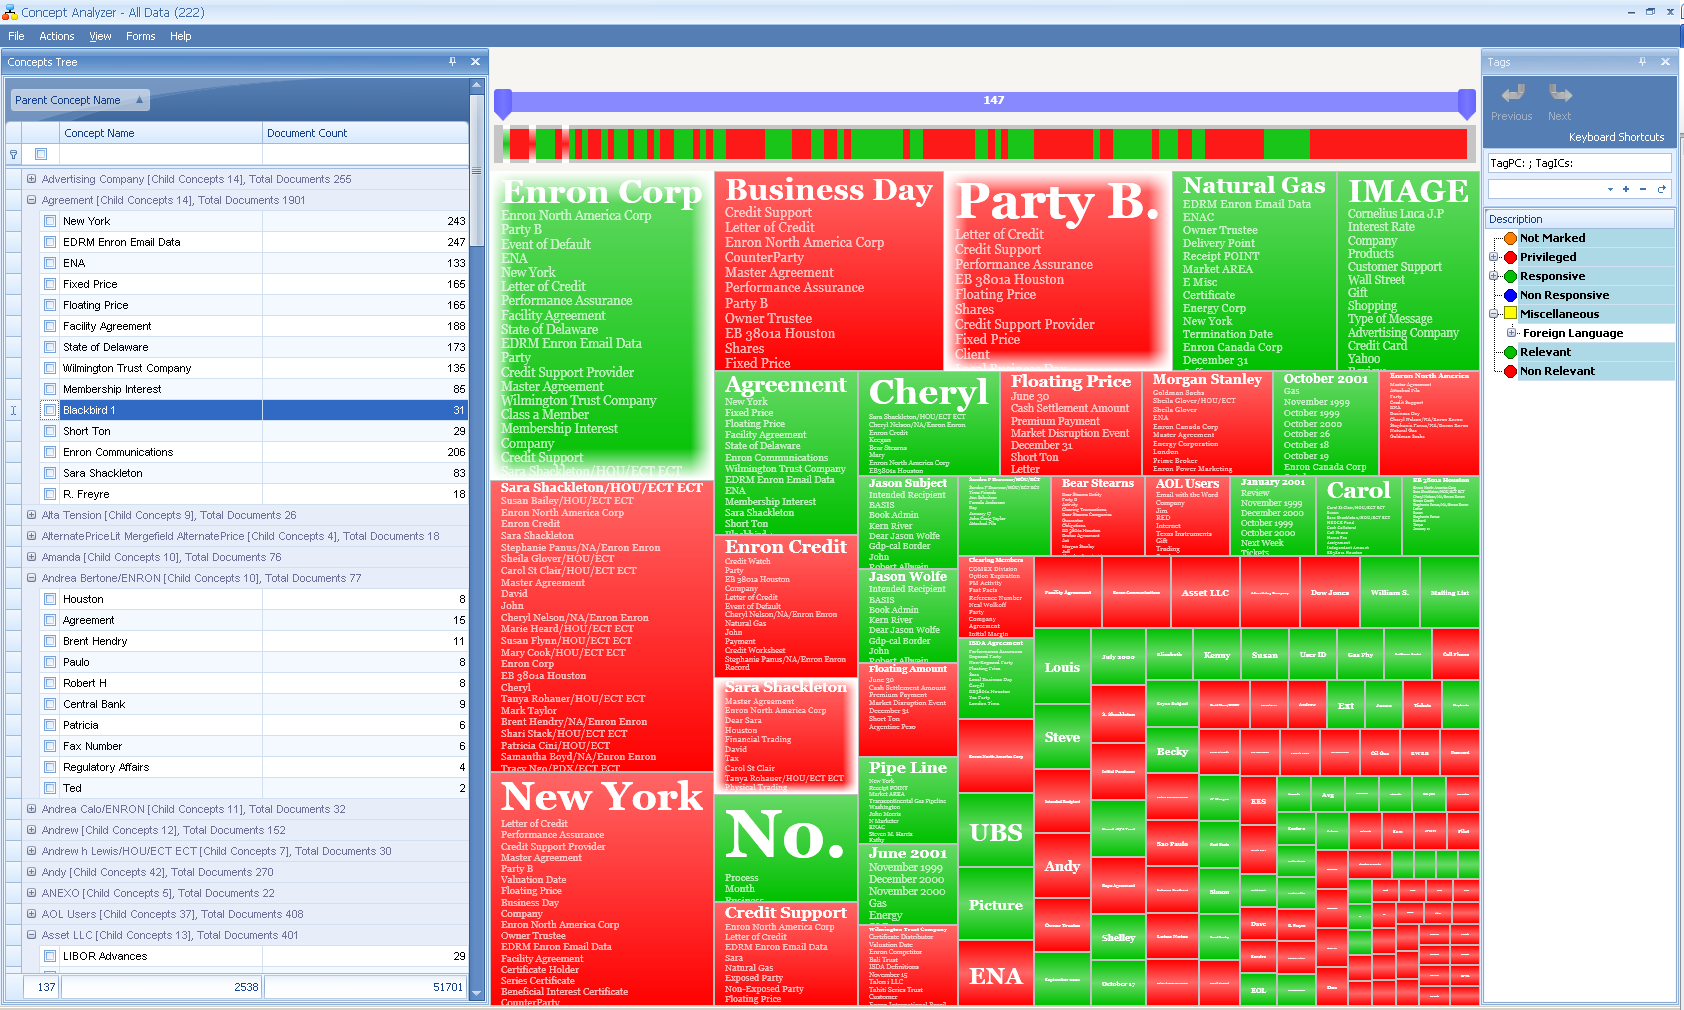
Concepts Tree#
Upon launching the Concept Analyzer, notice the Concepts Tree panel (left side of the image above). This panel organizes the identified concepts into groups (parent concepts). All documents in a child concept are related by that parent concept.
To expand a specific concept group, hit the small plus sign to the left of the group name. To expand all groups, right-click in the Concepts panel and select Expand All.
To generate a list of all concepts or a subset of, highlight the desired rows, right-click and select Export to Excel or Export Selected Rows to Excel.
To select a specific concept(s), check the box located on the left. Use the SHIFT and/or CTRL keys to select multiple concepts. Right-click and select Check All, to check all selected concepts. To check all sub-concepts for a specific group, right-click on the parent concept and select Check.
To build a view of certain concept documents, check those desired concepts, go to the Actions menu and hit Build View. Enter in the necessary details and hit OK. You can also go to the Actions menu and click Review to quickly populate those selected documents in the Review window, or click Build Multiple Views to create one View per concept.
Concepts Map#
The Concepts Map is a graphical tree map representing the concepts listed in the Concepts Tree. The concept boxes in the map are sized according to the number of documents in that concept. Concepts with more documents appear in larger boxes than those with fewer concepts. On the unfiltered map, the parent concepts appear at the top of each box in white font. Child concepts will appear in grey font beneath the parent within the same box. Selected concept boxes will have a faint white border around them. Hold down the CTRL key to select multiple concepts at once.
Concept boxes are colored based on Production Tag assigned to the majority number of document in that concept.
The slider bar at the top of the map allows users to zoom to a specific size threshold.
Double-click on a parent concept box to display the associated child concepts. When checking a child concept(s) in the Concept Tree you will see corresponding child concept box with a faint white border.
The Concepts Map also provides right-click options that are identical to the options available in the Actions menu at the top. Right-clicking on a concept group(s) gives you the option to:
- Build View
- Review with Family
- Build Multiple Views
- Print Preview
- Copy Chart Data to Clipboard
- Copy Chart Image to Clipboard
- Copy Selected Data to Clipboard
Tags#
Once a specific concept(s) is selected, use the tags panel to tag those associated docs with a Production Tag and any needed Issue Tags.
Statistics#
The statistics panels will display the Production and Issue Tags for the current Project. By default, they will list counts of the entire concept set. Upon selecting specific concept(s), the statistics panels will adjust accordingly.
Options#
All following options are accessed from the File, Options menu:
Note: Options denoted with a * are only available when the ‘Show Advanced Settings’ box is checked.
- *Close CA on Review: When ON, the Concept Analyzer window will close automatically when selecting the Review button to populate the selected documents in the Review window. OFF by default.
- Include Not Reviewed Documents in Map: When OFF, Not Reviewed documents will not display in the Concept Map.
- Filter Concepts by Form: When ON, documents will be filtered according to the Production Tags existing in the selected Form.
The following Common options are accessed from the File, Options menu:
- Confirm Multi Document Change: When ON a warning prompt will display before any tags are added/removed from multi documents.
- Confirm Single Document Change: When ON a warning prompt will display before any tags are added/removed from a single document.
- Family Tagging Mode: When set to Production Tag and Issue Tag, any Production Tags or Issue Tags added/removed to one family member will be populated to all other family members. When set to Production Tag, only Production Tag additions and removals will be copied to the entire family.
- Fast Mode: When ON, after selecting a Production Tag with no nested Issus Tags, the next document in sequence will automatically be selected. This option is compatible with single select Forms only.
- Highlight By Default: When ON, keywords will be highlighted by default within all viewers.
- Highlight HTML Exclusively: When ON, users will only be able to have highlighting turned on for the HTML viewer. Users will be unable to switch to another viewer unless they turn highlighting OFF.
- Include Family in View: When On, family members will be including when building a View or hitting the Review button.
Relationship Analyzer#
The Relationship Analyzer (RA) is used to identify email addresses and domains for a specific data set. Correspondence between either email addresses or domains can be identified with corresponding doc counts. Email aliases can also be identified.
Build Relations#
Before using the Relationship Analyzer, relations must be identified. Use the View Manager to build relations.
To Build Relations:
- In View Manager, check the View(s) or Scopes(s) to build RA over.
- Hover over Relationship Analyzer in the Tools menu and select Build RA.
- Select how the job should be built. Users can choose from: Local, On Workers, or a specific Worker from the Worker Selector.
Note: The ability to change how the job is run requires the user to have the ‘Advanced Worker Selection’ permission. If this permission is not given, this window does not appear and the job will automatically start running, defaulting to the option set in the File->Options menu.
- Click OK.
- When the progress bar finishes, right-click and Refresh in the View Manager.
- You will see the RA Status column for that specific source switch to Done.
Relationship Analyzer#
To open the Relationship Analyzer from Review:
- Open any View by selecting it in the Source Selector.
- From the Tools menu, select Relationship Analyzer.
To open the Relationship Analyzer from View Manager:
- Check the View or Scopes to open RA for.
- Hover over Relationship Analyzer in the Tools menu and select Open RA.
Layout#
Like all other Viewpoint windows, the Relationship Analyzer layout can be customized and saved per user. To save your layout, go to the View menu and select Save Layout. To load your last saved layout, go to the View menu and select Reset Layout.
Note: Please see the Viewpoint Layout section for instructions on modifying the Relationship Analyzer’s layout.
Domains#
The Domains panel is a listing of all domains identified from the selected source. Number of emails Sent from, Received to and the Total for each domain are listed. In addition, there is a Domain Category column that allows you to filter to like domains. Upon running RA, known domains are automatically categorized. To update or add domain categories, please see the Domain Category section below. To generate a domains report, select the desired domains, right-click and select Export to Excel.
Note: The Total field is defined as the count of all emails belonging to persons of that domain. Emails of those same persons but for other domains are included in the total count. Total count matches the count which will be seen in any Views build from that domain(s).
Double-click on a domain to open the View Details window described below. You can also right-click and select View Details.
Domain Category#
Your installation of Viewpoint includes a list of over 34,000 known domains, which are also categorized by function (i.e. accounting, adult, automotive, etc.). Upon building RA, domains that exist in your collection are automatically associated with the corresponding category. This association can be used to filter known domains for certain tasks. For example, domains associated with the adult or sports related might be bulk tagged as Not Responsive, whereas others associated with a legal domain might be isolated for a privilege review.
If a domain was not linked to a category upon building RA, you can update that domain using the Domain Category picklist as shown below. Once the association has been made, all previous RA builds are automatically updated to reflect the association. Also, any new RA builds including that domain will be linked as well.
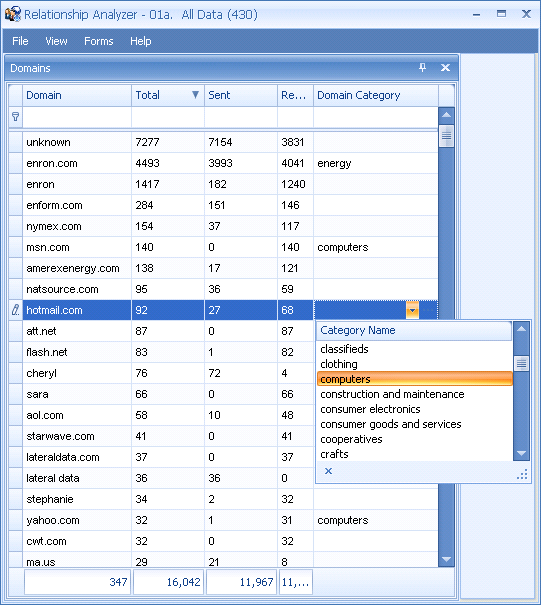
Domain Category Manager#
The category list can also be updated to reflect new categories, to change the name of an existing category, and to change the color of a category.
To modify the category list:
- Select the ellipse in the Domain Category column.
- Double-click on the category name to be updated.
- Change the name or update color accordingly.
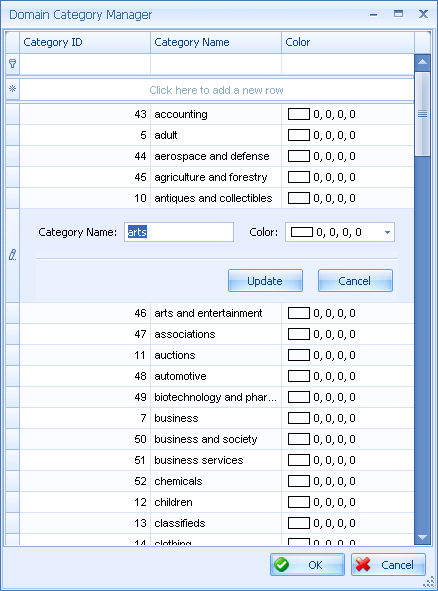
To add a new category:
- Select the ellipse in the Domain Category column.
- Click in the ‘Click here to add a new row’ section of the grid.
- Add the Category Name and select a color. The default value is no color.
Persons#
The Persons panel is a listing of all normalized email addresses identified from the selected source. A normalized email is one record which may actually account for multiple aliases. For instance, ‘ken.lay@enron.com’ and ‘klay@enr.com’ would be normalized to ‘Ken Lay’. Number of emails Sent from, Received to and the Total for each address are listed. To generate an email address report, select the desired address, right-click and select Export to Excel.
Double-click on an address to open the View Details window described below. You can also right-click and select View Details.
View Details#
Details of either domains or persons can be seen in the View Details window. The View Details window is broken up into the five tabs detailed below. Filters set in the first 3 tabs will affect the Relations Graph and Relations Map separately. In either graph, specific elements can be selected and tagged or used for View Building or direct Review.
The Persons Filter tab displays a list of all identified aliases for that person/domain. These aliases are normalized into one display name to reduce the effort in searching for the same person with multiple email addresses. Check a specific row(s) to filter the sub-sequent tabs. This tab will be hidden if there are no other aliases. The information in this tab is not filtered to the specific View used to open the Relationship Analyzer.
Note: By right-clicking on the Persons Filter tab itself, users can export a normalized, simple text list of the records currently displayed in the Persons Filter tab. This exported text list can be used to easily add display names and email addresses to a Keyword List for persistent highlighting.
The Domains Filter tab lists all domains with which the selected domain corresponded directly with. The information displayed in this tab is filtered to the specific View used to open the Relationship Analyzer. Check a row(s) to filter the sub-sequent tabs. The Domains Filter is only displayed when viewing details for a domain and is not an available tab when viewing details for a person.
The Correspondents Filter tab lists all email addresses with which the selected domain/person corresponded directly with. The information displayed in this tab is filtered to the specific View used to open the Relationship Analyzer. Counts may seem to be incorrect but as an example, if one person is related to another because both are included in the CC field of an email, the sent and received fields will show 0 but the total count will still display 1. Check a row(s) to filter the sub-sequent tabs.
The Date Range Filter tab displays a sliding date range scale of emails sent and received by the selected domain/person. The segment in red corresponds to email sent and the segment in blue corresponds to email received. Adjust the scale to filter the sub-sequent tabs. The information displayed in this tab is filtered to the specific View used to open the Relationship Analyzer. With the slider scale adjusted, you can click the Zoom to Selection button to adjust the graph to the time scale selected. Click Reset to revert the graph back to the original scale. Depending on the filters set in the previous two tabs, the Date Range Filter will display the following.
- If row(s) are not checked in the Persons Filter:
- If row(s) are not checked in the Correspondents Filter than the Date Range Filter will show the timeline for all emails where at least one of the addressees belong to the current domain/person.
- If row(s) are checked in the Correspondents Filter than the Date Range Filter will show the timeline for emails where at least one of the addressees belongs to the current domain/person and the other(s) belongs to at least one of the checked correspondent(s).
- If row(s) are checked in the Persons Filter:
- If row(s) are not checked in the Correspondents Filter than the Date Range Filter will show the timeline for all emails where at least one of the addressees belong to the checked person(s).
- If row(s) are checked in the Correspondents Filter than the Date Range Filter will show the timeline for all emails where at least one of the addressees belong to the checked person(s) and the other(s) belong to at least one of the checked correspondent(s).
The Relations Graph is a dynamic wheel which adjusts based on the filters selected in the previous three filter tabs. Domain names and counts can be seen as tool tips in the outside layer and persons names and counts can be seen as tool tips in the inside layer. Different domains and persons are designated by color. Each person appears under his/her primary domain, no matter if the emails included in the View were sent/received from/to other accounts belonging to other domains. Depending on the filters set in the previous two tabs, the Relations Graph will display the following.
- If row(s) are not checked in the Persons Filter
- If row(s) are not checked in the Correspondents Filter than the Relations Graph will show the relationships of the current domain/person plus all of their immediate relationships filtered by the timeline set in the Date Range Filter, if any.
- If row(s) are checked in the Correspondents Filter than the Relations Graph will show the relationships of the current domain/person with any checked correspondent(s) filtered by the timeline set in the Date Range Filter, if any.
- If row(s) are checked in the Persons Filter
- If row(s) are not checked in the Correspondents Filter than the Relations Graph will show all relationships of checked person(s) plus all of their immediate relations filtered by the timeline set in the Date Range Filter, if any.
- If row(s) are checked in the Correspondents Filter than the Relations Graph will show all relationships of checked person(s) with any checked correspondent(s) filtered by the timeline set in the Date Range Filter, if any.
To expose the Tags panel click the small arrow located in the middle of the right hand side panel. Select any desired domains and you will see them populate above the scale bar. Re-select the domain to remove it. Select the desired tags to tag those documents belonging to the selected domains.
When building a View from the Relations Graph, if you do not select any items, the resulting View will include only documents between the main domain and direct correspondents.
The Relations Map is a tree map which segregates domains into boxes sized by the number of emails corresponding to those domains. Users can slide the count filter at the top to zoom in on a specific section of the map. Double-clicking on a specific domain box will open the individual email addresses associated with that domain. Production Tag counts can be seen for the individual email addresses. The Relations Map is based on the filters selected in the first three filter tabs. It is independent of any adjustments made in the Relations Graph. The colors of the boxes correlated to the color of the Production Tag assigned to the majority of documents for that box. However, this rule ignores the count of Not Reviewed documents. If all documents are Not Reviewed, the box will display in light blue.
Depending on the filters set in the previous two tabs, the Relations Map will display the following:
- If row(s) are not checked in the Persons Filter
- If row(s) are not checked in the Correspondents Filter than the Relations Map will show the relationships of the current domain/person filtered by the timeline set in the Date Range Filter, if any.
- If row(s) are checked in the Correspondents Filter than the Relations Map will show the relationships of the current domain/person with any checked correspondent(s) filtered by the timeline set in the Date Range Filter, if any.
- If row(s) are checked in the Persons Filter
- If row(s) are not checked in the Correspondents Filter than the Relations Map will show all relationships of checked person(s) filtered by the timeline set in the Date Range Filter, if any.
- If row(s) are checked in the Correspondents Filter than the Relations Map will show all relationships of checked person(s) with any checked correspondent(s) filtered by the timeline set in the Date Range Filter, if any.
To expose the Tags panel click the small arrow located in the middle of the right hand side panel. Select one or more top level domains or zoomed in email addresses and choose from among the desired tags to tag those documents.
Options#
All following options are accessed from the File, Options menu:
Note: Options denoted with a * are only available when the ‘Show Advanced Settings’ box is checked.
- Close RA on Review: When ON, the Relationship Analyzer window will close automatically when selecting the Review button to populate the selected documents in the Review window. OFF by default.
- *Combine Email Senders/Recipients into Single Persons: When ON, the RA will attempt to combine senders/recipients with similar names but different emails into one person.
- *Treat Multiple Selections as ‘AND’ Search: When ON, the RA will treat multiple selections as an ‘and’ search when building a View; otherwise, it will be treated as an ‘or’ search.
The following Common options are accessed from the File, Options menu.
- Confirm Multi Document Change: When ON a warning prompt will display before any tags are added/removed from multi documents.
- Confirm Single Document Change: When ON a warning prompt will display before any tags are added/removed from a single document.
- Family Tagging Mode: When set to Production Tag and Issue Tag, any Production Tags or Issue Tags added/removed to one family member will be populated to all other family members. When set to Production Tag, only Production Tag additions and removals will be copied to the entire family.
- Fast Mode: When ON, after selecting a Production Tag with no nested Issus Tags, the next document in sequence will automatically be selected. This option is compatible with single select Forms only.
- Highlight By Default: When ON, keywords will be highlighted by default within all viewers.
- Highlight HTML Exclusively: When ON, users will only be able to have highlighting turned on for the HTML viewer. Users will be unable to switch to another viewer unless they turn highlighting OFF.
- Include Family in View: When On, family members will be including when building a View or hitting the Review button.
Stratas#
The Stratas functionality is used to identify and group documents based on user-specified document attributes. Stratas allows users to create multiple layers (or levels) of grouping to help them pinpoint documents for review/investigation or mass tagging. For example, users can create a Strata that would first group a set of documents by custodian. From within custodian, users may then choose to further group the documents by year and, from within year, then by file type, etc. Stratas provides a graphical interface similar to the Concept Analyzer to review the results of each Strata.
Stratas is opened by clicking the Stratas icon from the Dashboard.
Note: To utilize Stratas, users must be granted the Allow Stratas permission within the Advanced Tools category in Security Management.
Create Stratas#
To create a new Strata:
- Right-click within the Stratas panel and select New.
- Enter a Description.
- Click Select View to select the Target View on which you want to build the Strata.
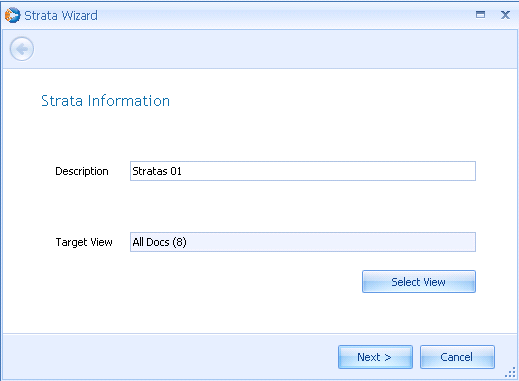
- Select Next.
- Right-click within the Levels grid and select New.
- The default grouping for any new level is to group by Production Tags. To change your grouping criteria, select the ellipse within the Group cell.
- Select your grouping criteria and click OK.
- Documents within a Strata level can be grouped by the following:
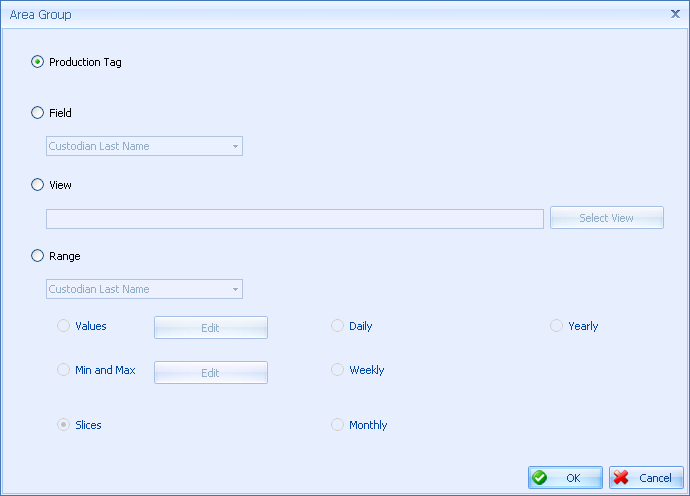
- Production Tag – will group documents by Production Tag. If a document has multiple production tags, it will be included in multiple groups. This is the default grouping for new Strata levels.
- Field – will group documents by the value(s) within a specified field (e.g. custodian or author).
- View – will group documents based on whether they are in a specific view or are not.
- Range – allows the user to group documents based on a range of criteria.
- Values – user enters specific values by which to group. Documents that have the value(s) will be grouped accordingly. Those without the values will be placed into a single “Empty” grouping.
- Min and Max – user enters the minimum and maximum value for each grouping. For example, if grouping by the Attachment Count field, the user may decide to create three groupings; those emails with 1) 0 to 1 attachments, 2) those with 2 to 5 and 3) those with more than 5. Min and Max can only be used for numeric-type fields.
- Slices – this option will sort the values of a numeric-type field and automatically group the documents into roughly six to ten groups (or slices), from minimum to maximum values.
- Daily, Weekly, Monthly, Yearly – these options are enabled when a date field is selected from the Range field pick-list. Documents will be grouped by day, week, month or year.
- By default, the color of the resulting grouping box within a Strata will be dictated by the prominent Production Tag within that group of documents. To change the appearance criteria, select the ellipse within the Appearance cell.
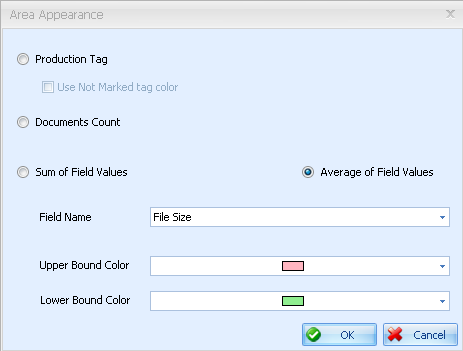
- Production Tag – A group will assume the color of the prominent production tag within that group.
- Documents Count – Groups with more documents will assume a shade closer to the Upper Bound Color, while groups with fewer documents will assume a shade closer to the Lower Bound Color.
- Sum of Field Values – Will sum the values in a numeric field and groups with a sum closer to the maximum value will shade towards the Upper Bound Color, while groups with a sum closer to the minimum value will shade towards the Lower Bound Color.
- Average of Field Values – Will average the values in a numeric field and groups with an average closer to the maximum value will shade towards the Upper Bound Color, while groups with an average closer to the minimum value will shade towards the Lower Bound Color.
- Once all the desired grouping levels have been added, click Next. The order in which groupings are added will dictate the order in which documents within the view will be grouped.
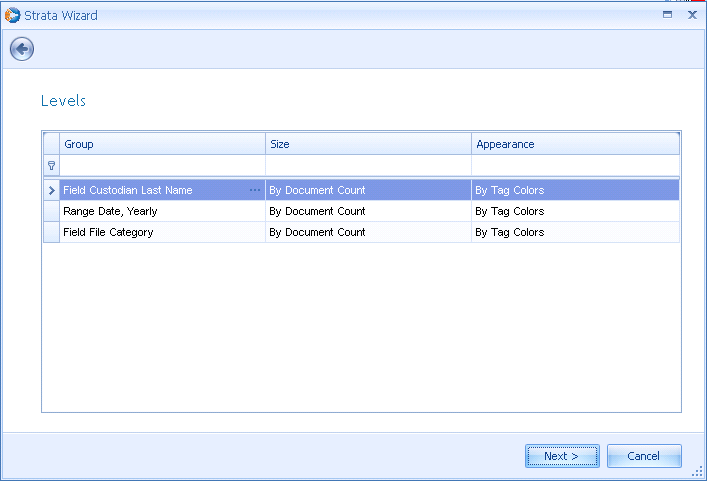
- Check Rebuild and display strata on finish if you want to automatically display the results or refresh an updated Strata.
Stratas#
To open a Strata, double-click on the Strata from the Stratas Panel.
Layout#
Like all other Viewpoint windows, the Stratas layout can be customized and saved per user. To save your layout, go to the View menu and select Save Layout. To load your last saved layout, go to the View menu and select Reset Layout.
Panels#
The following panels are available in Stratas from the View menu:
- Stratas panel for displaying a list of Stratas.
Stratas Display#
The Stratas display is a graphical tree map representing the document groupings. The Group boxes in the map are sized according to the number of documents in that group. Groups with more documents appear in larger boxes than those with fewer documents. The grouping value appears at the top of each box in white font. A breakdown of the Production Tag values and total number of Documents will appear below the grouping value within the same group box. Selected Group boxes will have a faint white border around them. Hold down the CTRL key to select multiple groups at once.
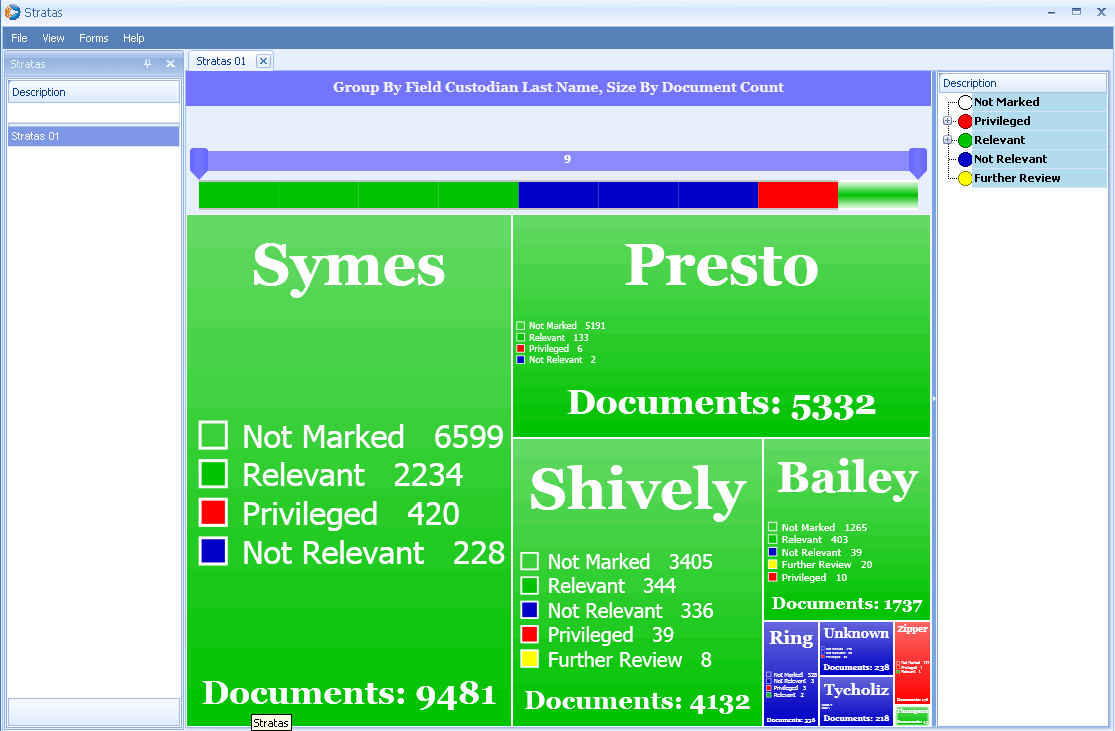
The slider bar at the top of the map allows users to zoom to a specific size threshold.
Double-click on a group box to display the next grouping level.
To build a View of certain groupings, select the desired group box, right-click and select Build View. Enter in the necessary details and hit OK. You can also click Review to quickly populate those selected documents in the Review window, or click Build Multiple Views to create one View per strata.
Tags#
Once a specific group(s) is selected, use the tags panel to tag those associated docs with a Production Tag and any needed Issue Tags.
Update Stratas#
To update a Stratas, right-click on the Stratas in the Stratas panel and select Update. This will walk you through the Strata Wizard and allow you to change parameters.
Delete Stratas#
To delete a Stratas, right-click on the Stratas in the Stratas panel and select Delete. Deleting a Stratas will not delete documents or the associated View.
Copy Stratas#
To copy all the criteria associated with a Strata to a new Strata, right-click on the Strata in the Stratas panel and select Create Copy. This will open the Strata Wizard and the user will be walked through process of copying the criteria of the selected Strata to a new one using a different Target Source. While the Levels and the options that comprise them are copied, the user is still allowed to make any necessary changes before clicking Finish.
Appendix A – Custom Field Guideline#
When custom field data is displayed in Review its format can be specified by populating the “Format String” property of the Custom Field. This is done in the Custom Field Dialog, accessible through the View Manager’s Setup menu.
Format Strings for Numeric Values#
Standard format strings for numeric values are specified in the Axx format. Here A is a character which denotes whether values should be transformed to currency format, scientific notation, etc. xx is a sequence of digits which indicates the desired number of decimal places or minimum number of digits in the resulting output. The table below gives some used values.
Format String | Description | Sample Format String | Sample Output |
|---|---|---|---|
C | The number is converted to a string that represents a currency amount. | c2 | $1,234.00 |
N | Thousand separators are inserted between each group of three digits to the left of the decimal point. | n0 | 1,234 |
p | A percent symbol, %, will be added to end of the value. | p | 25.00% |
Format Strings for Date/Time Values#
Standard date and time format strings contain a single character. This character defines the pattern used to represent the value (whether and how to display year numbers, month numbers, etc). The table below lists the most used format characters.
Format String | Description | Sample Output |
|---|---|---|
d | Short date pattern. | 3/12/2003 |
D | Long date pattern. | Wednesday, March 12, 2003 |
t | Short time pattern. | 12:00 AM |
T | Long time pattern. | 12:00:00 AM |
f | Full date/time pattern (short time). | Wednesday, March 12, 2003 12:00 AM |
F | Full date/time pattern (full time). | Wednesday, March 12, 2003 12:00:00 AM |
g | General date/time pattern (short time). | 3/12/2003 12:00 AM |
G | General date/time pattern (full time). | 3/12/2003 12:00:00 AM |
Specific Format Strings for Date/Time Values#
To create format patterns for date and time values, you need to combine the strings listed in the tables below. These strings represent the year, month, day number and so on in different formats. The following table lists the most used strings that can be used to format dates.
Format String | Description | Sample Output |
|---|---|---|
yy | The last two digits of the year. | 03 |
yyyy | Four digit year. | 2003 |
MM | The number of the month. | 09 |
MMM | The short text description of the month. | Sep |
MMMM | The full name of the month. | September |
dd | The number of the day. | 02 |
ddd | The short text for the day of the week. | Tue |
dddd | The full name of the day of the week. | Tuesday |
/ | Date Separator. | N/A |
Time Format Strings
Format String | Description |
|---|---|
hh | Hours. |
mm | Minutes. |
ss | Seconds. |
tt | If present, represents data in AM/PM format. |
: | Time separator. |
Format Strings for Fuzzy Dates#
Fuzzy date strings are needed for dates in which specific parts of the full date are missing or incomplete. For example, a collection of docs may contain month and year information but all are missing the day. In this instance, a ‘0’ should be inputted where the day would go. To create a fuzzy date format string set the Format Type to String and set the Format String as either MM/dd/yyyy or dd/MM/yyyy.