
Sections Post to Relativity
Manual informationPost to Relativity
1.1 | August 27, 2021 | Rebranded adhering to the latest Conduent brand central documentation standards/guidelines. | Technical Writer
Document conventions
Convention | Explanation |
|---|---|
Bold | For file names, commands, fields, menus, options, and window names. |
Courier New | Commands as you should type them. |
Lucida Console | Example output generated by the system. |
Italics | For configuration variables, including variable portions of file names and URLs. Also indicates a document name. |
Note / Blue Callout | The Blue Callout text indicates information that is of special interest or importance, an idea that could be useful or additional information about a product or a feature. |
| The Caution icon along with the text indicates actions that can lead to problems in system operation or configuration settings if the instructions are not followed properly. |

Revision history
This section tracks the initial creation of the document after each major version thereafter.
Ver: | Date | Description | Reviewed / Approved By |
|---|---|---|---|
1.0 | Feb 28, 2020 | Initial Version | Team |
1.1 | August 27, 2021 | Rebranded adhering to the latest Conduent brand central documentation standards/guidelines. | Technical Writer |
Post to Relativity#
Overview#
The Viewpoint Post to Relativity tool is designed to provide a streamlined process to move project files and metadata from Viewpoint to Relativity’s review platform. The tool is accessed by installing the Post to Relativity (PTR) tool on a machine that is able to access both the Viewpoint environment and the Relativity server. This has been included in the installer for Viewpoint 6.0.6 or newer.
Note: PTR is currently only compatible with Relativity Desktop Client version 9.3 and 9.4. The Support for newer versions will be added as development and testing is completed.
Prerequisites#
Before the tool can move data to Relativity, the data first needs to be processed into the Viewpoint Processing application, either by being staged or imported.
Refer to the Viewpoint Processing Manual for detailed information about processing the data in Viewpoint.
The data also need to be posted to the Viewpoint Review application. Finally, the data needs to be built into a View using the View Manager within the Review application. A View is a collection or group of documents within the Viewpoint, and is the item that will be selected later on in the PTR Wizard to be posted to Relativity.
Refer to the Viewpoint Review Manual for more information on building Views within the View Manager.
Viewpoint Login#
To begin the process of posting to Relativity, perform the following steps:
- Run the Post to Relativity application, the following PTR Wizard appears:
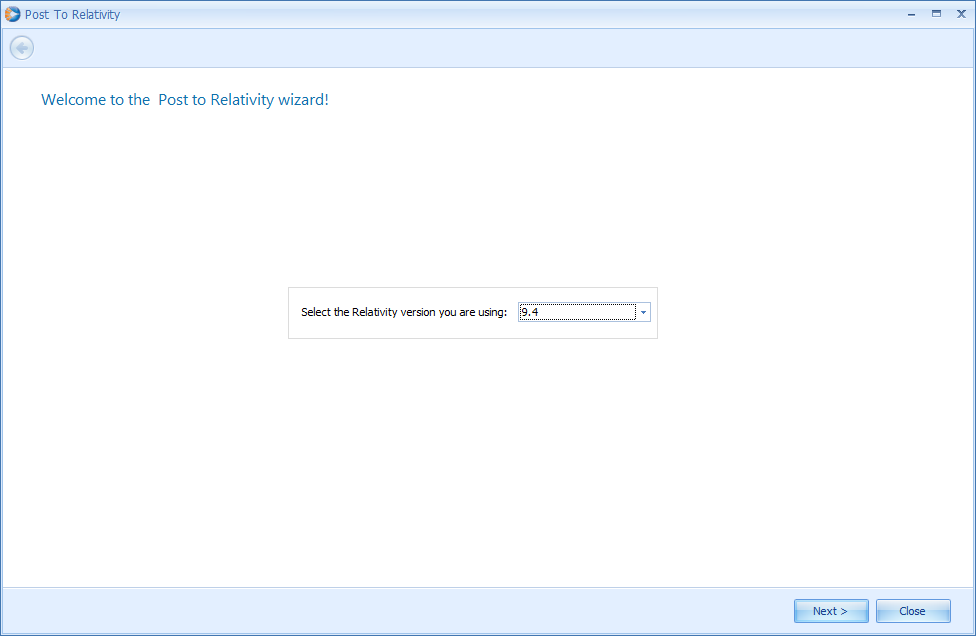
- Select the Relativity version using the provided drop down list.
- Click Next, the following screen appears:
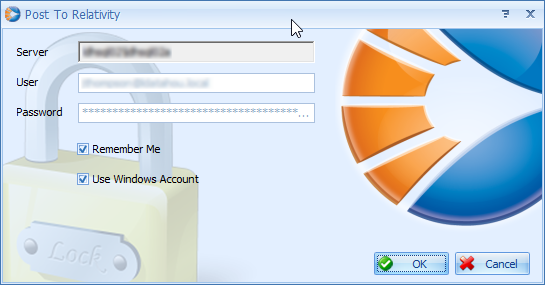
- Enter the Viewpoint Review SQL Server name (ex. SQLServer\VPReview) in the provided field.
- Enter the valid User & Password in the provided field.
Note: If the Use Windows Account box is checked, the User and Password fields will be automatically populated.
- Click OK.
Viewpoint Project Selection#
The next step is to select the Viewpoint Project that contains the data to be posted to Relativity.
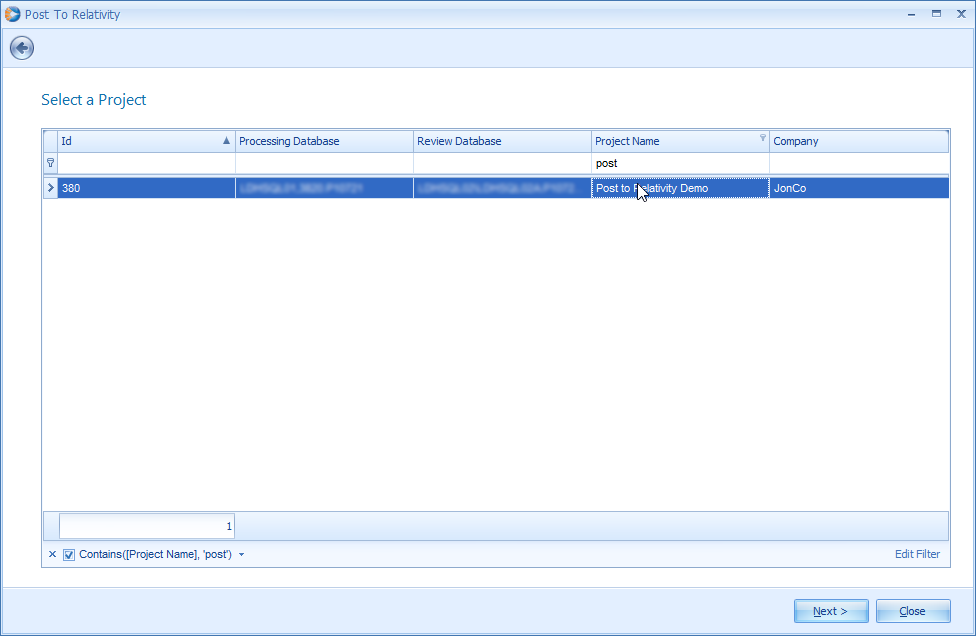
Each of the columns displayed can be sorted and/or filtered using the column headers or filter boxes under the headers to make it easier to sort through a large number of Projects.
- Click Next after the Project is selected.
Source Selection#
This page of the wizard is where the View will be selected. The View is nothing but the collection of documents that will be posted to Relativity. The creation of the View should have been performed prior to using the PTR tool. The source selector is displayed and organized the same way it is in View Manager within the review application.
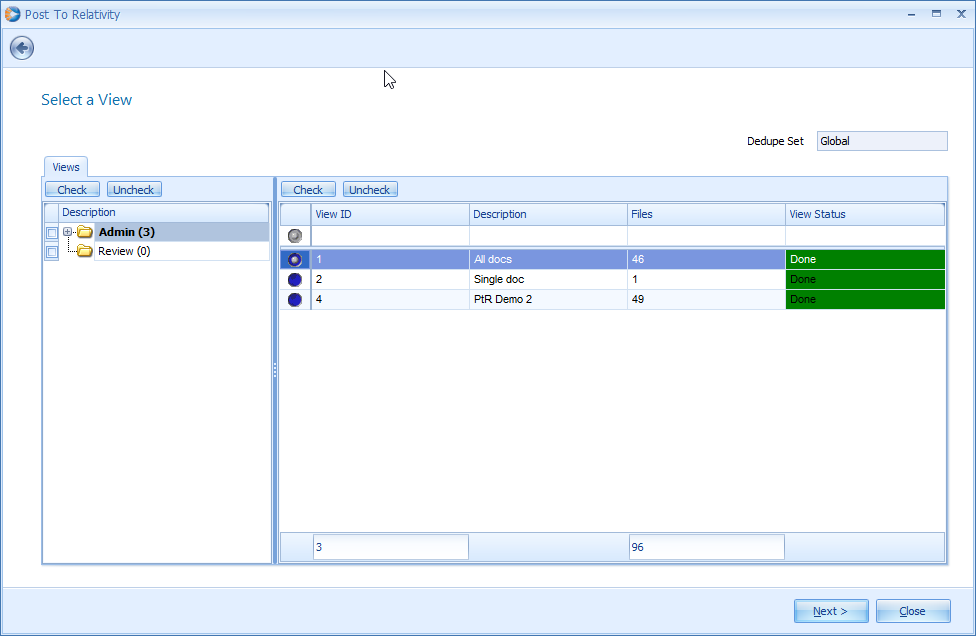
- The left pane contains the folder hierarchy and on the right pane, all the Views will be displayed that contains in the selected folder.
- When you check the boxes next to folders, it allows the right panel to display Views from multiple folders at a time.
- The right panel which contains the View list can be sorted and filtered using column headers or filter boxes under the headers to make it easier find a specific View.
- Only one View can be selected Post to Relativity.
- To select a View, click the blue radio button in the first column of the View panel.
- Click Next to continue.
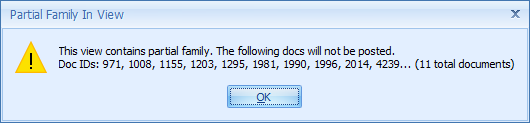
The PTR tool will not post partial families. If a View is selected that does not contain the full families of all the documents contained in the View, a warning will be displayed. The documents that have incomplete families will not be posted with the rest of the View.
Login to Relativity#
After the source is selected successfully, the next step is to establish the link to Relativity. The wizard will prompt the user for Relativity login information.
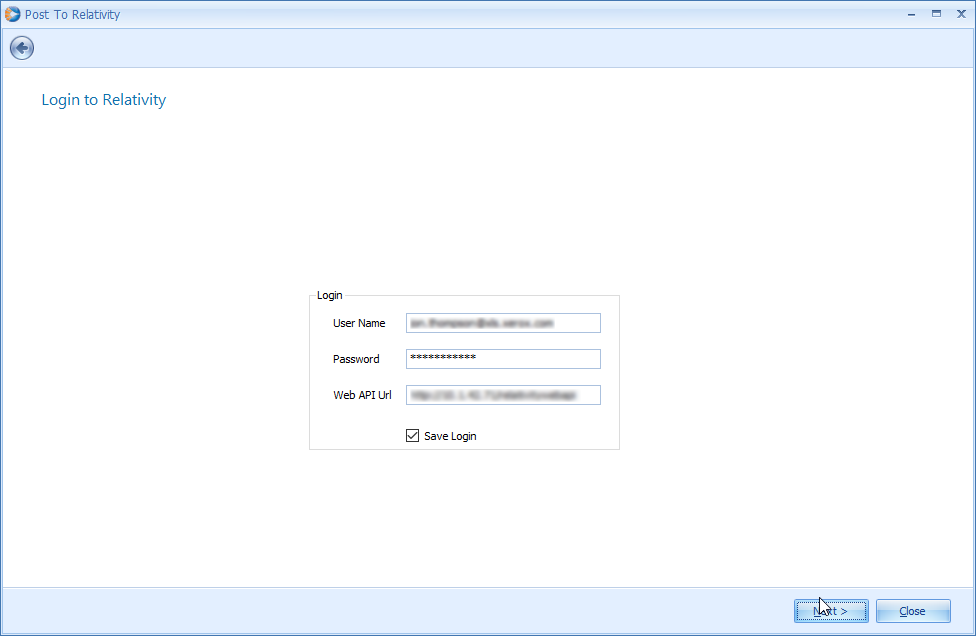
- Enter the valid Login credentials (User Name & Password) in the provided fields.
- Enter the Relativity Web API URL in the respective field.
- Click Next to continue.
Workspaces and Fields#
The Workspaces and Fields page of the wizard is the place the users select wherein to which the Relativity Workspace Viewpoint data will be posted.
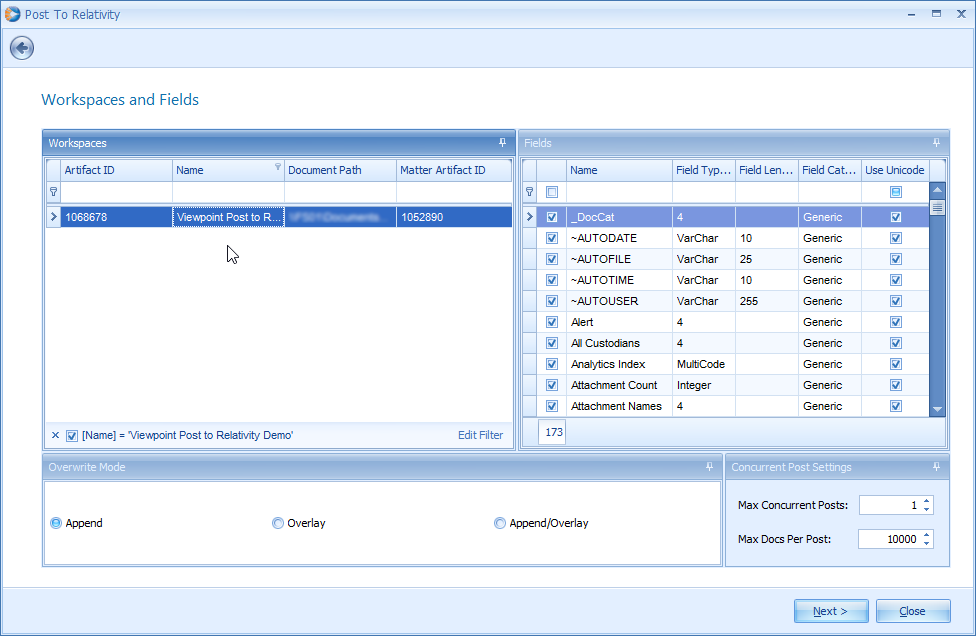
The page is divided into four panels which are explained in the following sections.
Relativity Workspaces#
The Relativity Workspaces panel displays the list of available Workspaces. The same as with other lists that are already covered. This list can also be sorted and filtered. When the Workspace is selected, the Fields panel will populate.
Relativity Fields#
The Fields panel will display a list of fields that is available to map to an equivalent Viewpoint field. By default, all of the fields are checked in the first column.
A checked box means the field will be available as a dropdown option on the next page of the wizard where the fields are mapped to Viewpoint fields.
Unchecking unnecessary fields here will make the dropdown list on the next page easier to sort through.
Overwrite Mode#
The Overwrite Mode panel is a simple selection of how the data will be loaded in to Relativity.
- Append – The documents will be added to the Relativity Workspace as new records. Existing records will remain untouched.
- Overlay – The post will update records that exist already in the Relativity Workspace. No new records will be added.
- Append/Overlay – A combination of the first two options. If the document does not already exist in the Workspace, it will be added; otherwise, the records will be updated with new field information.
Concurrent Post Settings#
This panel is meant to provide a way to help tweak the performance of the posting process. Users can break up the job into multiple, smaller posts which can be run concurrently, instead of a single large post that goes one record at a time.
Note: The performance benefits of this feature are limited by the available throughput of the network and the rate at which Relativity can make the changes.
- After all the necessary items are selected, click Next in the above screen.
Field Mapping#
The last step in the wizard is to map Viewpoint fields to the corresponding Relativity fields. The fields displayed on the left side lists all the Viewpoint fields that are available to map.
Refer to the Viewpoint Field Descriptions – Review documentation for more information specific to each field.
- To map the Relativity fields to Viewpoint fields, click anywhere in the row of the Relativity Fields column and select a corresponding field from the options presented in the dropdown box.
- Only fields that are mapped will be posted to Relativity.
- There are only two required fields that needs to be mapped before posting.
- The Viewpoint DocID field should be mapped to the Relativity Control Number field and the Viewpoint Native File Path field should be mapped to the Relativity Folder Path field.
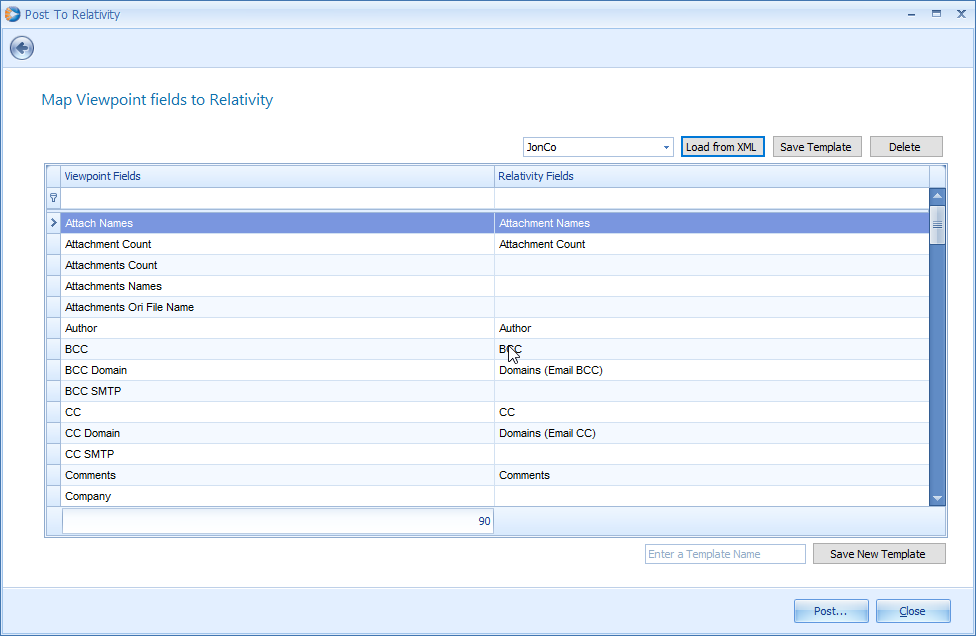
- To delete a Relativity Field mapping, select the field in the Relativity Fields column and press Ctrl+Delete.
Templates#
Templates are a valuable tools to cut down the setup time required to post multiple Views to Relativity.
- Once the Viewpoint and Relativity fields are mapped, enter a template name in the text field provided and click Save New Template.
- Next time when a View is posted to the same Relativity Workspace, select the previously saved template from the provided dropdown list.
- Click the Load from XML option to automatically fill in the field mappings which are previously used. Saved templates are tied to the Relativity Workspace, not to the Viewpoint Project.
- A template can be changed by loading the template, making changes to the mappings, and then click the Save Template button near the top-right of the window.
- To delete a template, select the template from the dropdown list and click the Delete button.
Posting#
When all the necessary fields are mapped, the wizard is ready to post to Relativity.
- Click Post to begin the process of copying the files and inserting the records into the Relativity database.
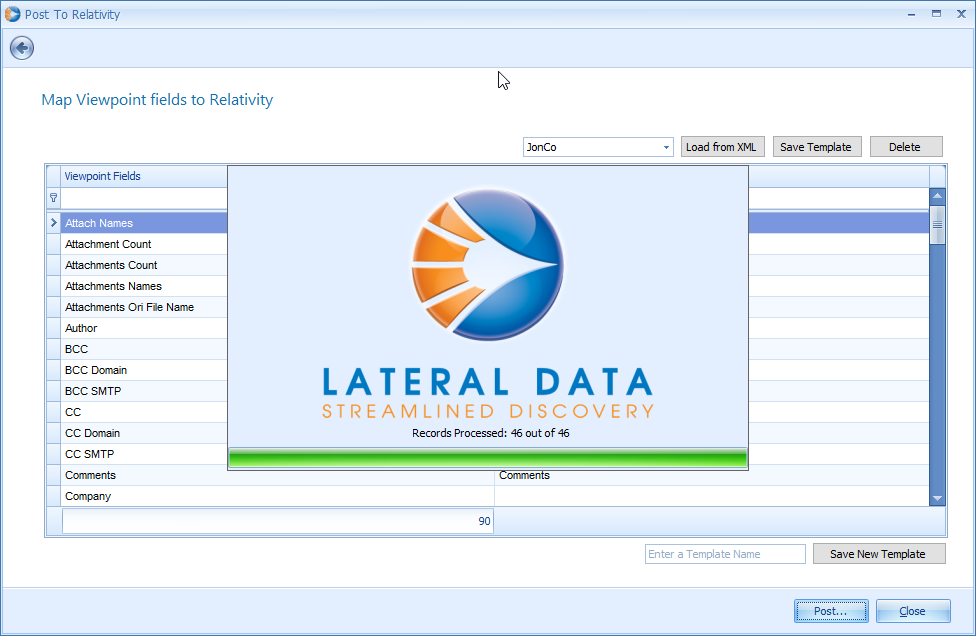
Note: Depending on the number of documents being posted, available bandwidth, and couple of other factors, the amount of time this process takes to complete will vary.
Post Summary#
After the process is completed, a Post Summary will be displayed, which contains the basic information about the Post along with a count of errors, if any occurred.
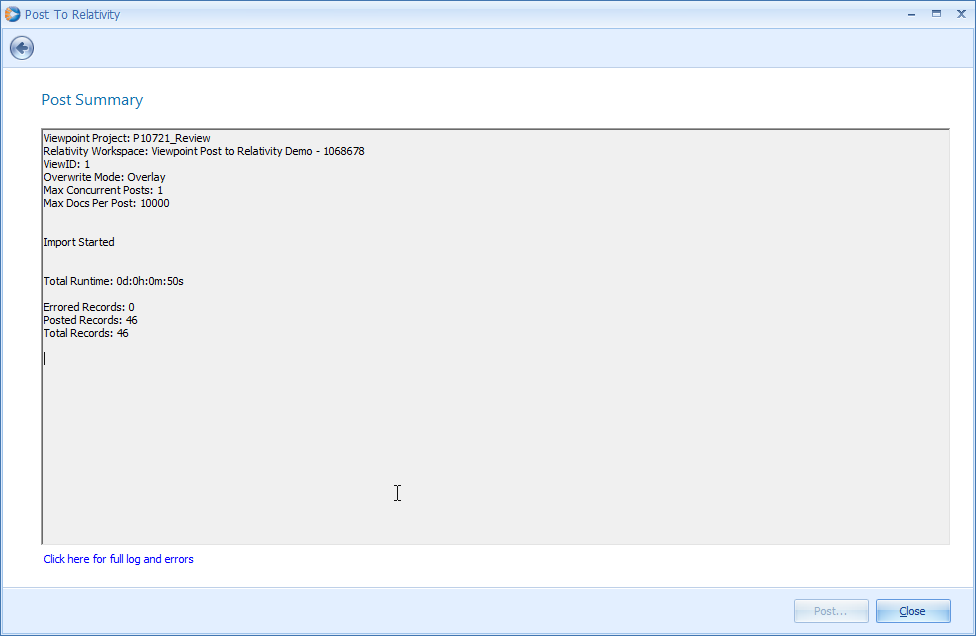
Click here for full log and errors – this option facilitates to open a Windows file browser location of the logs and errors. There will be one folder for logs and one for errors.